Our Guide to Roborabbit Element Interaction
Contents
Browser automation tools are built to simulate human action on a webpage. Aside from loading a destination site and saving information, interacting with the elements on a page is the core functionality that makes browser automation tools so powerful and versatile.
Pretty much any action a user takes on a browser can be simulated by a good web automation tool, such as:
- Clicking a Next button
- Logging into a password-protected page
- Pasting a paragraph of text from the clipboard
- Entering text into a search field
- Solving CAPTCHAs
Automating tasks like these reduces the manual work that would otherwise go into app testing, data scraping, and more. You can repeat them as often as needed, executing various scenarios until your needs are met.
Choosing the right browser automation tool requires understanding the types of interactions each one can handle. A versatile tool that supports a wide range of actions will likely be the best fit for your needs, as it will provide multiple viable solutions to achieve your goals.
Why Use a Nocode Web Automation Solution?
Roborabbit provides users with a range of browser actions powered by Puppeteer, giving you robust capabilities in the form of accessible, pre-built solutions. The nocode builder makes setup quick and easy, and no deep technical knowledge is necessary.
A simple interface minimizes the time it takes to get an automation up and running. Without having to build a solution from ground-up, you can quickly start executing tasks and adjusting them to suit your scenario.
In this guide, we’ll walk through the element interaction options and what you can expect when adding them to your tasks.
How to Interact with Webpage Elements using Roborabbit
Roborabbit offers users 26 different ways to interact with webpage elements. Many rely on Helper config (CSS selectors, XPath, JS selectors, etc.) to locate elements, but there are also special actions like hitting enter or implementing a loop that offer you more ways to engage with a site.
Let’s walk through the actions one by one:
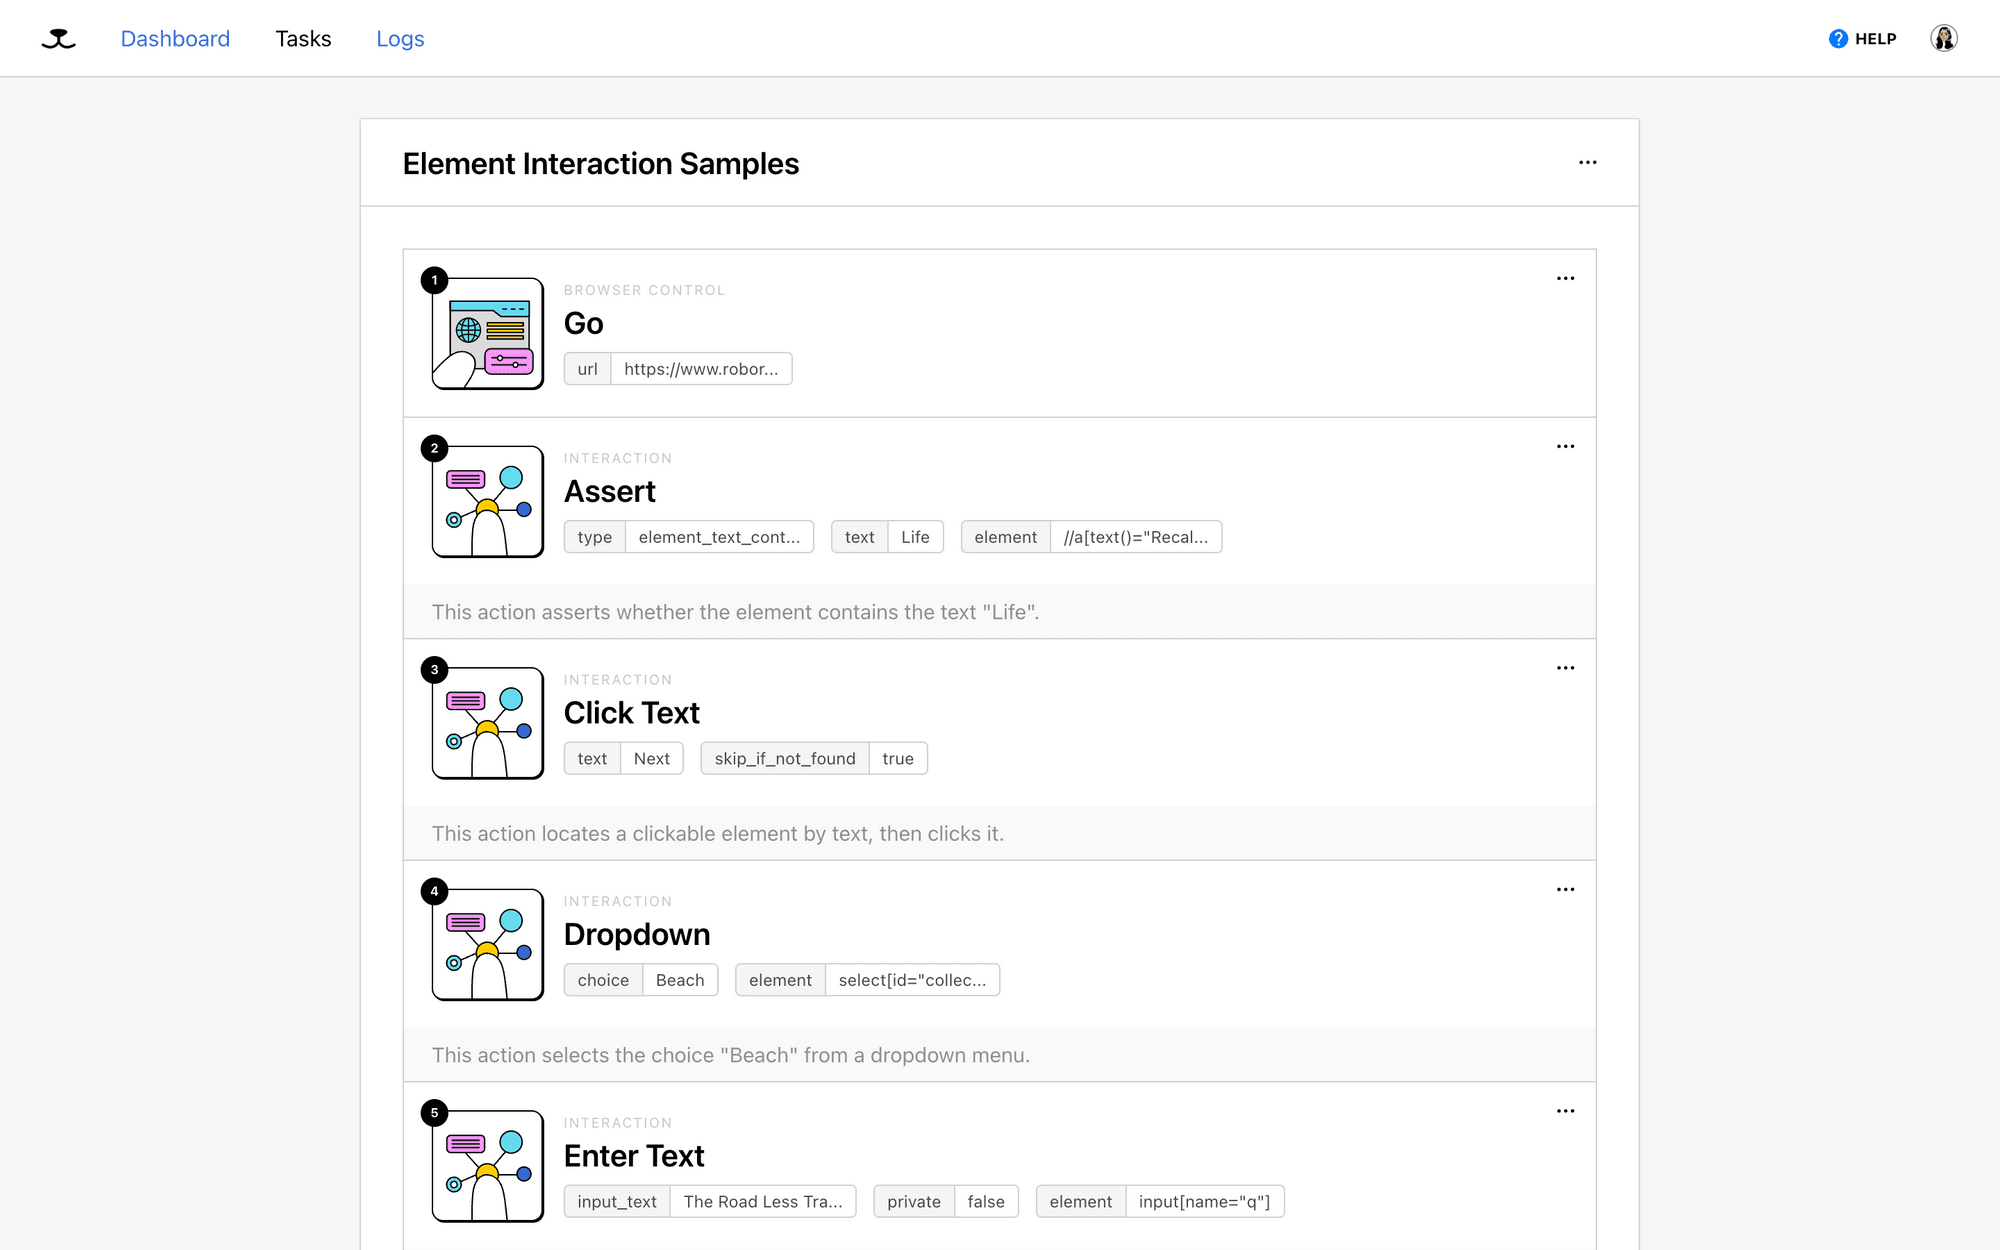
Assert
The Assert action checks whether an element exists, is visible, or contains specific text. This can be helpful when testing website elements or deciding whether or not a task can continue.
To set up this action, you’ll have to provide Helper config to identify the element and choose the type of assertion you want to make. If you’re checking whether the element contains specific text, you’ll have to enter that information as well.
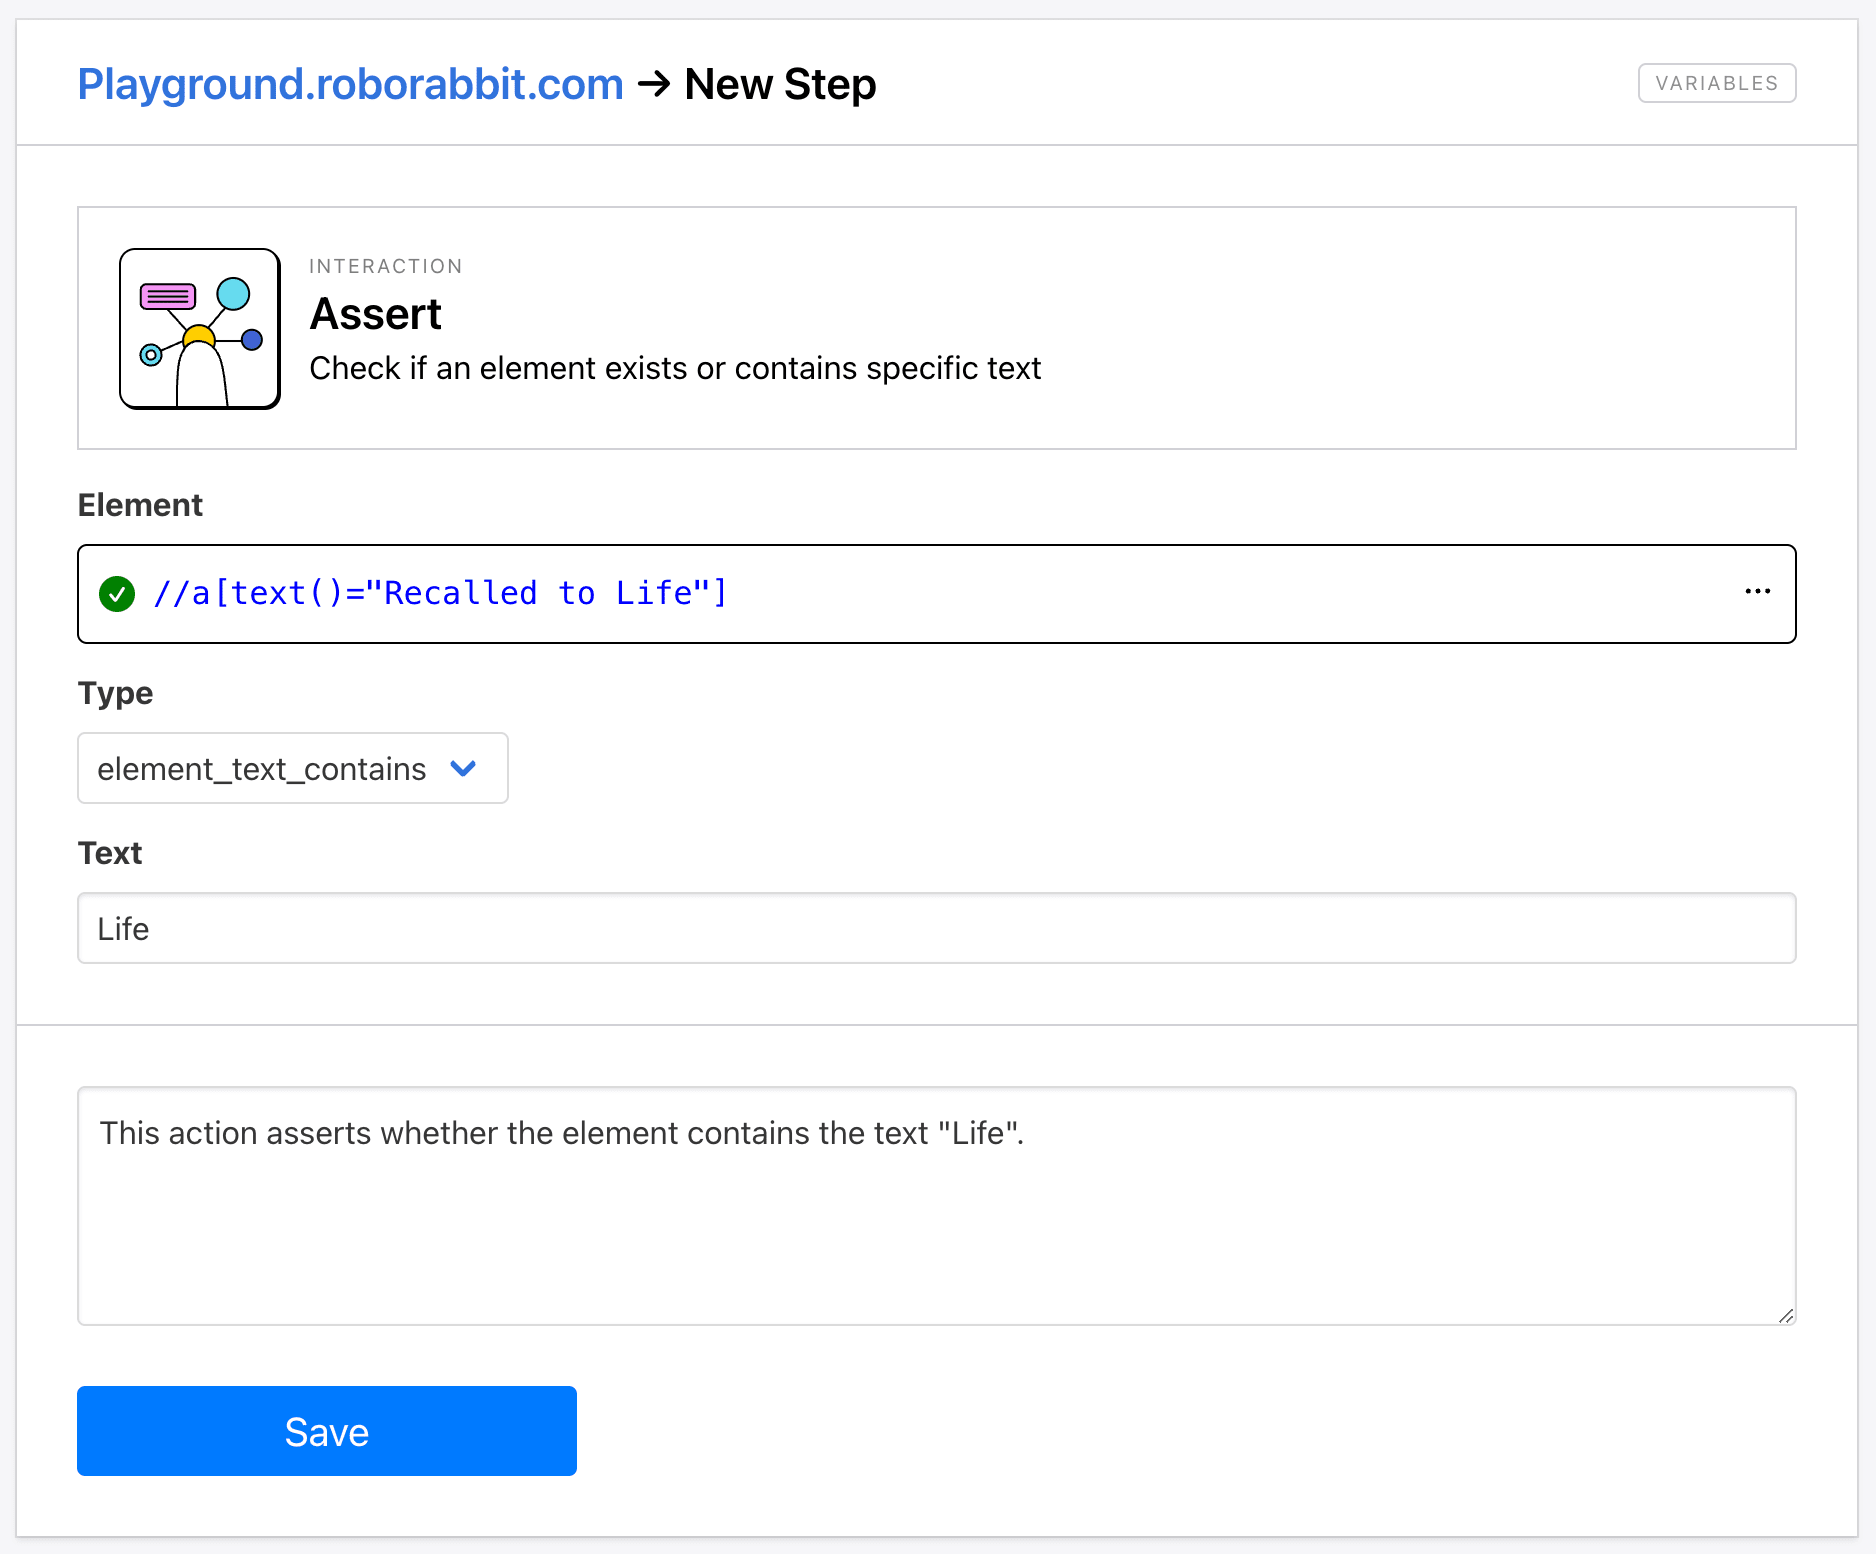
Running the task will reveal a simple true or false assertion, which you can see in the output log:
Hare Hint 🐰: The Roborabbit Helper Chrome extension can help you generate config isolating your chosen elements more easily.
Click
The Click action is the simplest way to click a specific element. You can use it to navigate to another page, prompt an action, or advance through multi-step flows.
When setting up the step, you’ll need to provide Helper config that isolates your chosen element. You can also choose to check the Skip If Not Found option, which will allow the task to proceed to the next step even if the element doesn't exist. If you don't check this option, the task will fail when the element is not found.
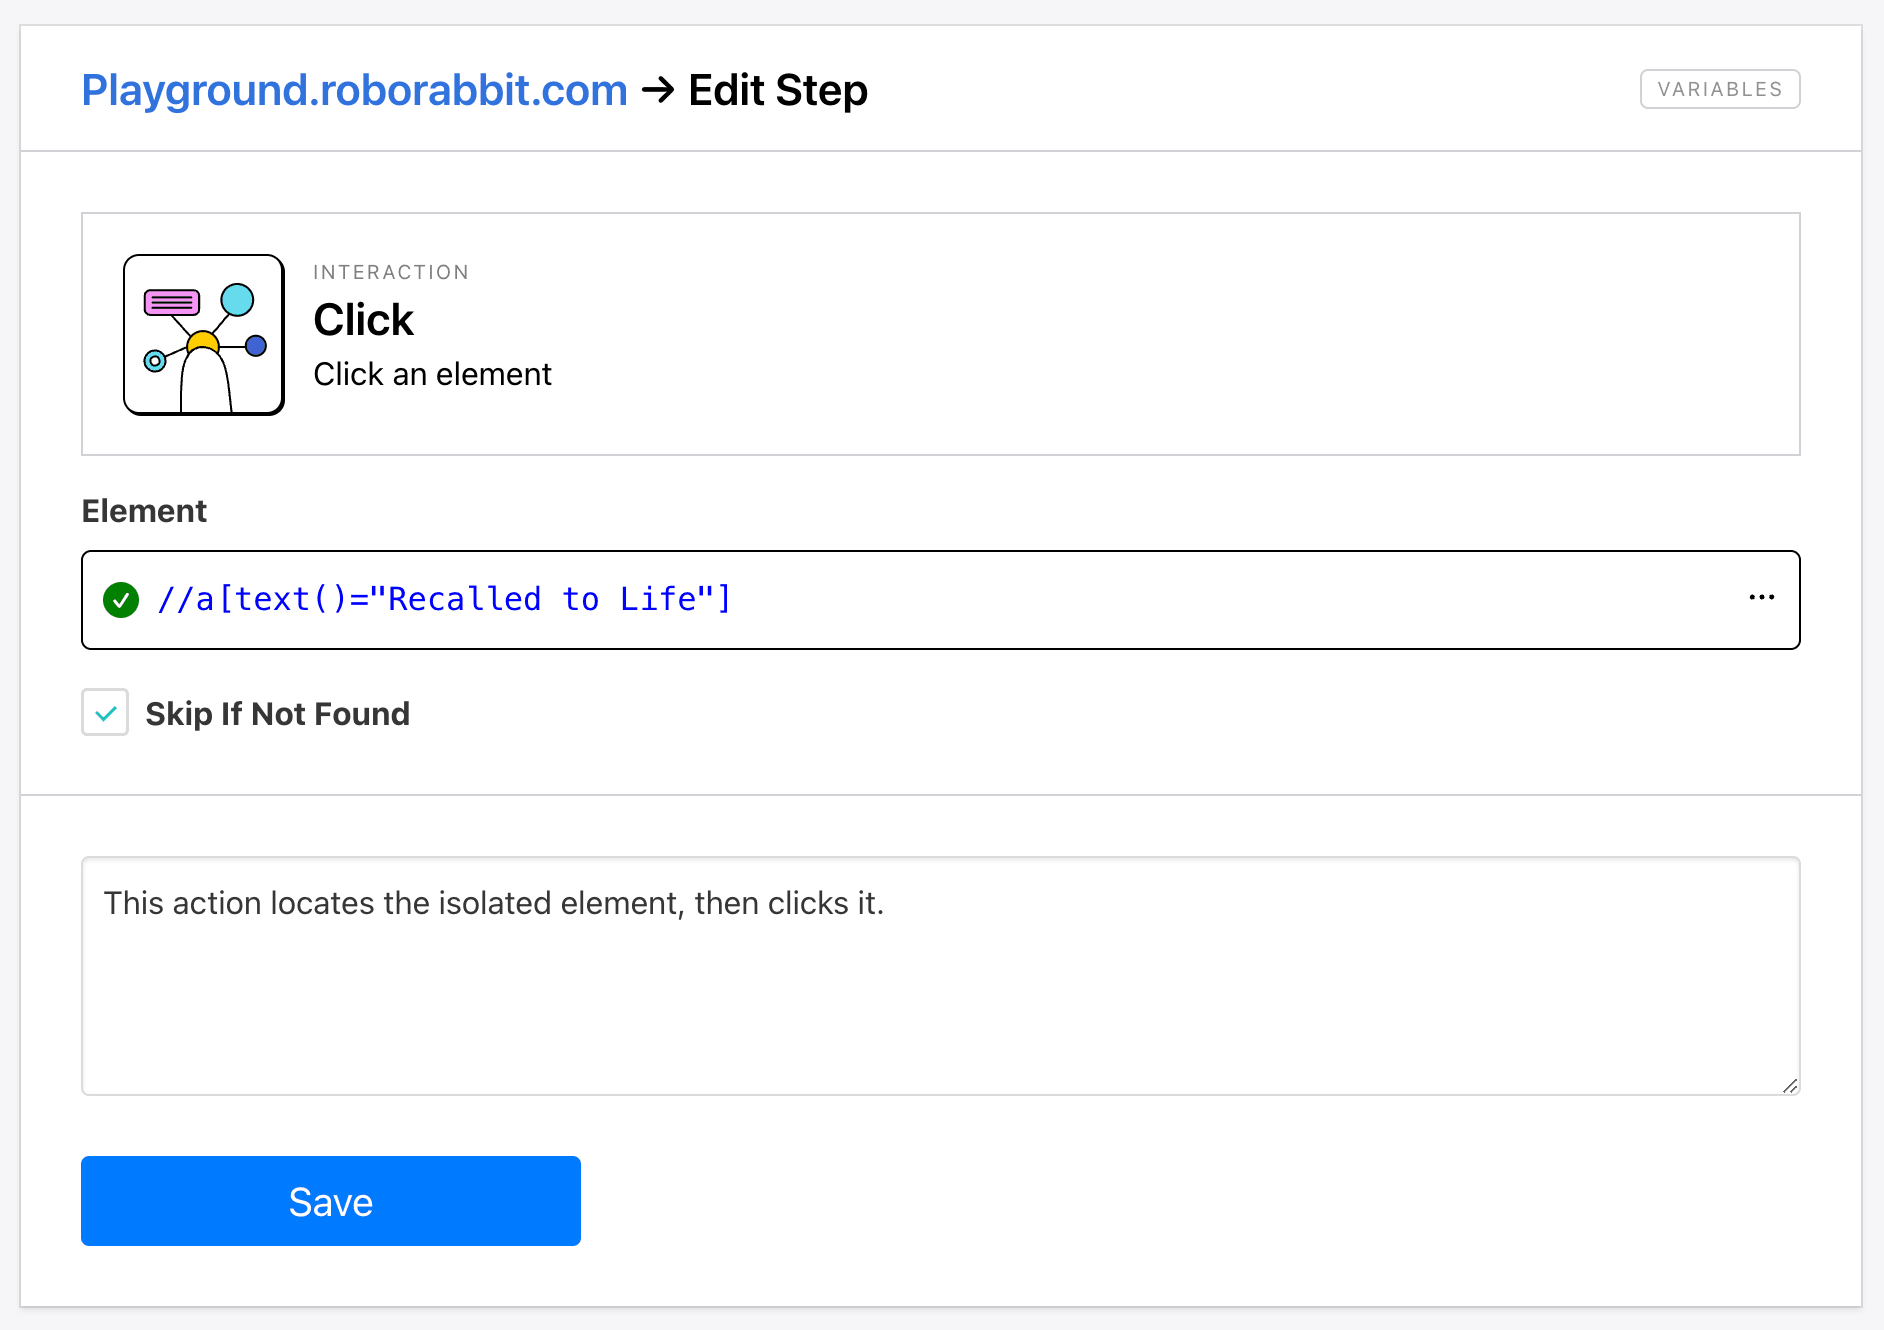
Since no data is produced, the output log does not yield anything except the parameters for the action. However, the video should show the element being isolated and clicked.
Click Text
The Click Text action locates a clickable element by text instead of with a selector, then interacts with it. This is helpful on a site where the exact position of the element may vary, but its text remains the same.
To set up the step, simply provide the text you want to locate and check whether you want it to Skip If Not Found.
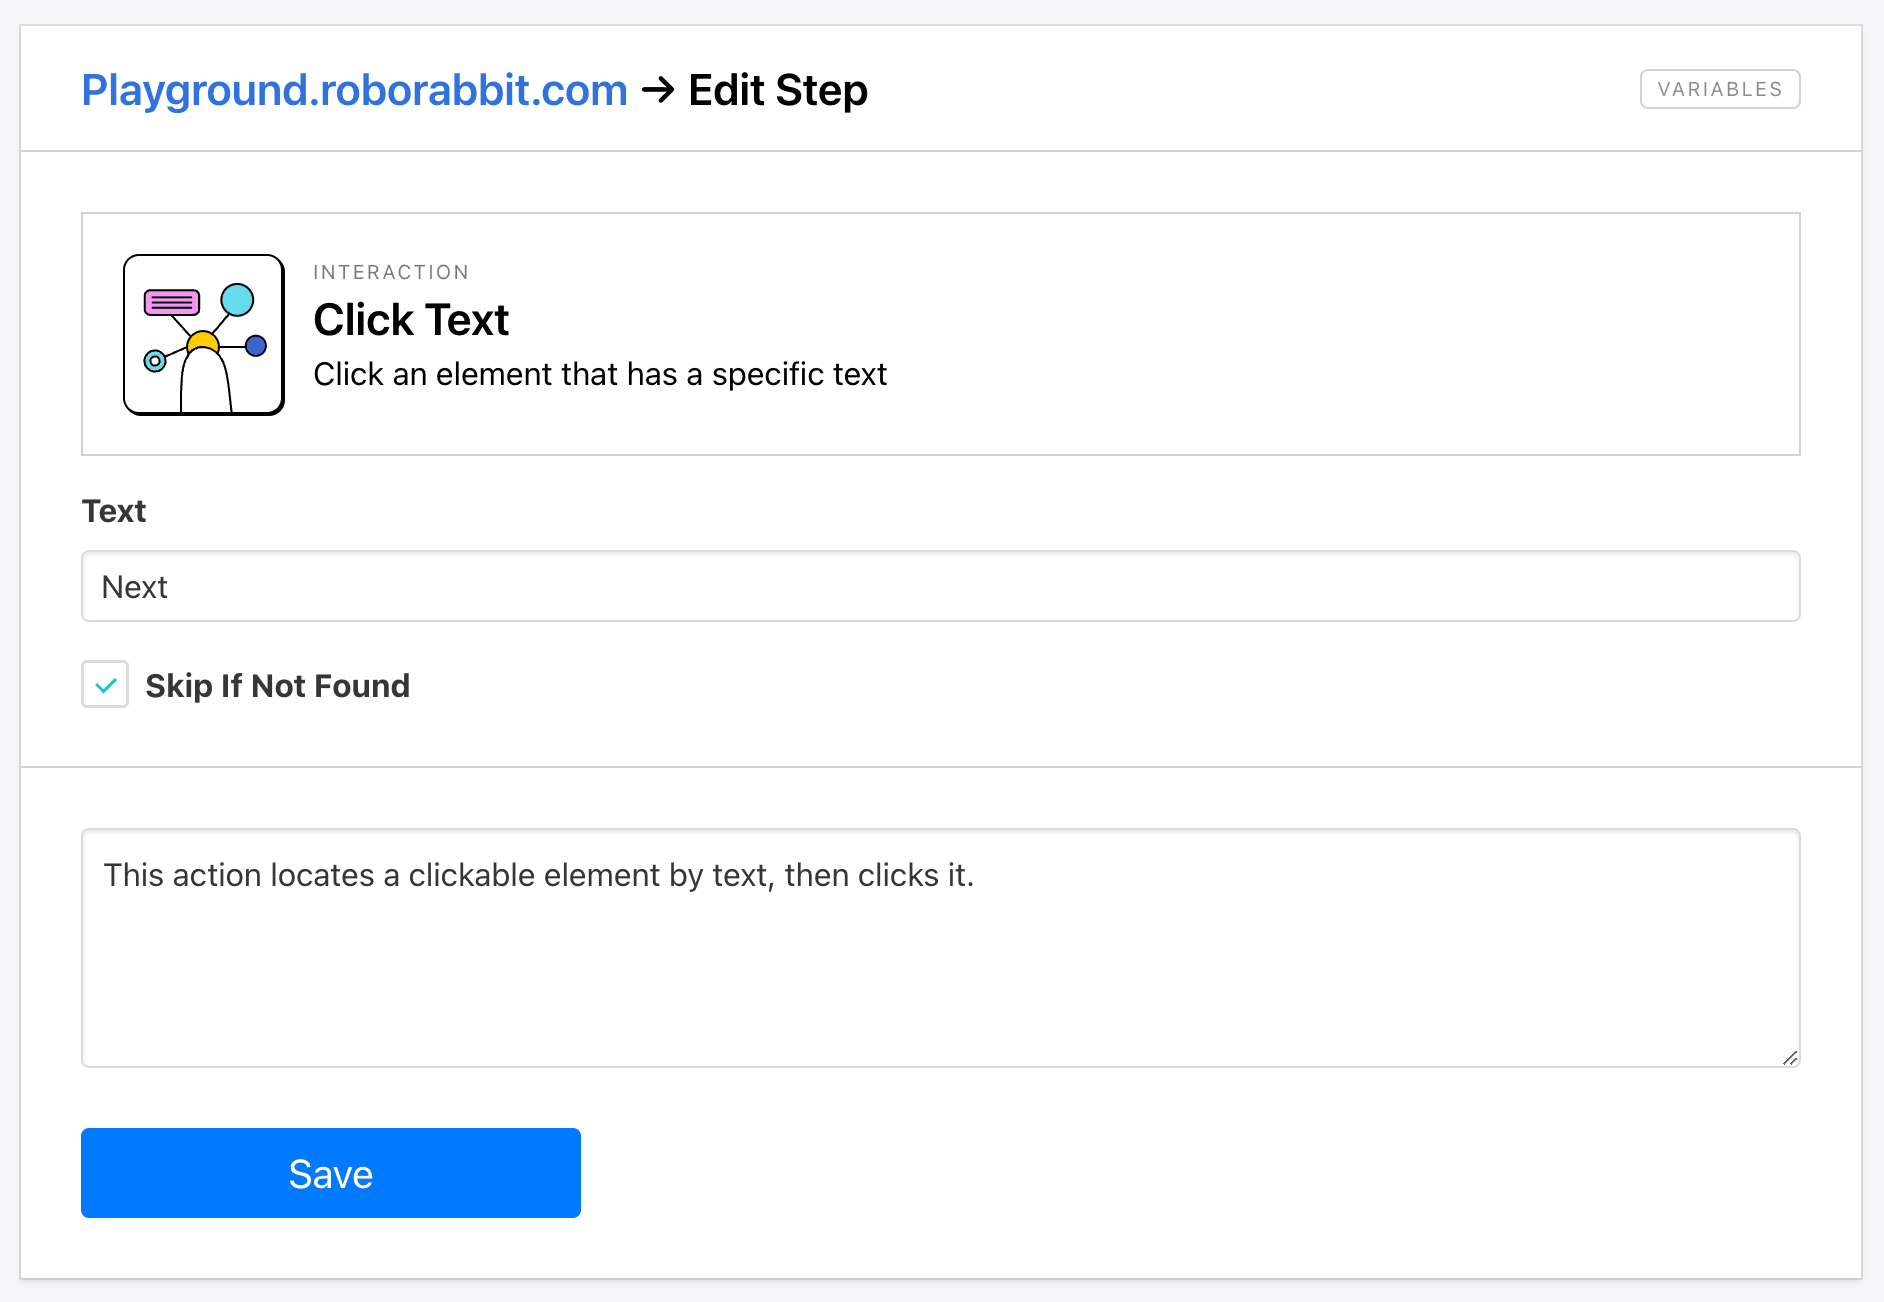
Like the other click action, the output log does not yield much—but the video will show the element being isolated and clicked.
Download
The Download action interacts with a button or link that initiates a download prompt, downloading the file and storing it on Roborabbit servers. This can serve use cases such as extracting research PDFs, saving high-quality images, and much more.
Set up the step by entering Helper config for the download element.
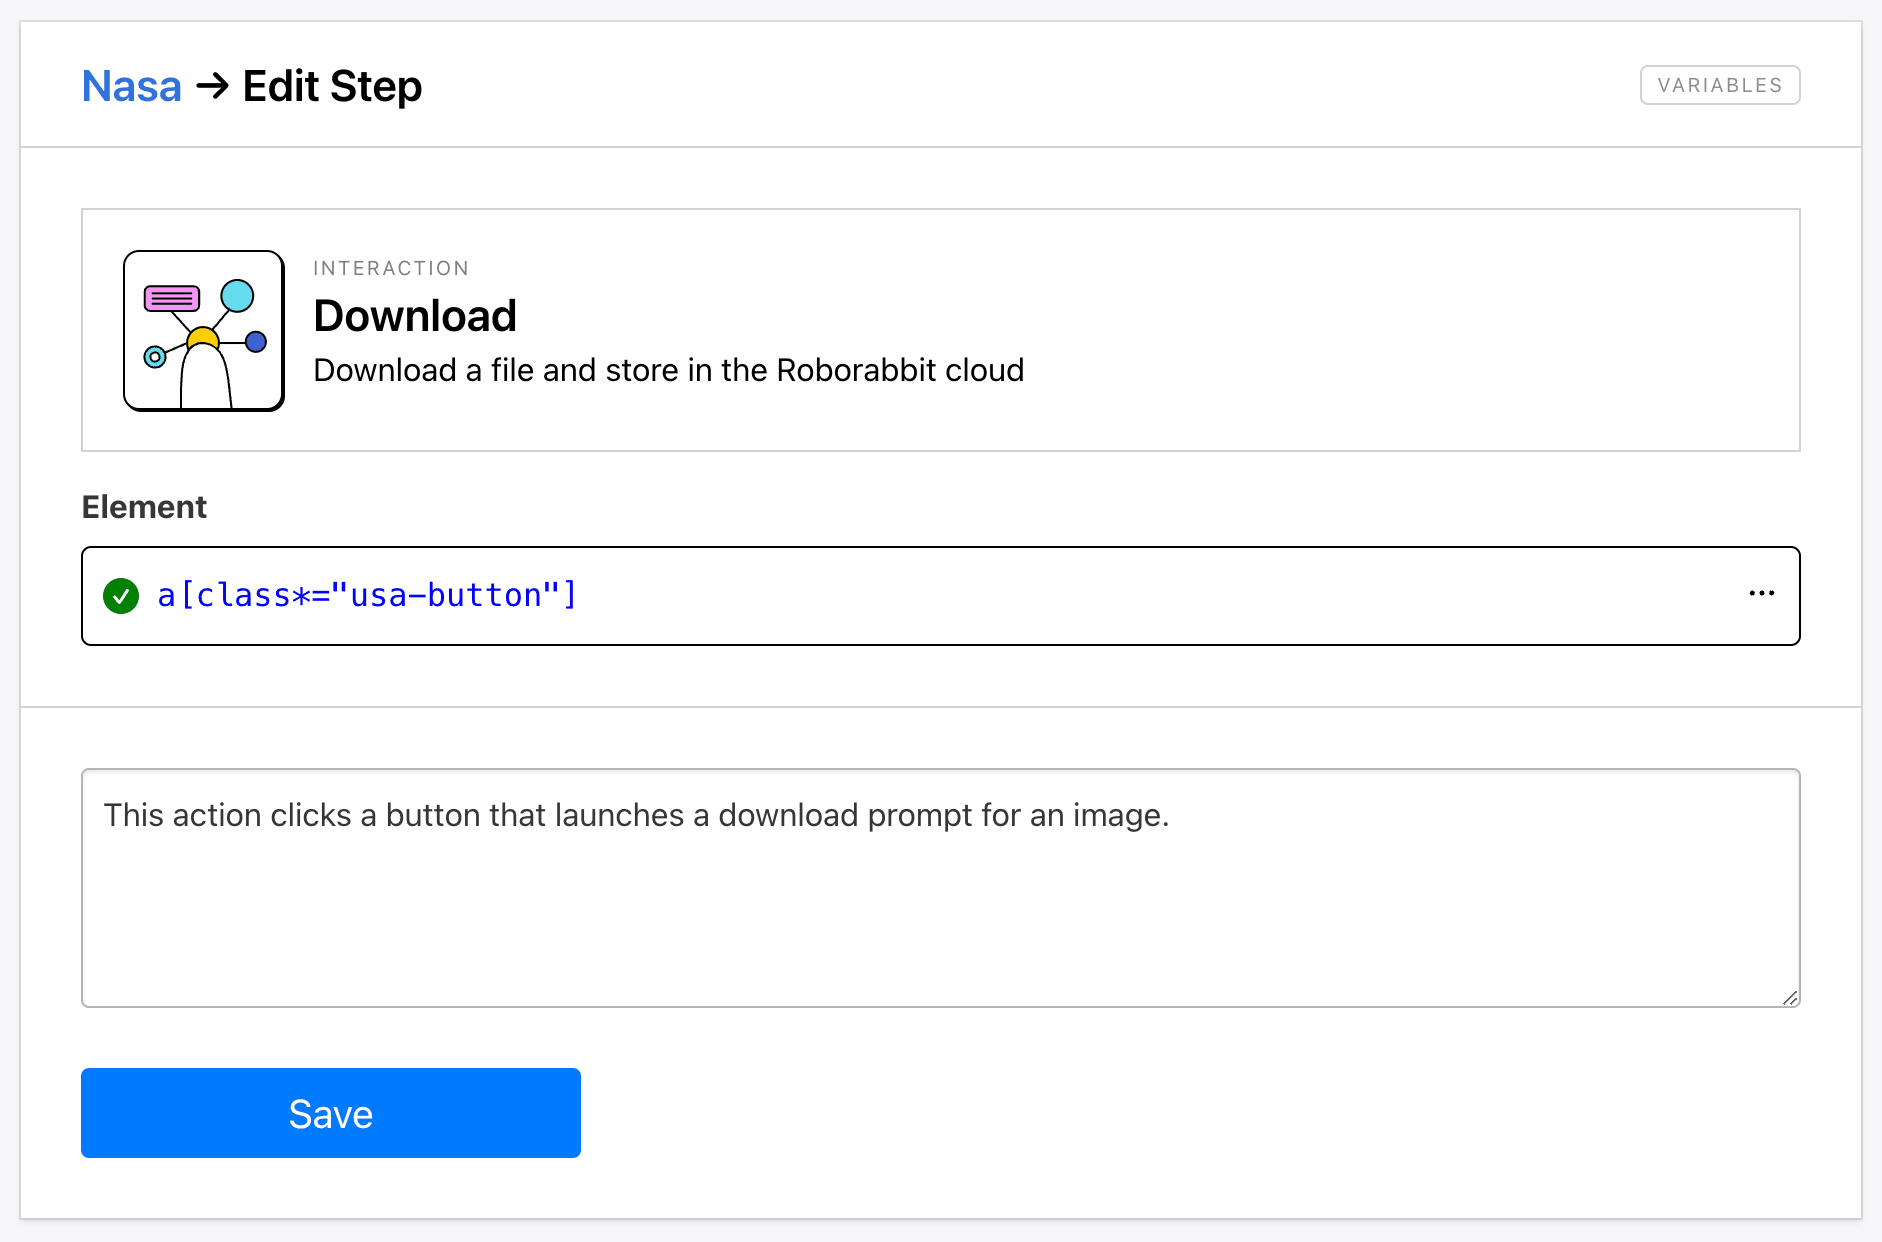
The task log should yield a link to the downloaded asset.
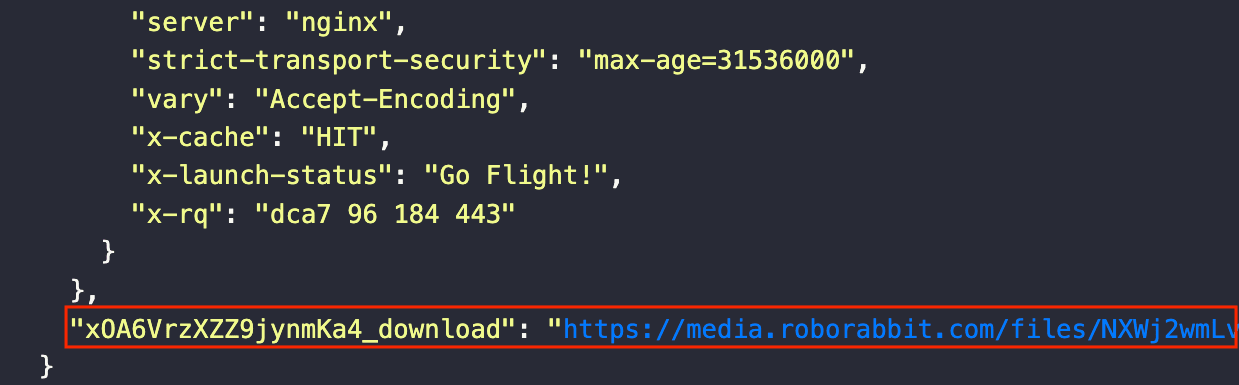
Hare Hint 🐰: Downloads are stored on Roborabbit servers for 24 hours, so it’s important to move them to a more durable storage location. You can do this manually for one-off use cases or automatically with a Zapier workflow.
Dropdown
The Dropdown action selects an item from a dropdown menu, saving you the additional effort of setting up two separate click steps. You can use it for navigating menus, filtering content, and filling out forms.
Add the action to your task, then set it up by inserting Helper config for the dropdown menu. Enter a label or value that identifies the item in the Choice field.
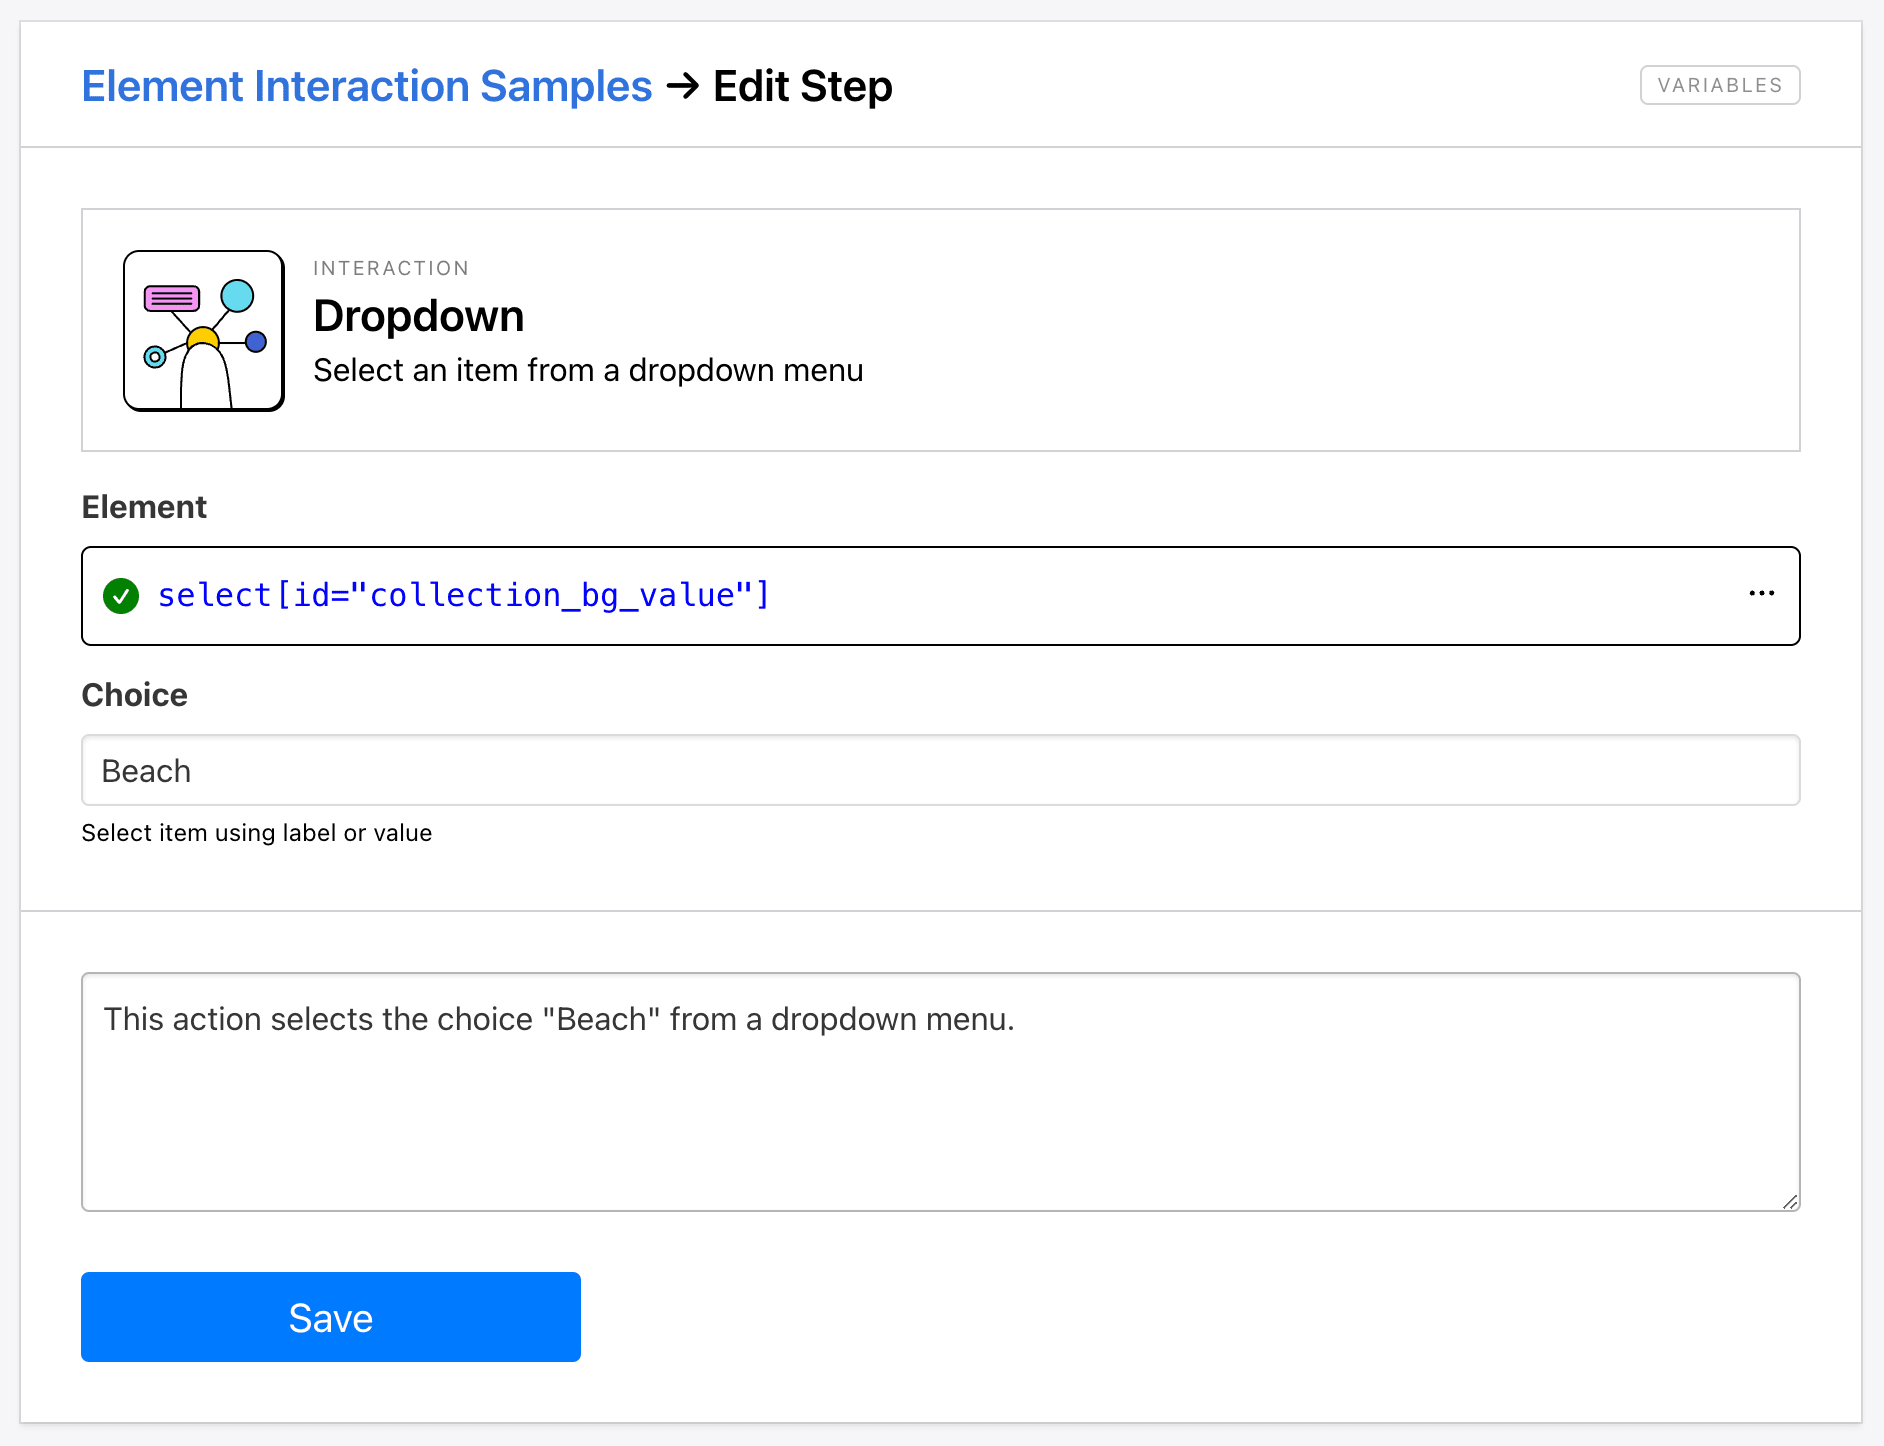
As more of a navigation step, the output log doesn’t yield results, but you should see the interaction occur in the video.
Enter Text
The Enter Text action inserts a string of text into a specified input field. This allows you to apply search values, programmatically fill out forms, and enter specifications.
To set up the action, you’ll need Helper config that isolates the input field. Then, you can enter the string into the Input Text field. You can also toggle Private , which gives you the option to hide text in logs—helpful when you’re working with sensitive information.
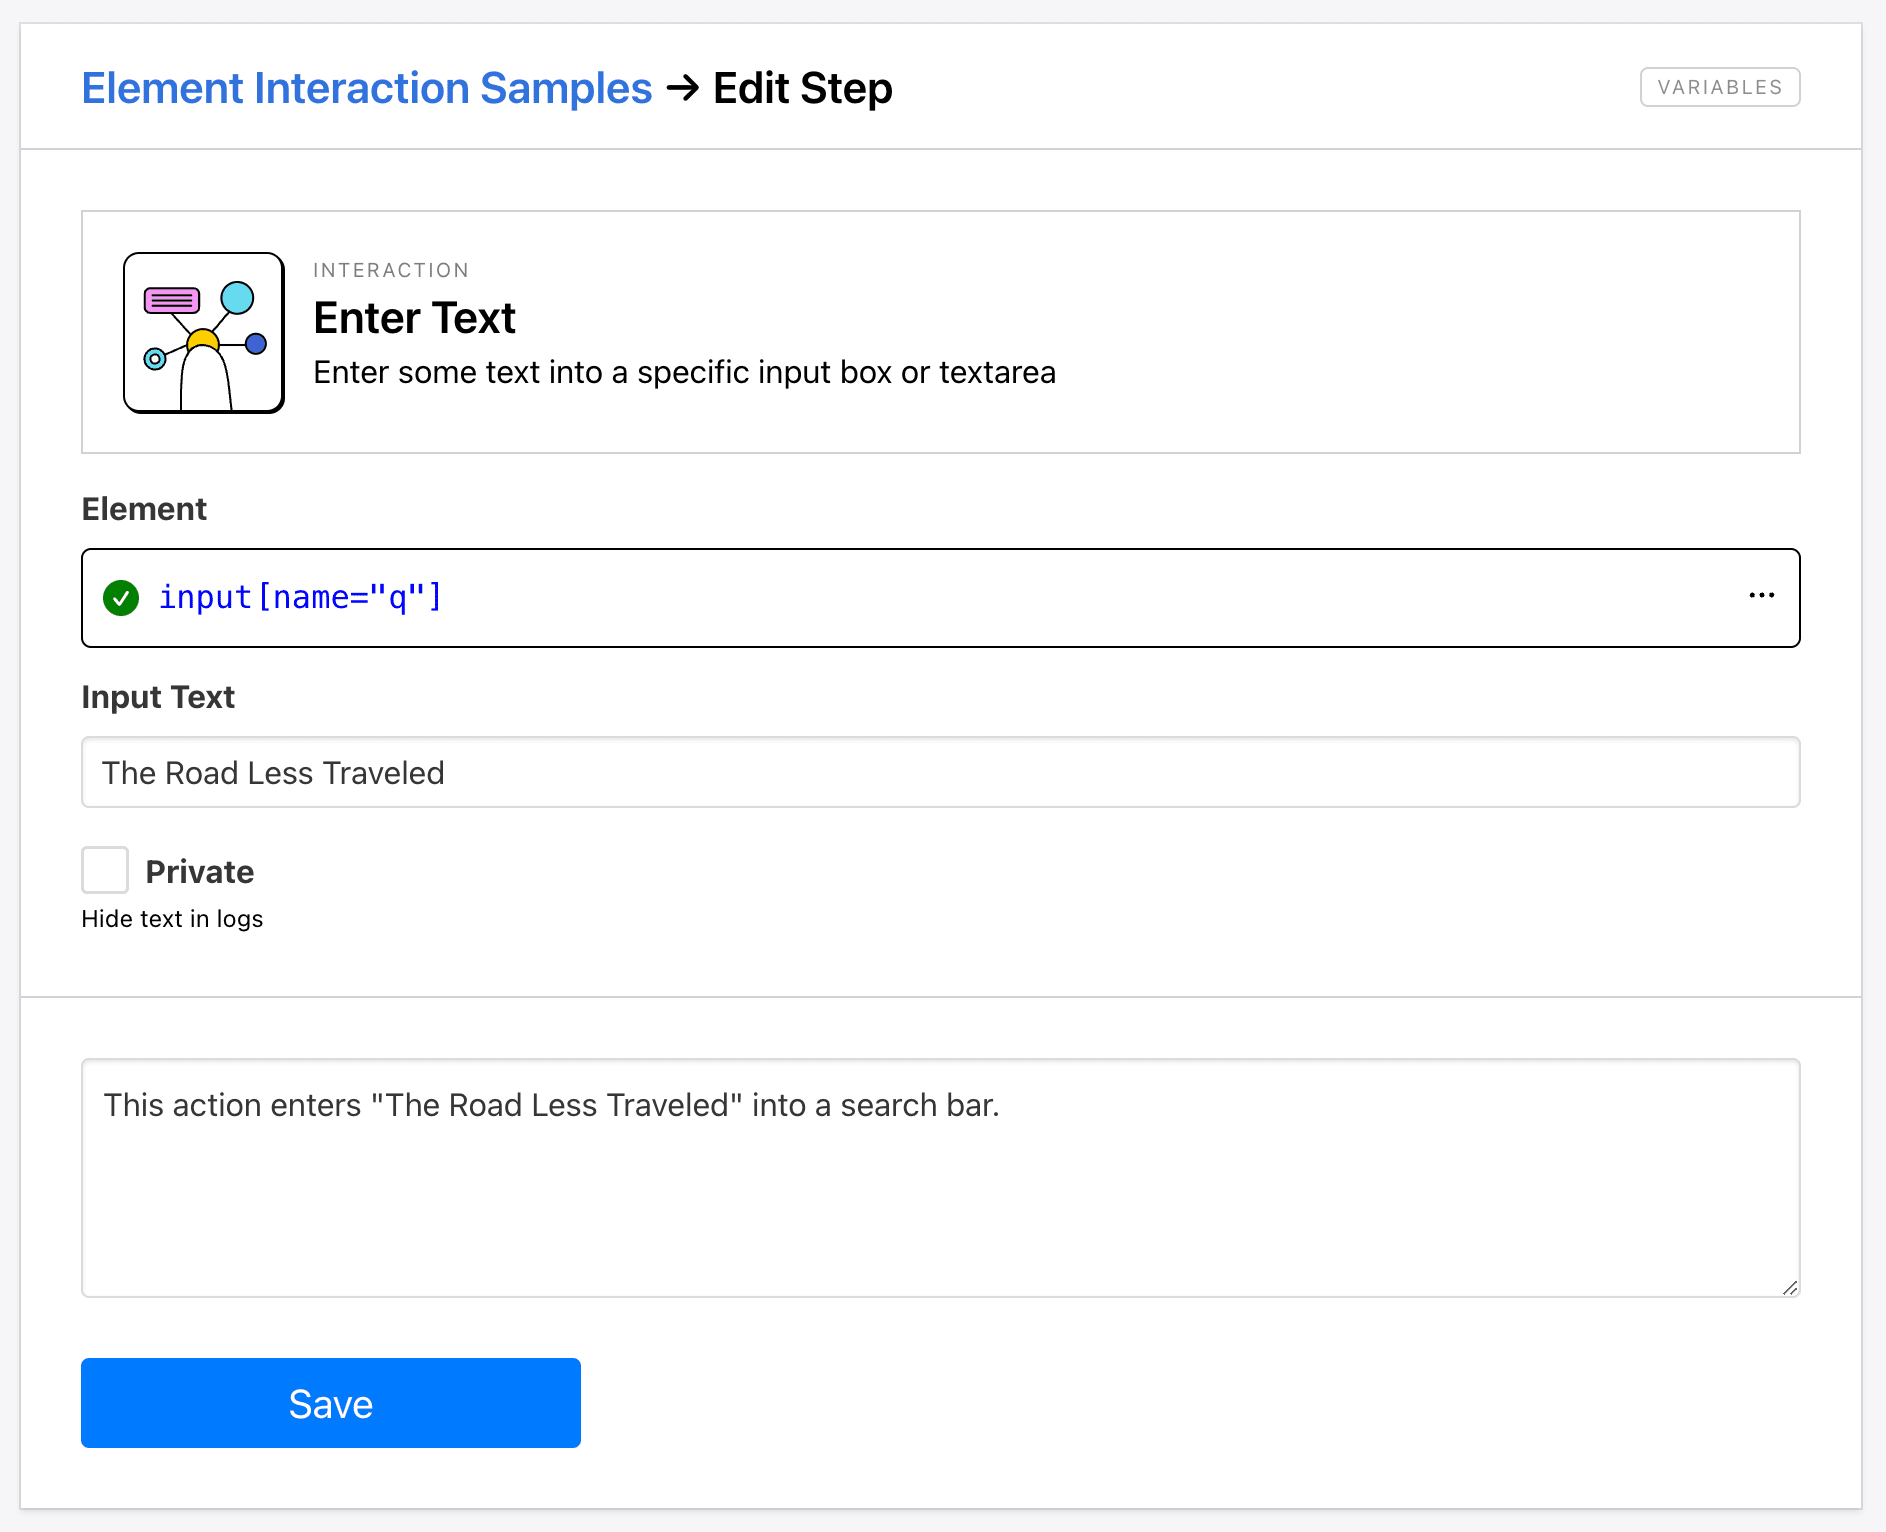
The video of the automation should show the text being inserted into the field.
Find And Click
The Find And Click action locates all of the elements matching a provided ID, then clicks each one. This is ideal for interacting with dynamic elements with an unpredictable selector or for clicking multiple instances of the same element.
You only need to provide the Id of the element(s) during setup.
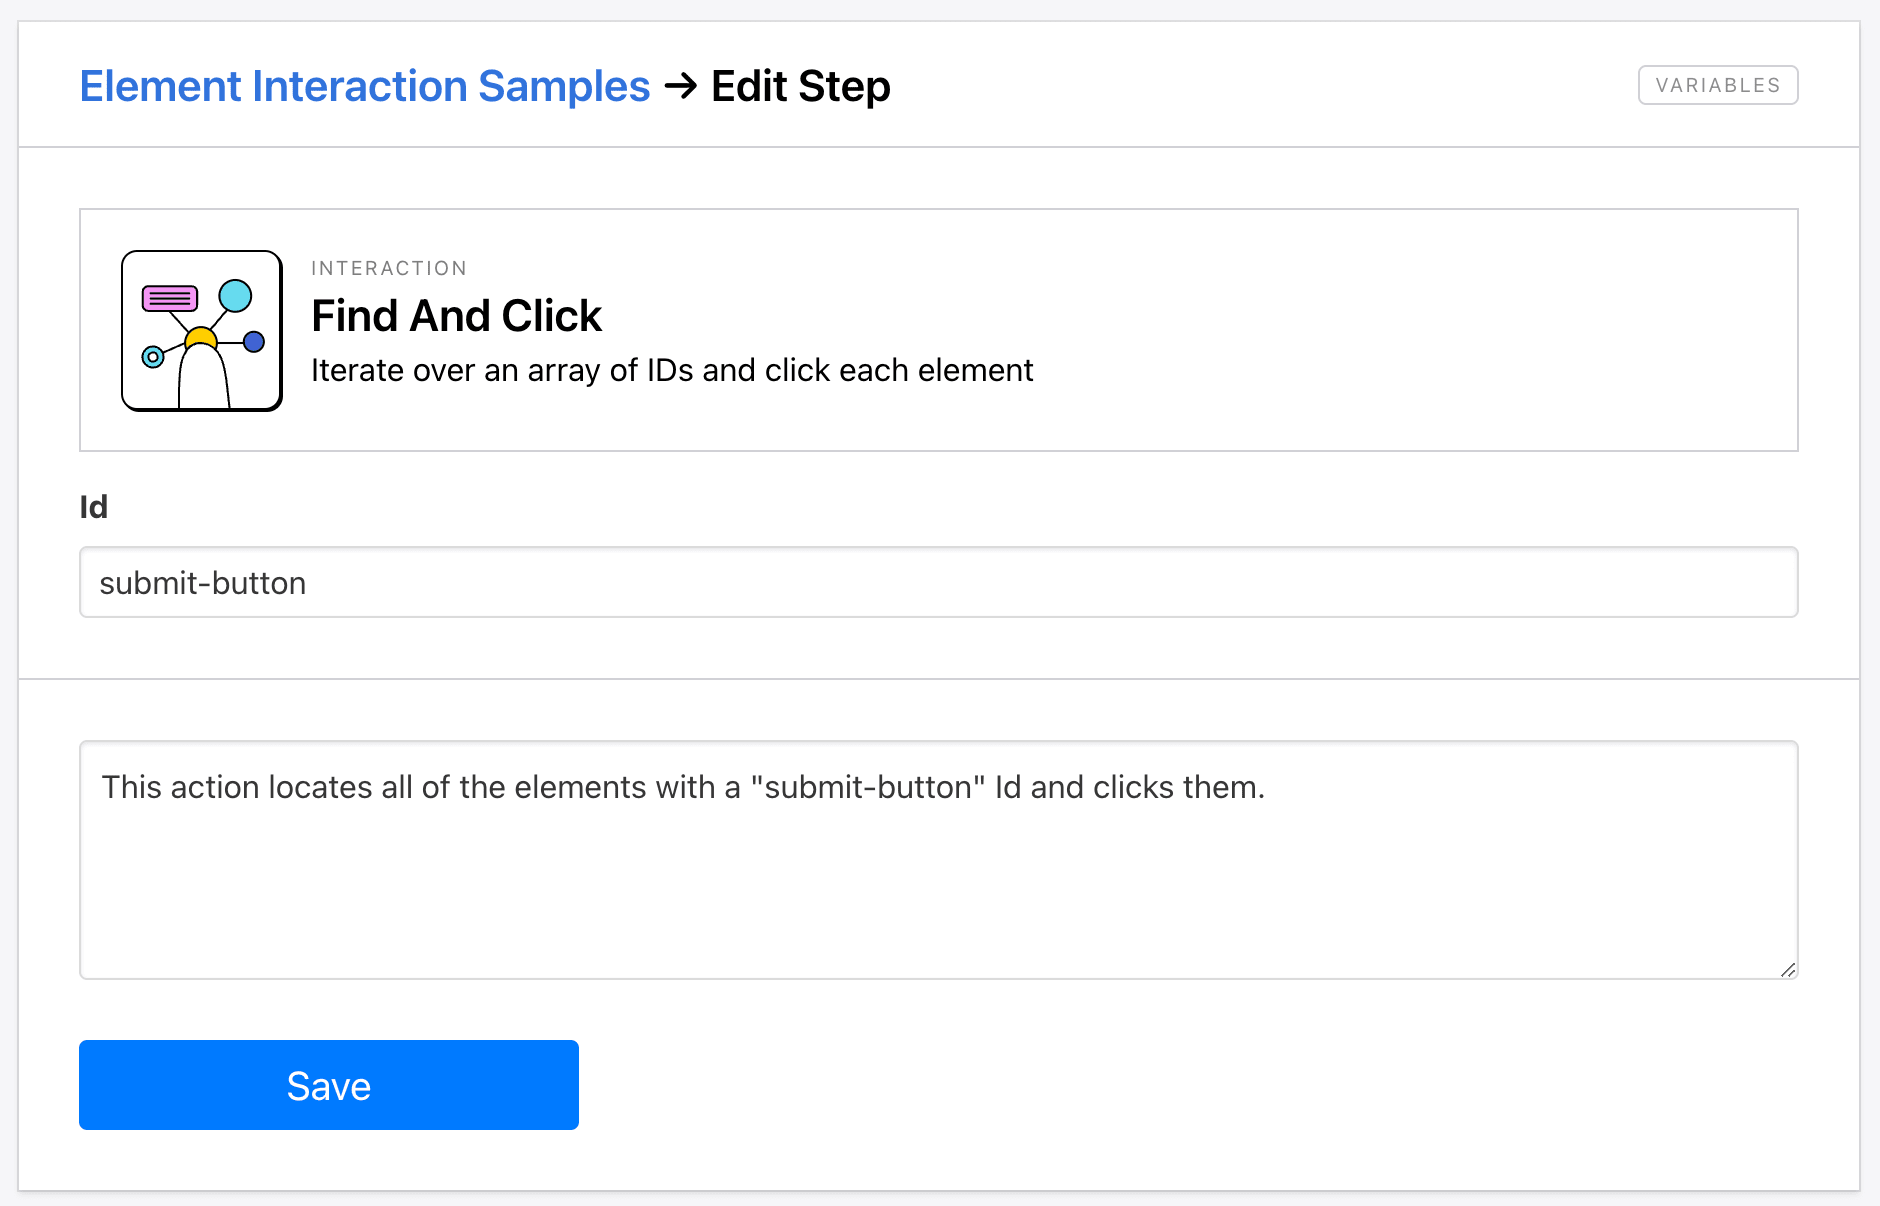
Your task video should show each element being identified and clicked.
Go To Step
The Go To Step action instructs Roborabbit to go back to the selected step, carrying the proceeding steps out for as many times as needed. This can help you programmatically fill out forms, repeatedly click buttons, and execute tests.
Set up the action by selecting the step you wish to rewind to and specifying how many times the process should be repeated.
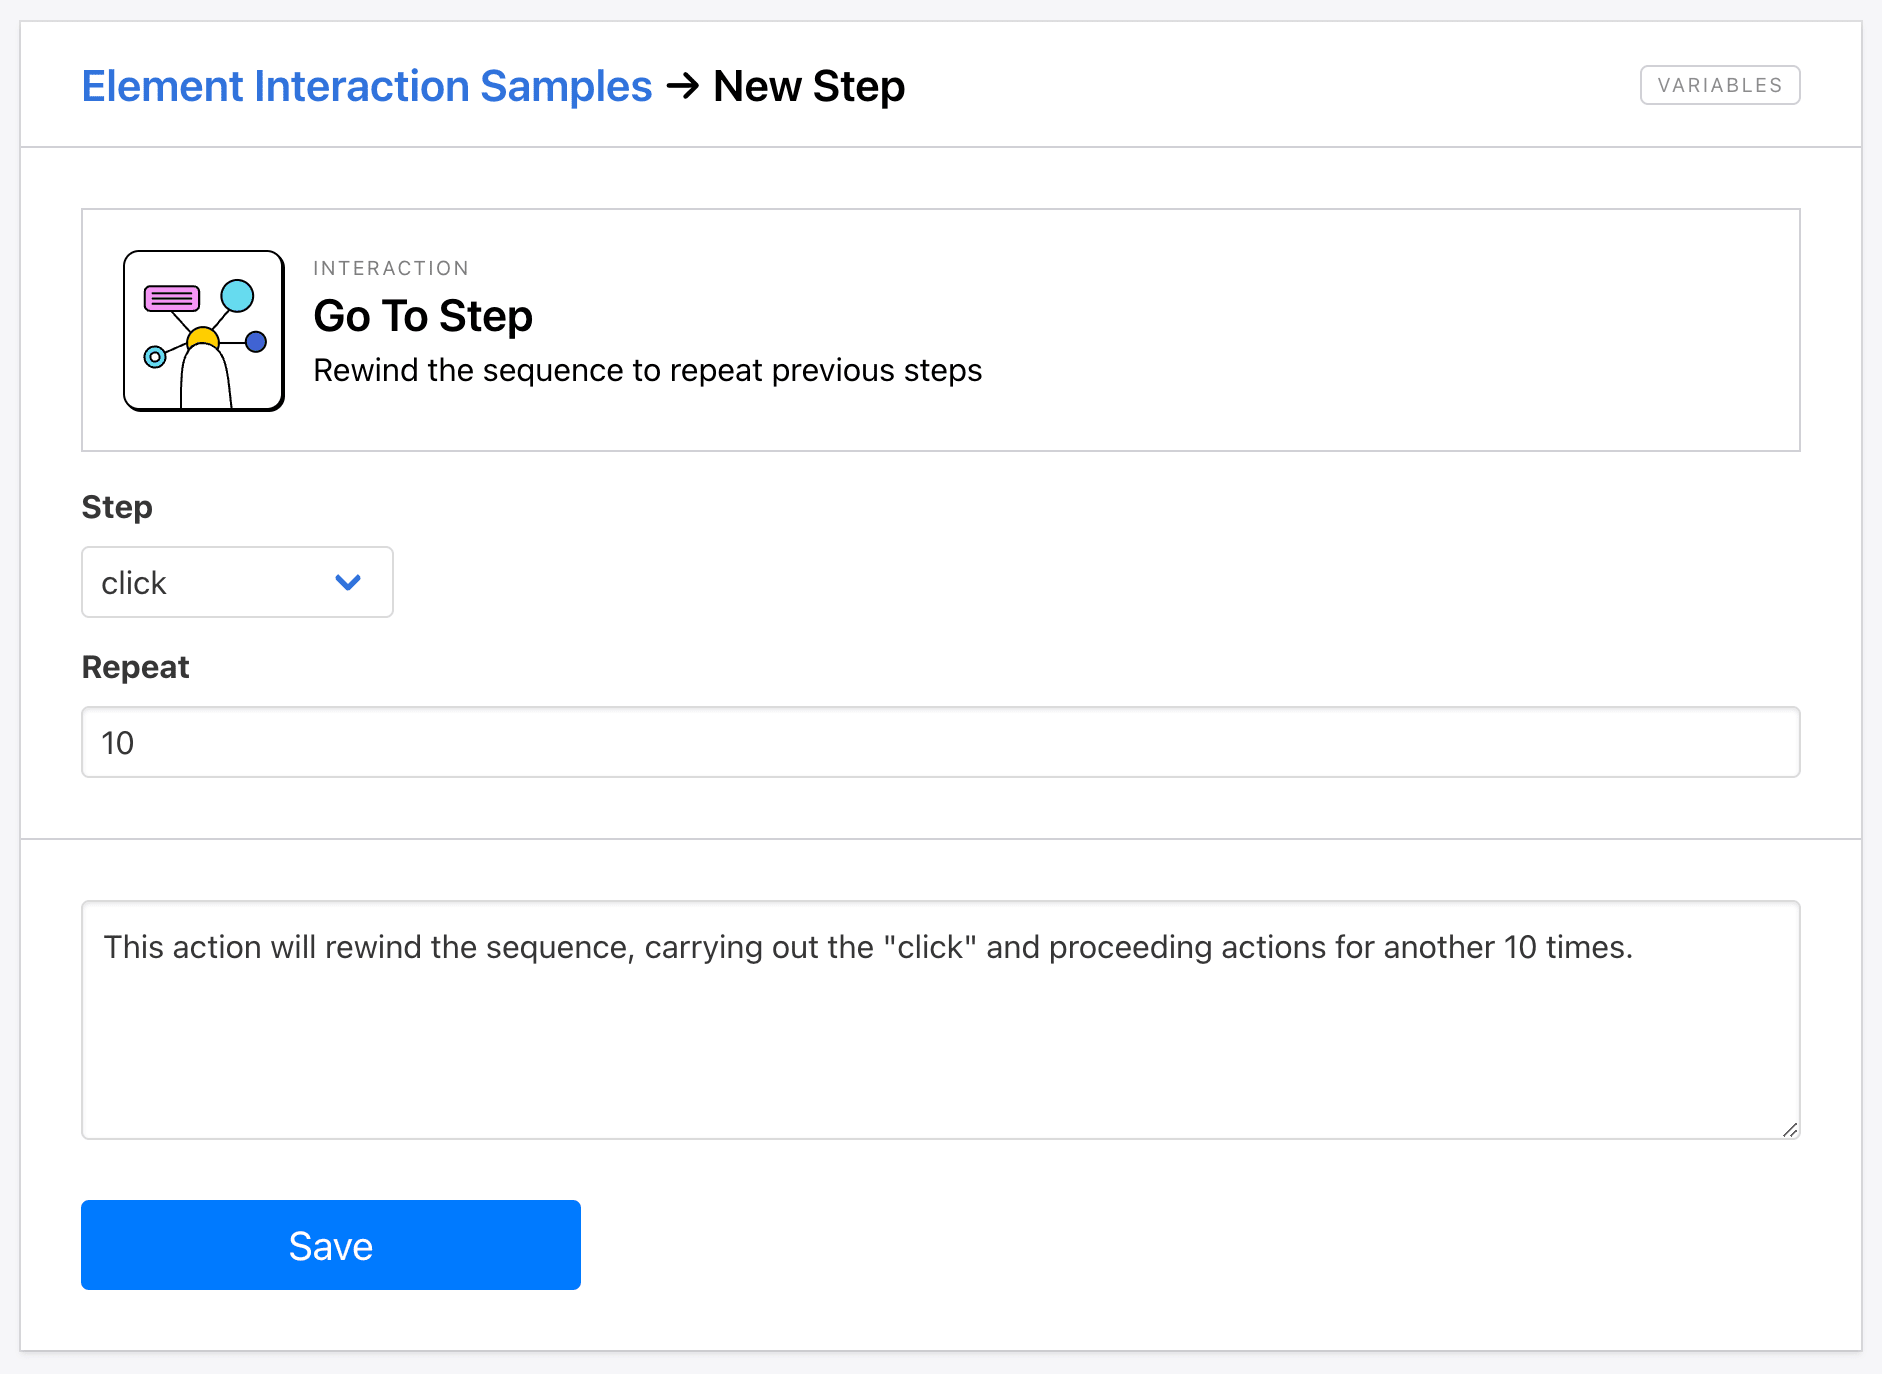
Any data in the output log will depend on the proceeding actions that will be repeated, but the results of this action will be more obvious on video.
Hit Enter
The Hit Enter action simulates pressing the enter key on your keyboard. This is useful in situations like submitting forms, triggering dynamic content, and just more accurately simulating user behavior.
There’s little setup required for this action—simply add it at the appropriate point in your task.

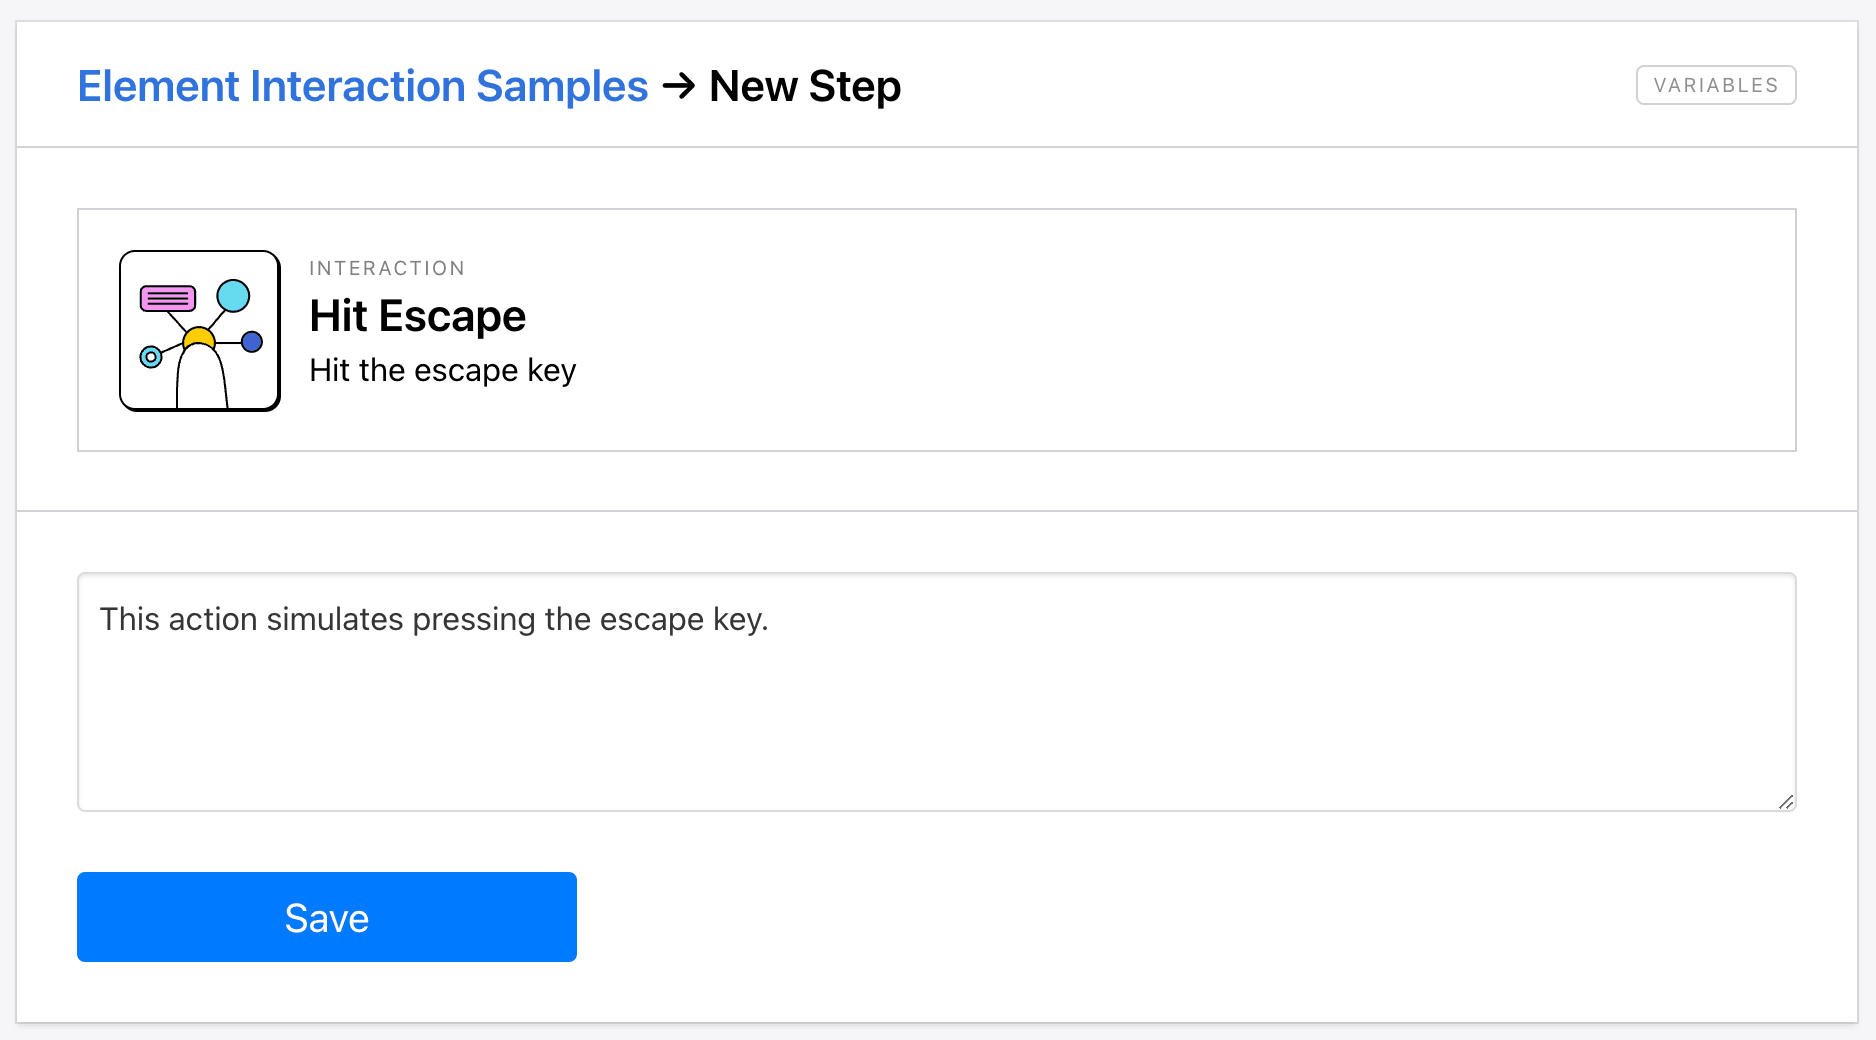
Hit Escape
Like the previous action, Hit Escape simulates pressing the escape key on your keyboard. This can be used in web testing to simulate user behavior when interrupting or ending a process.
No additional information is needed to set up this action—just add it to your task at the best stage.
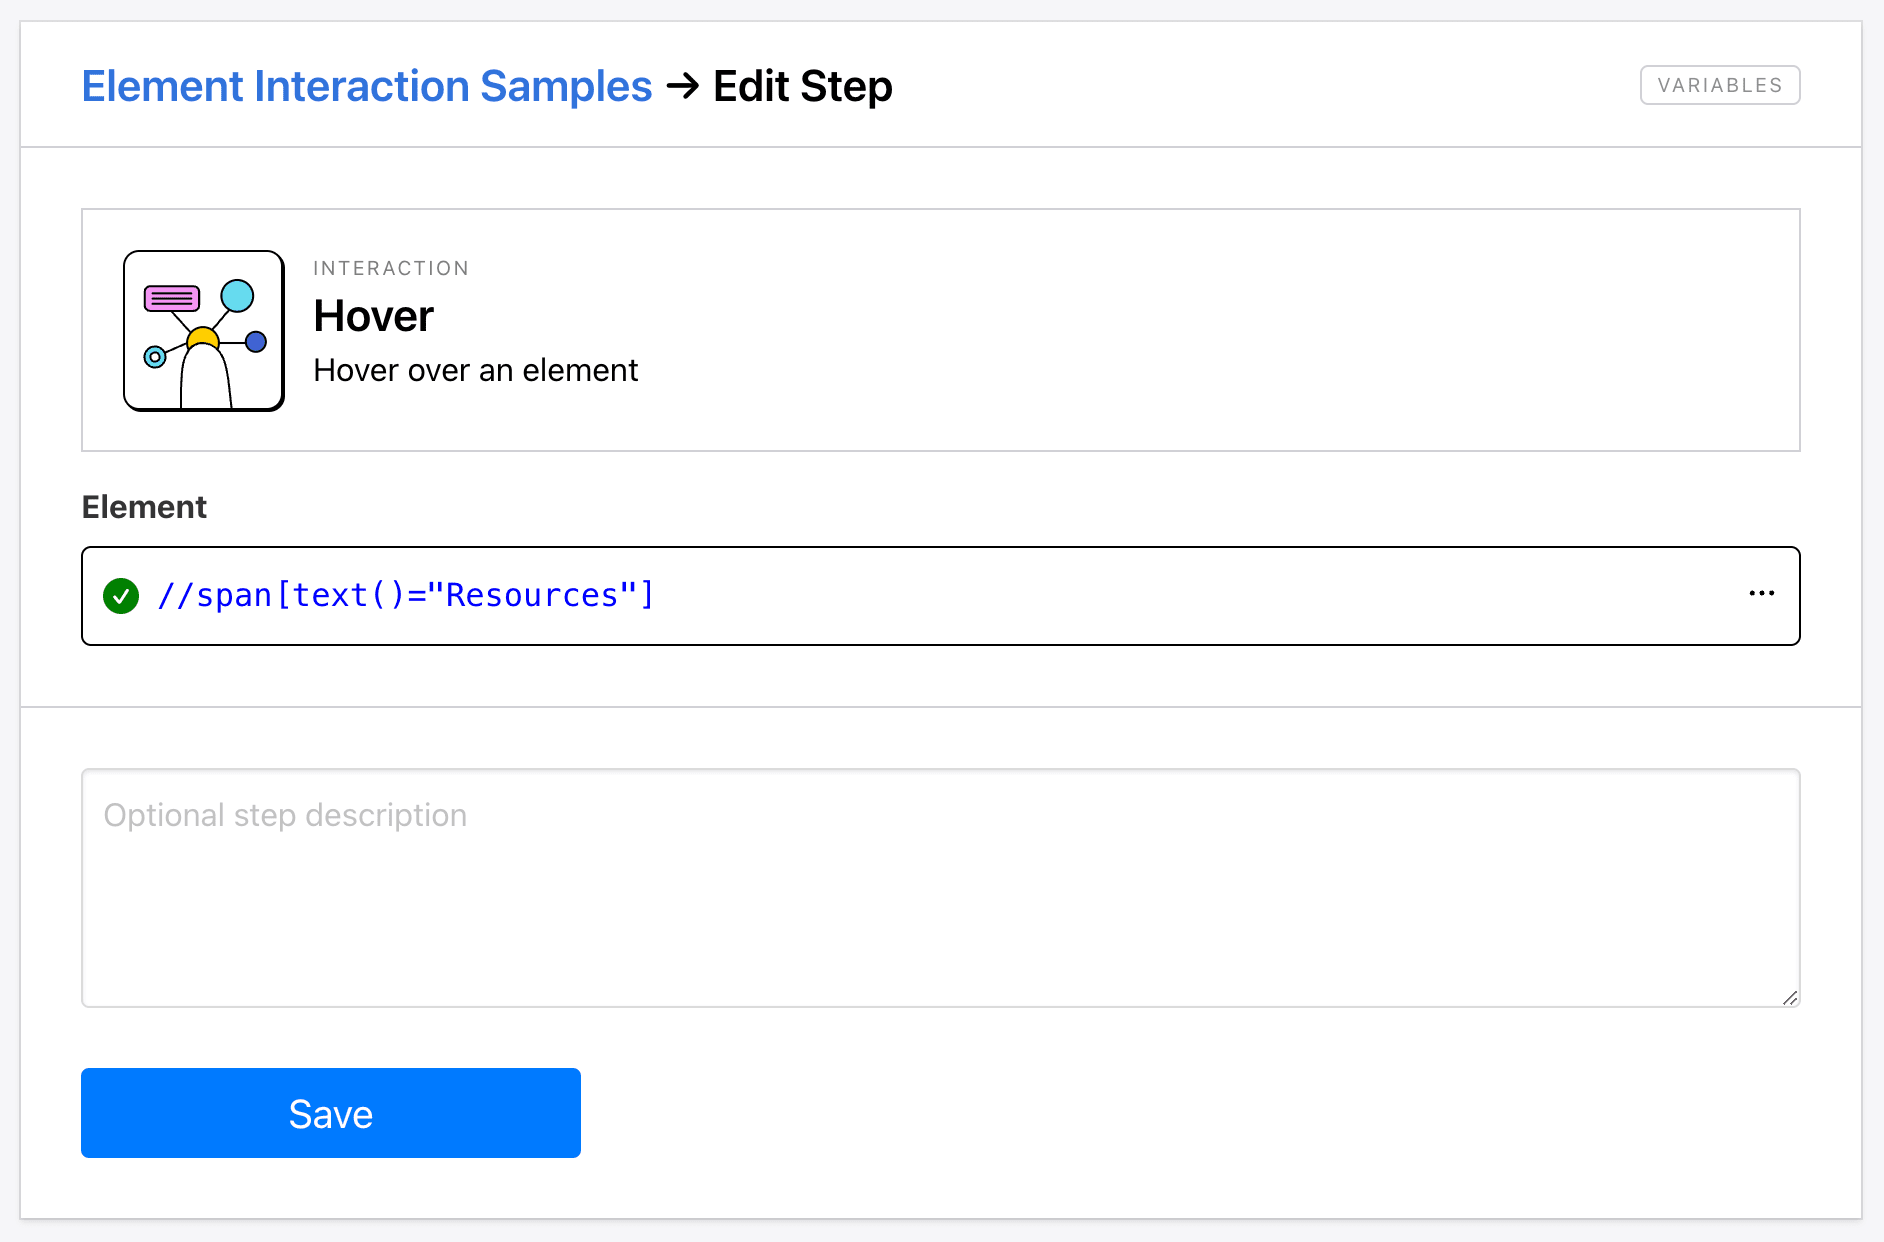
Hover
The Hover action scrolls to bring an element into view and hovers over its center. This can test hover actions, open menus, and more.
You’ll need Helper config to identify the element you want hovered over, but nothing more is needed for setup.
If Then
The If Then action creates a conditional statement that only carries out the following step if met. You can use it to extract data if it meets requirements or click on an element that exists.
To set up the action, select the Assert step that the condition is based on, then choose whether you want the step to proceed if it’s true or false.
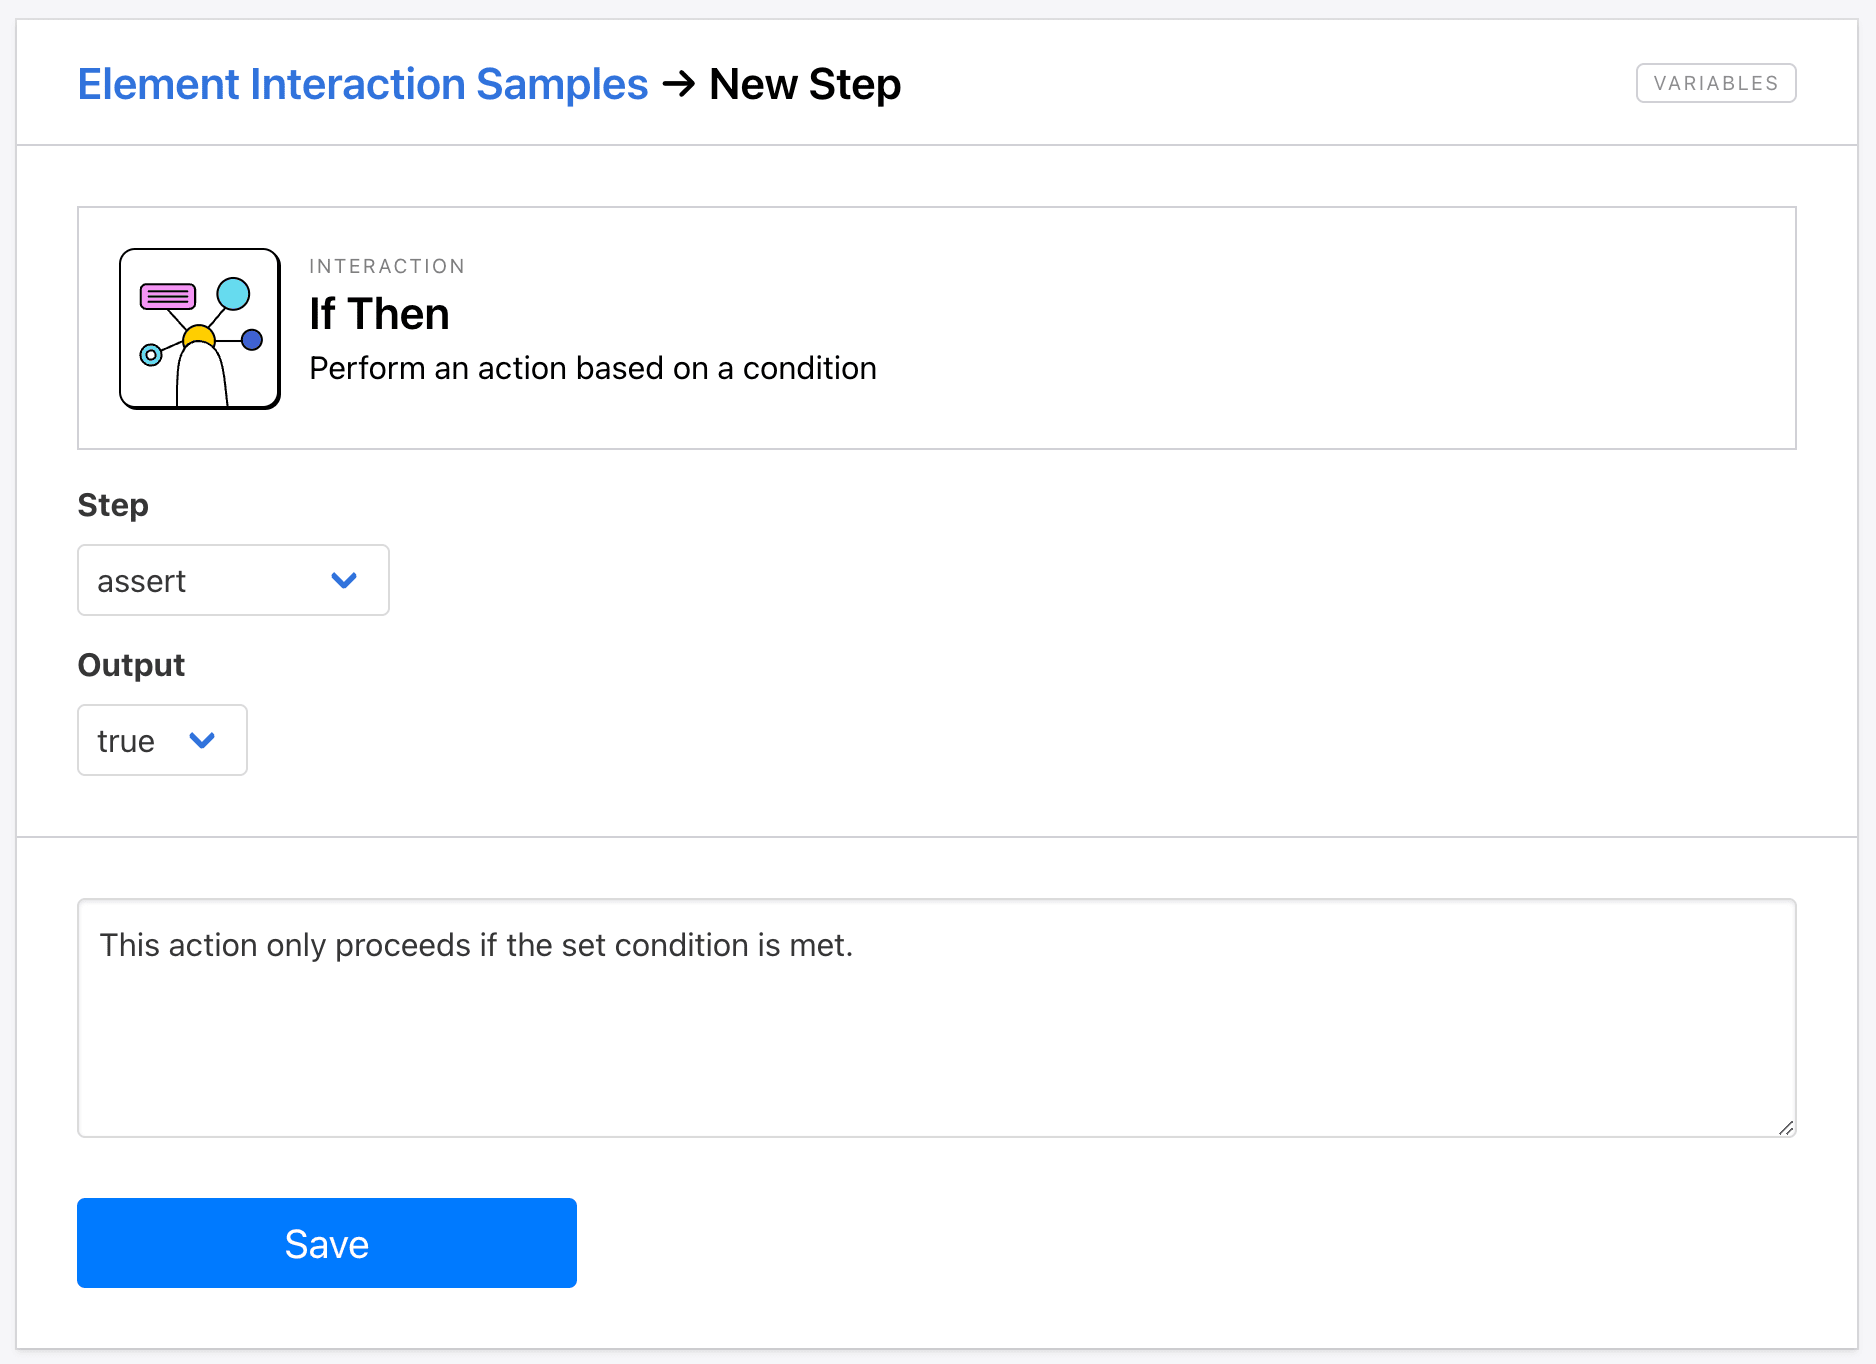
The action placed directly after this step will execute if the expected condition is met.
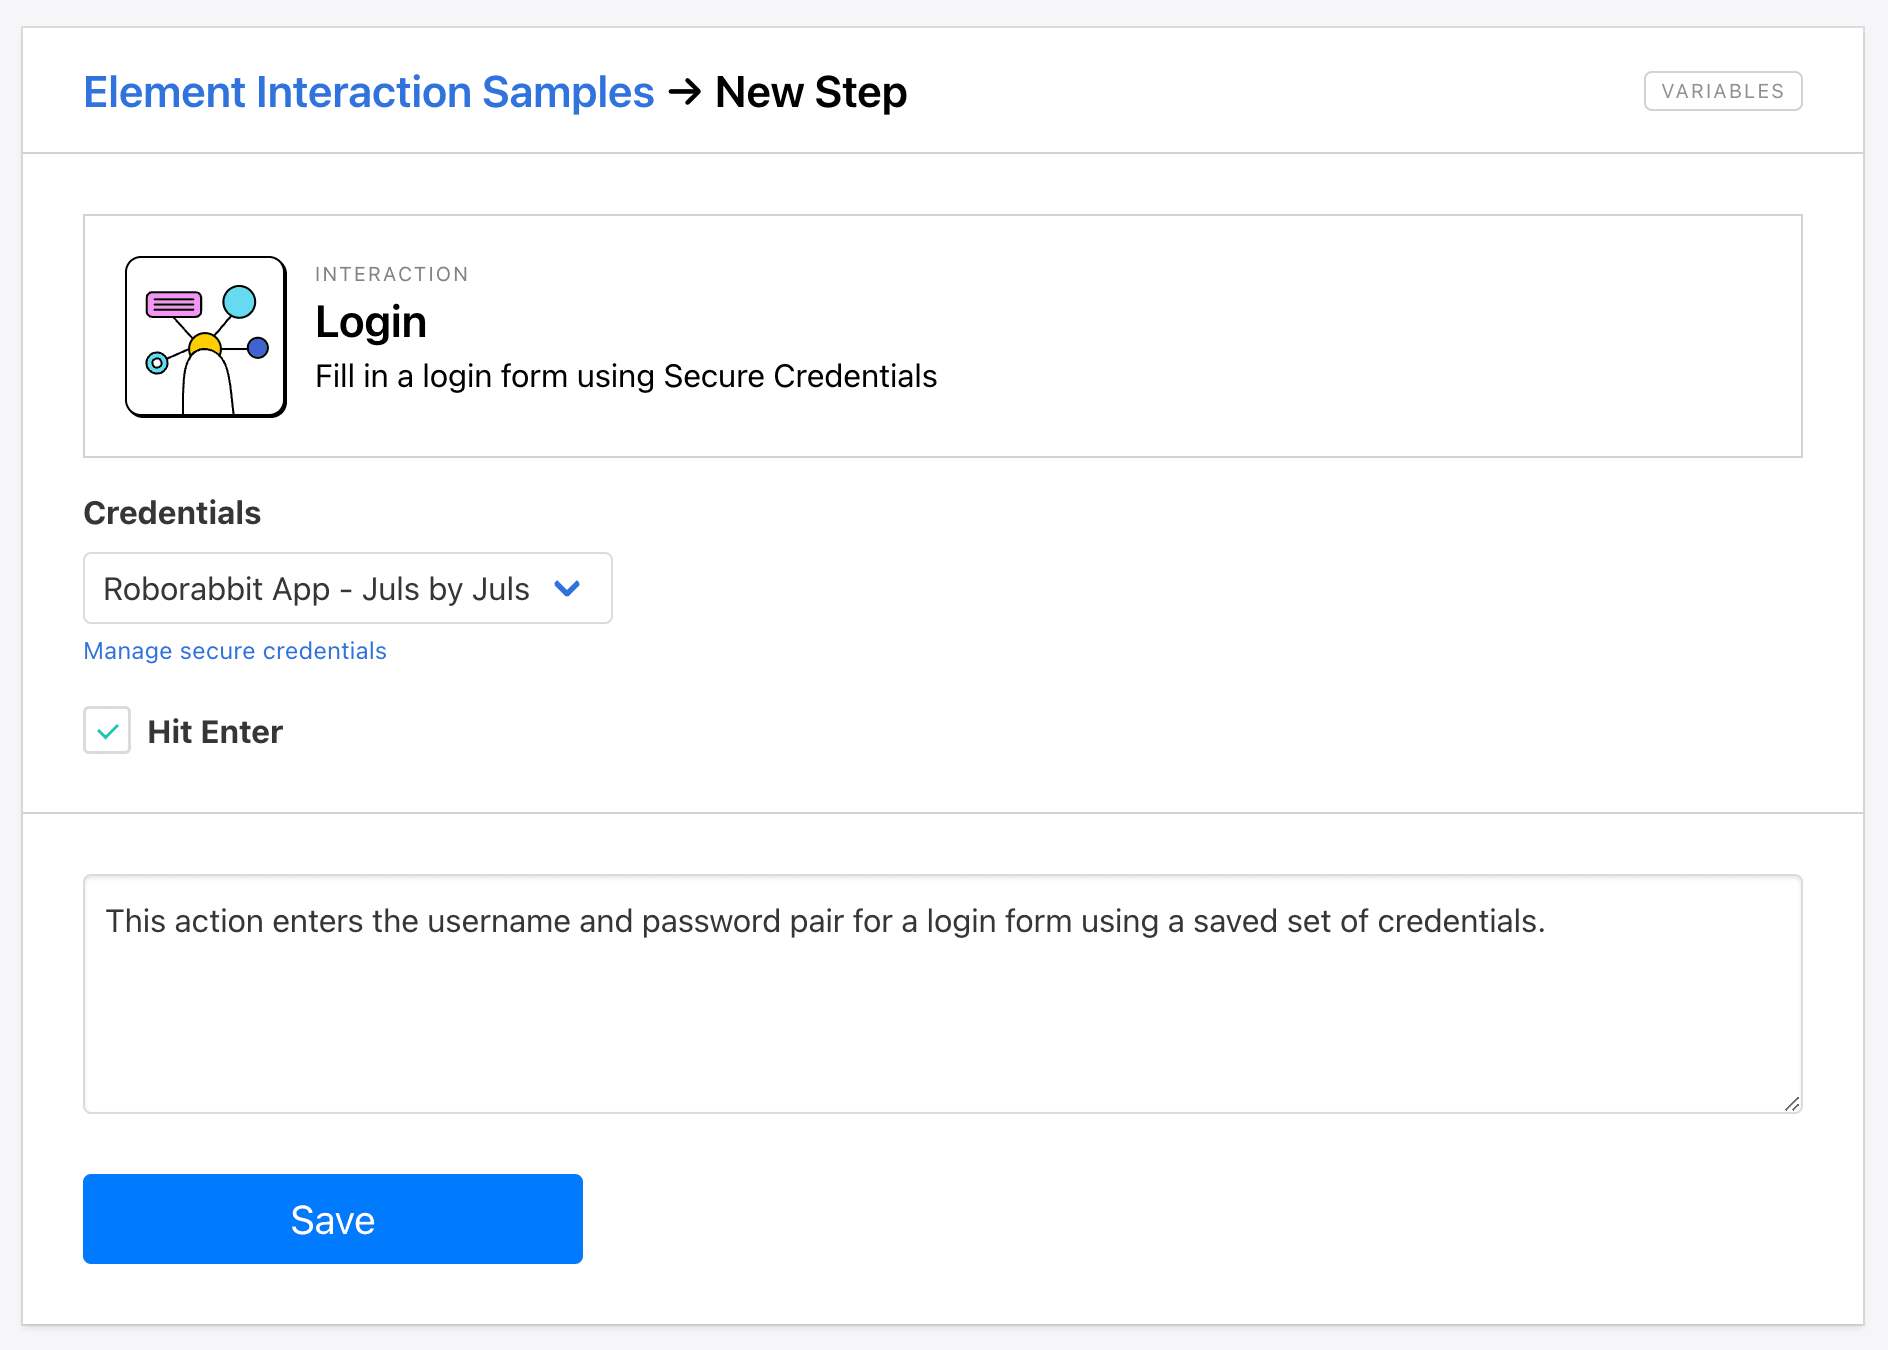
Login
The Login action enters the username and password pair for a login form using a saved set of credentials. It can also include hitting the enter key to keep you from having to add another step. You can use this action to access password-protected sites automatically.
Set up the action by adding a username and password pair to Secure Credentials, then choose which one you want in your step. Check Hit Enter if appropriate for your use case.
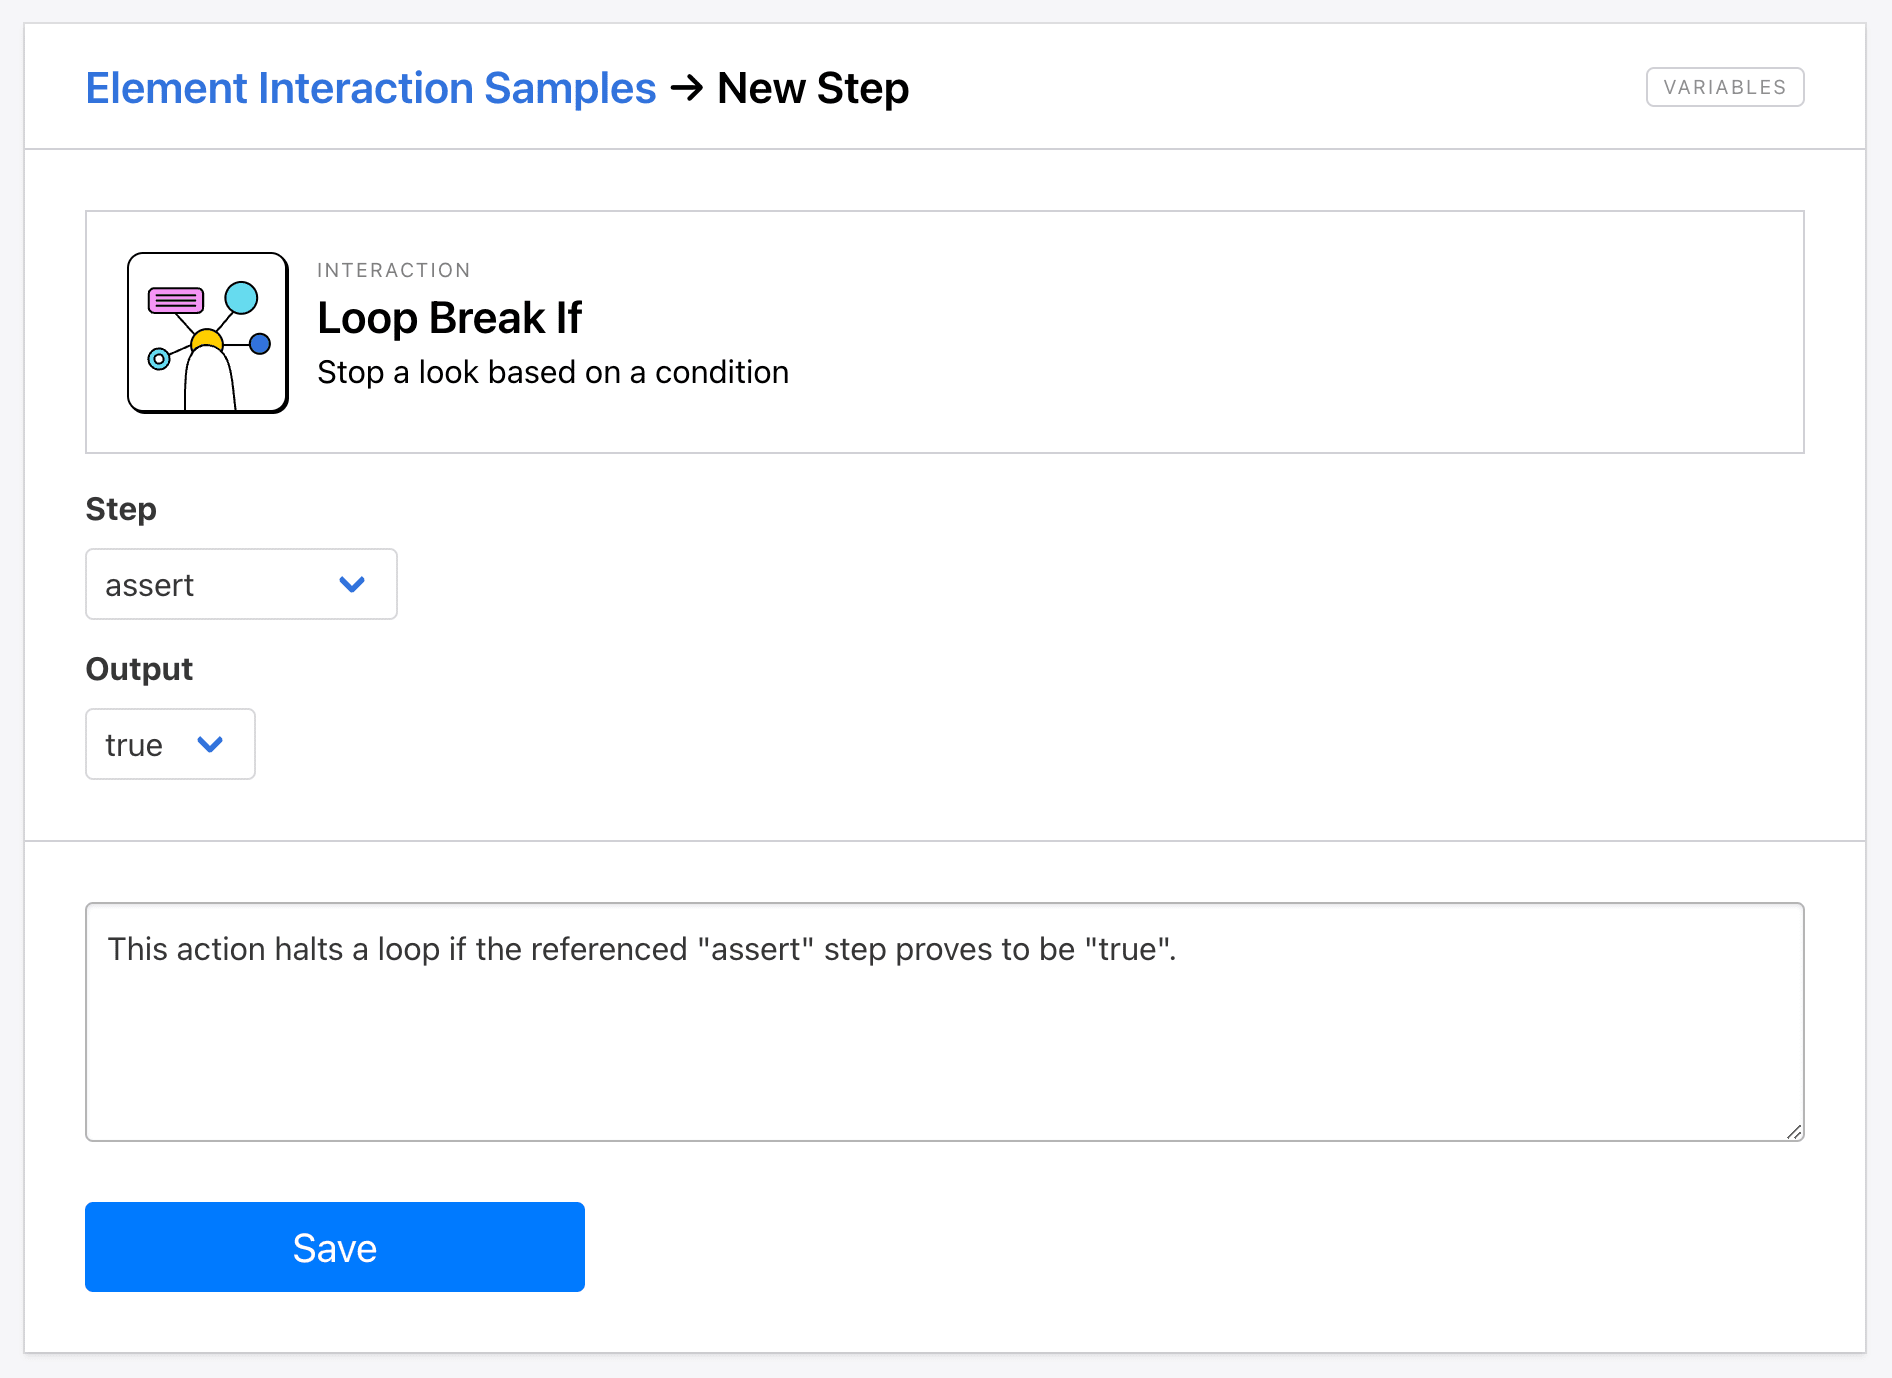
Loop Break If
The Loop Break If action establishes a condition which, if met, stops a loop in your task. It can be placed in the middle of the loop, breaking it early if requirements aren’t met. You can use the action to end one part of the task, such as if an element is no longer visible or relevant.
You can set the condition for this action by selecting the assert step associated with the condition. Then, choose whether you want the loop to break if it’s true or false.
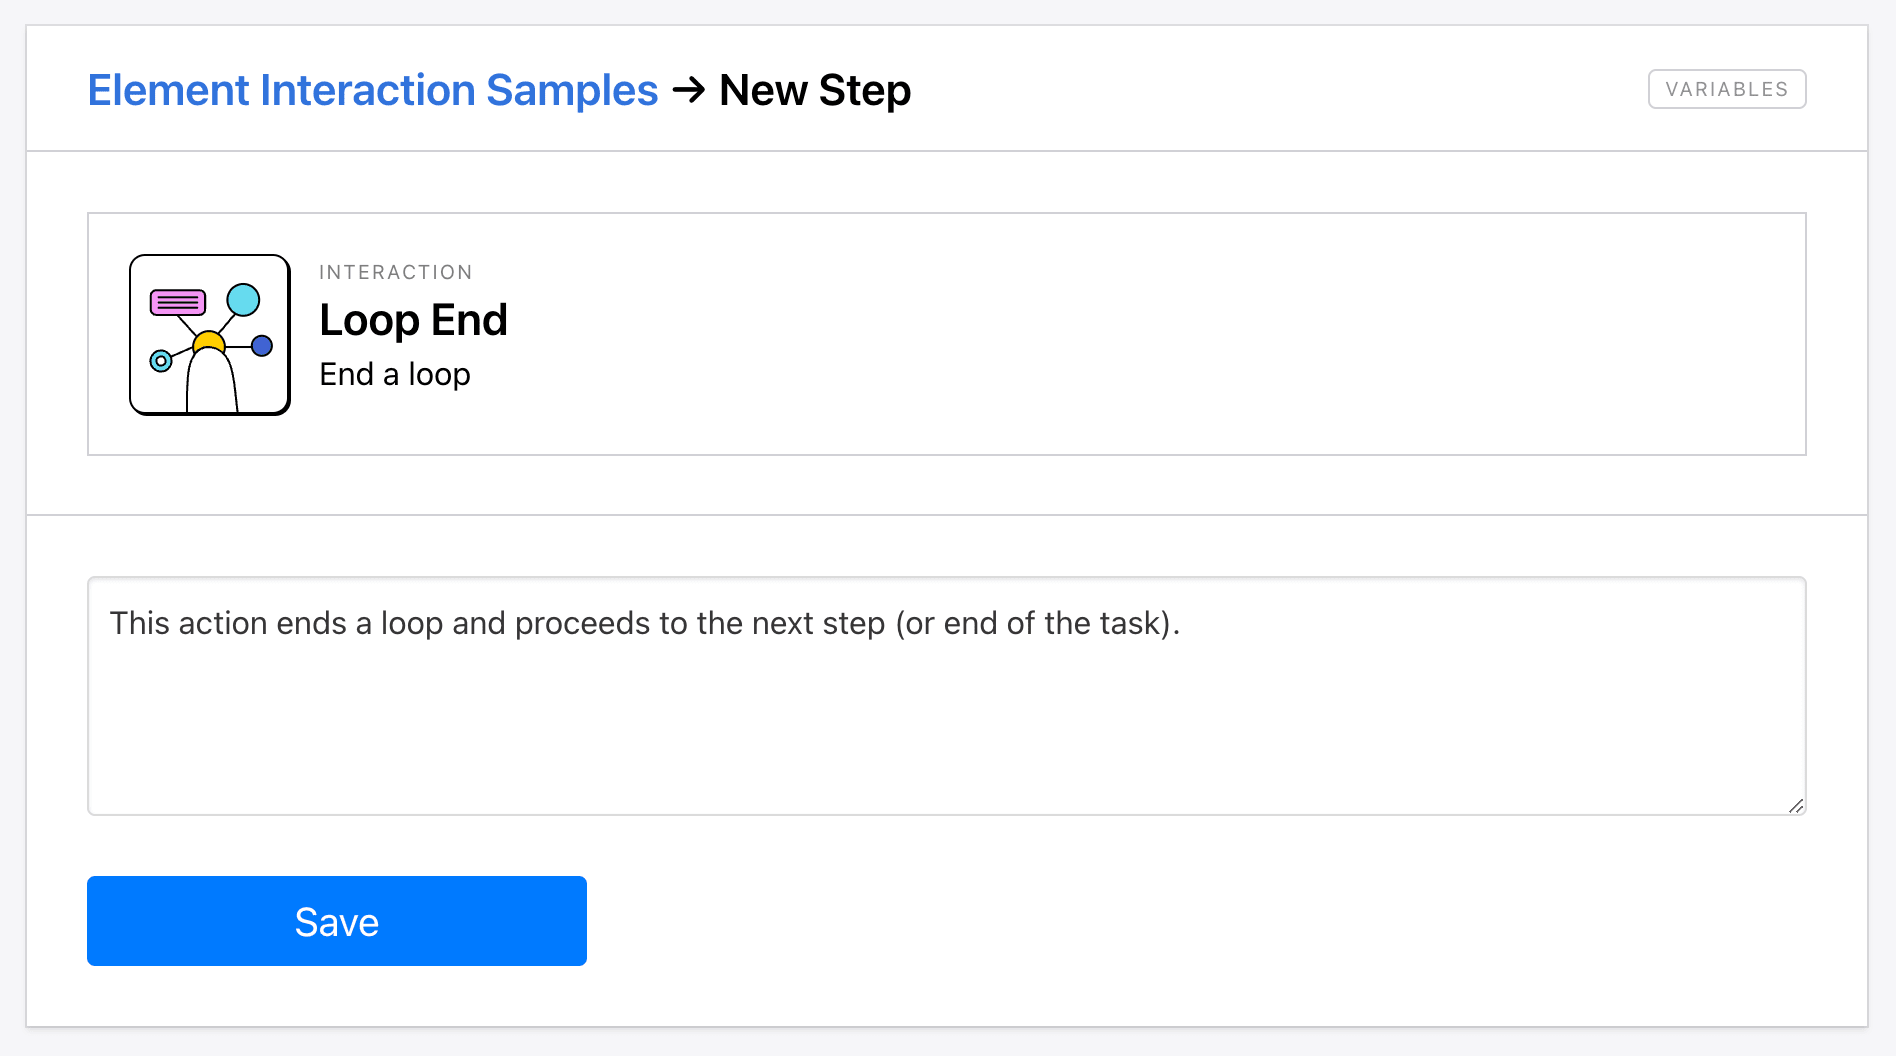
Loop End
The Loop End action breaks a loop, proceeding to the next step. This is helpful when you need a loop to run for a specific number of times or with a predictable set of data, such as when gathering chronologically-ordered information.
Little setup is needed for this step—simply add it after the last action in your loop.
Loop Start
The Loop Start action kicks off a loop, repeating any steps within it for as many runs as necessary. You can use it to scrape multiple pages of data, click through a wizard, and fill out forms.
Set up the action by deciding whether you want the loop to repeat a fixed number of times or use data. This can be from a list of links manually entered or a variable from a previous data-saving step.
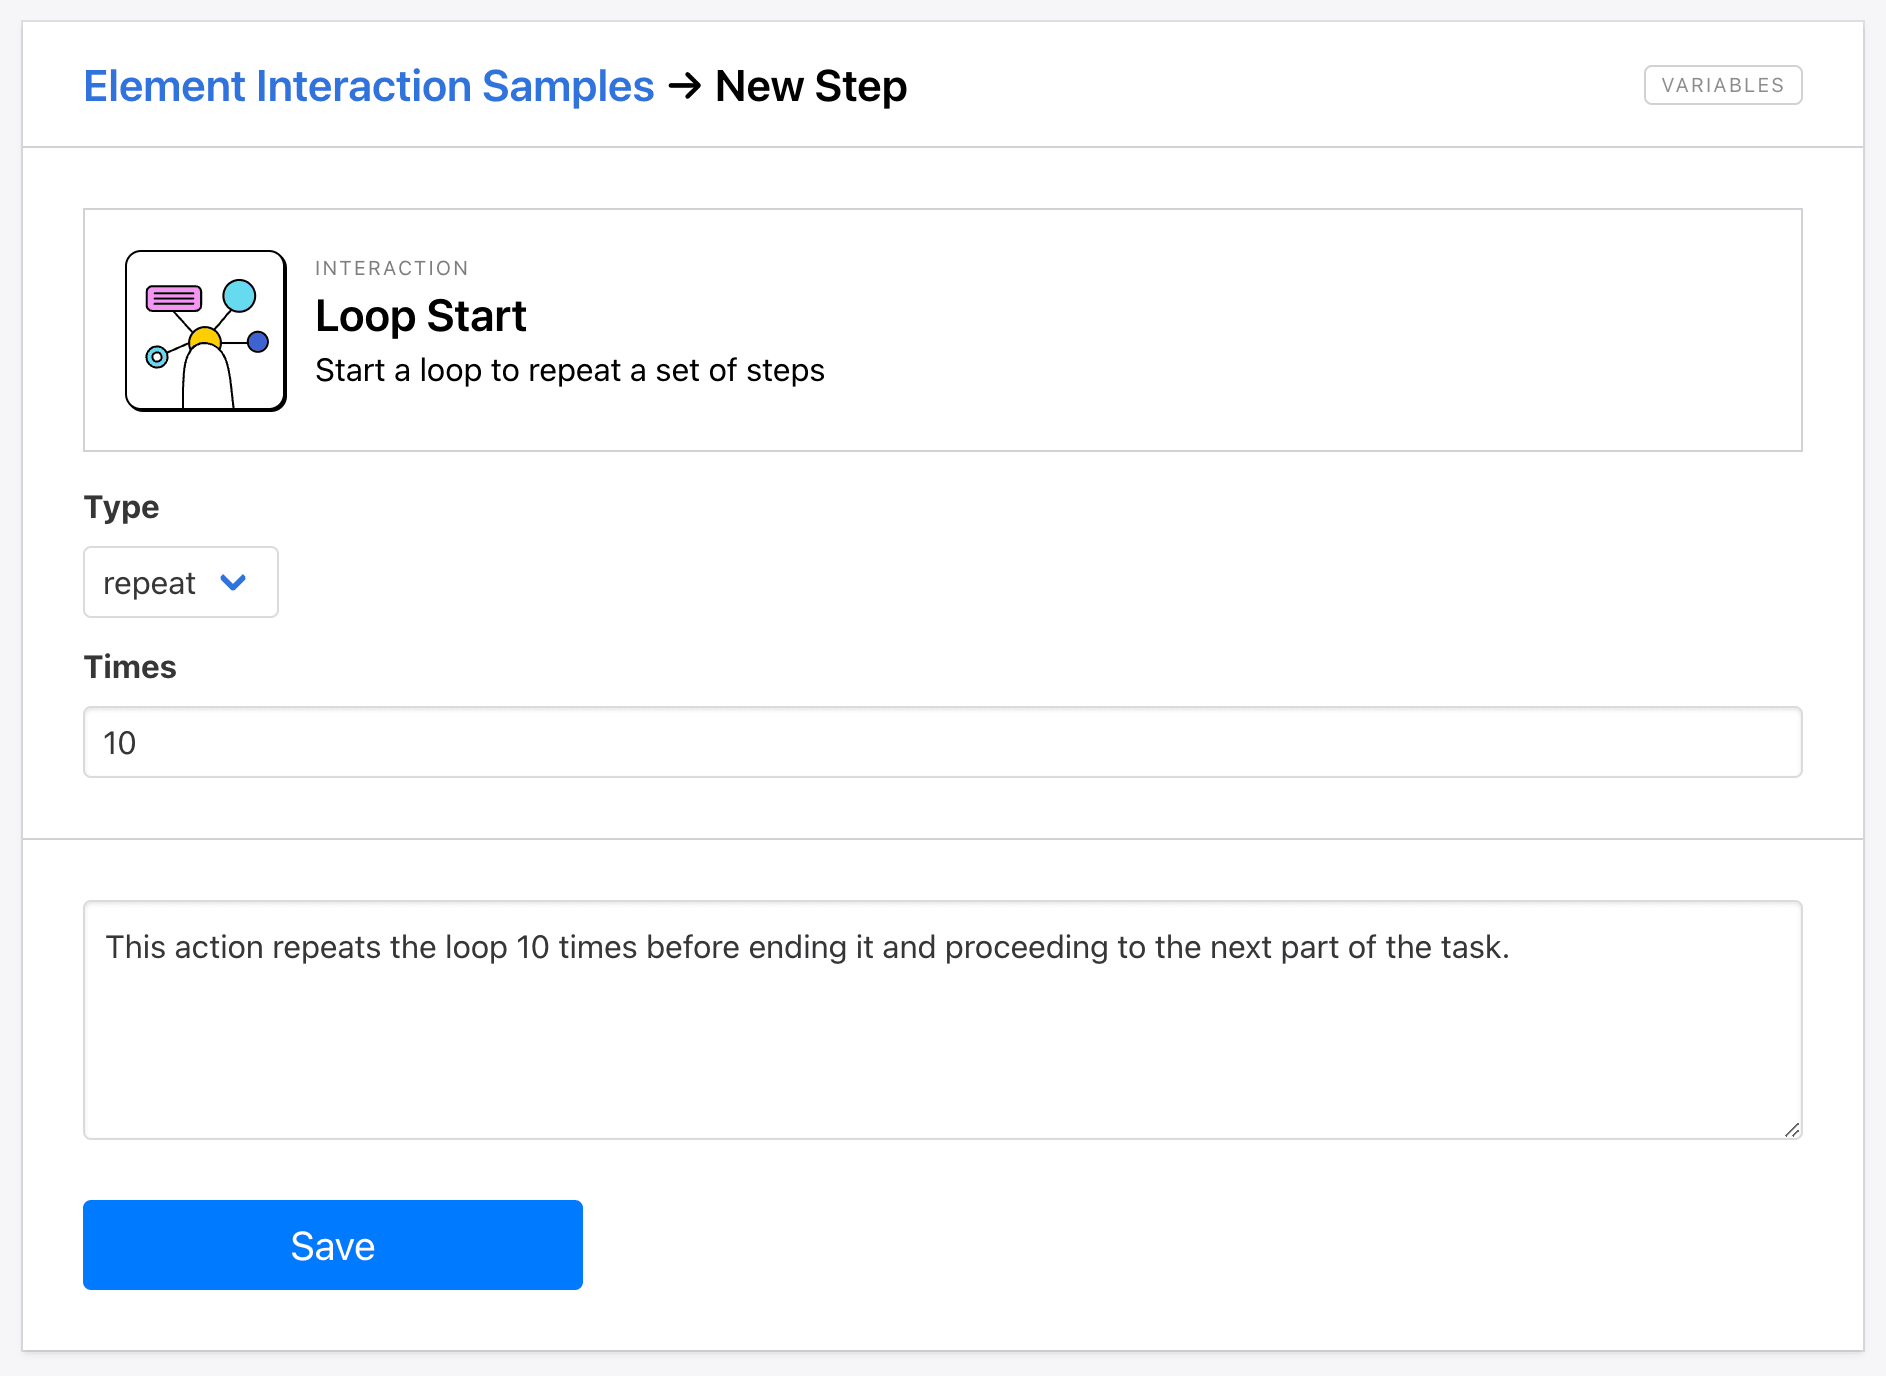
Any following steps will then repeat as many times as specified, until the loop is ended or broken based on a condition.
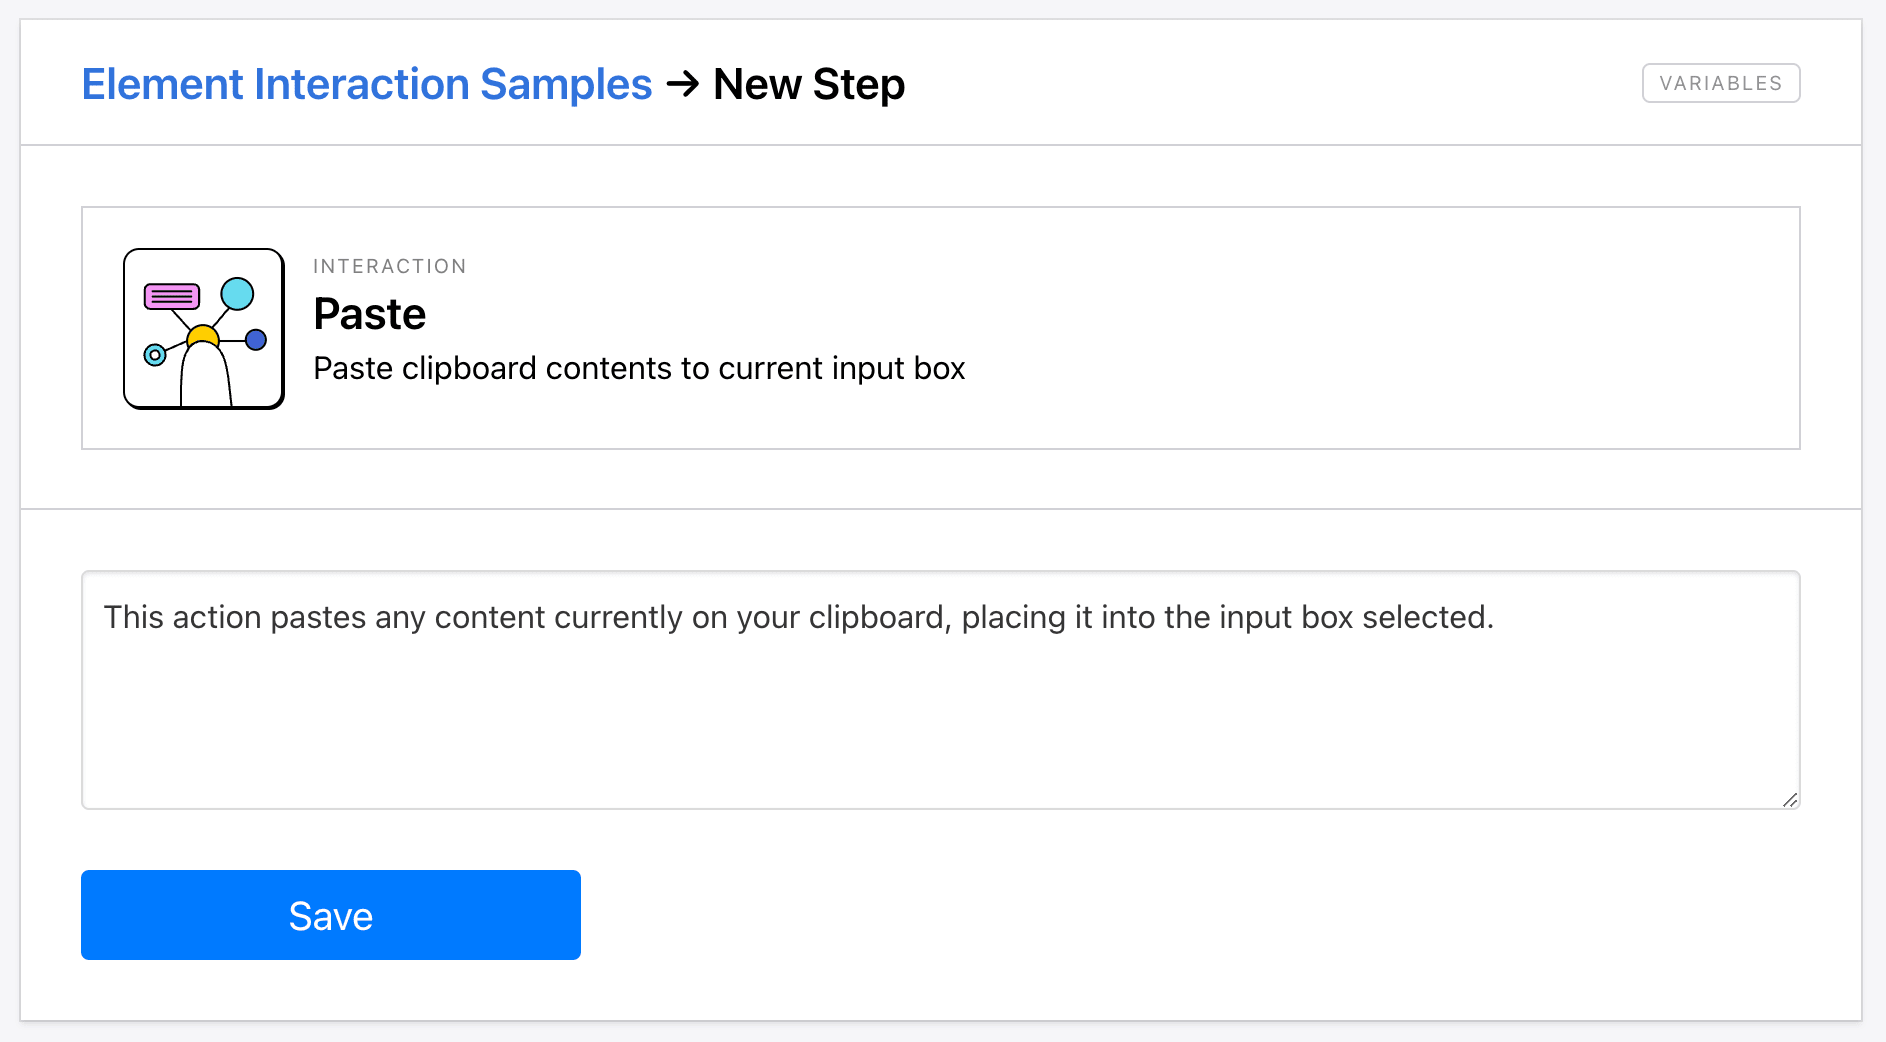
Paste
The Paste action places any content currently saved to your clipboard into the input box selected. This can be useful when you’ve clicked a Copy button to save content and want to place it in a different location.
To set up the action, add it to your task in the appropriate order.
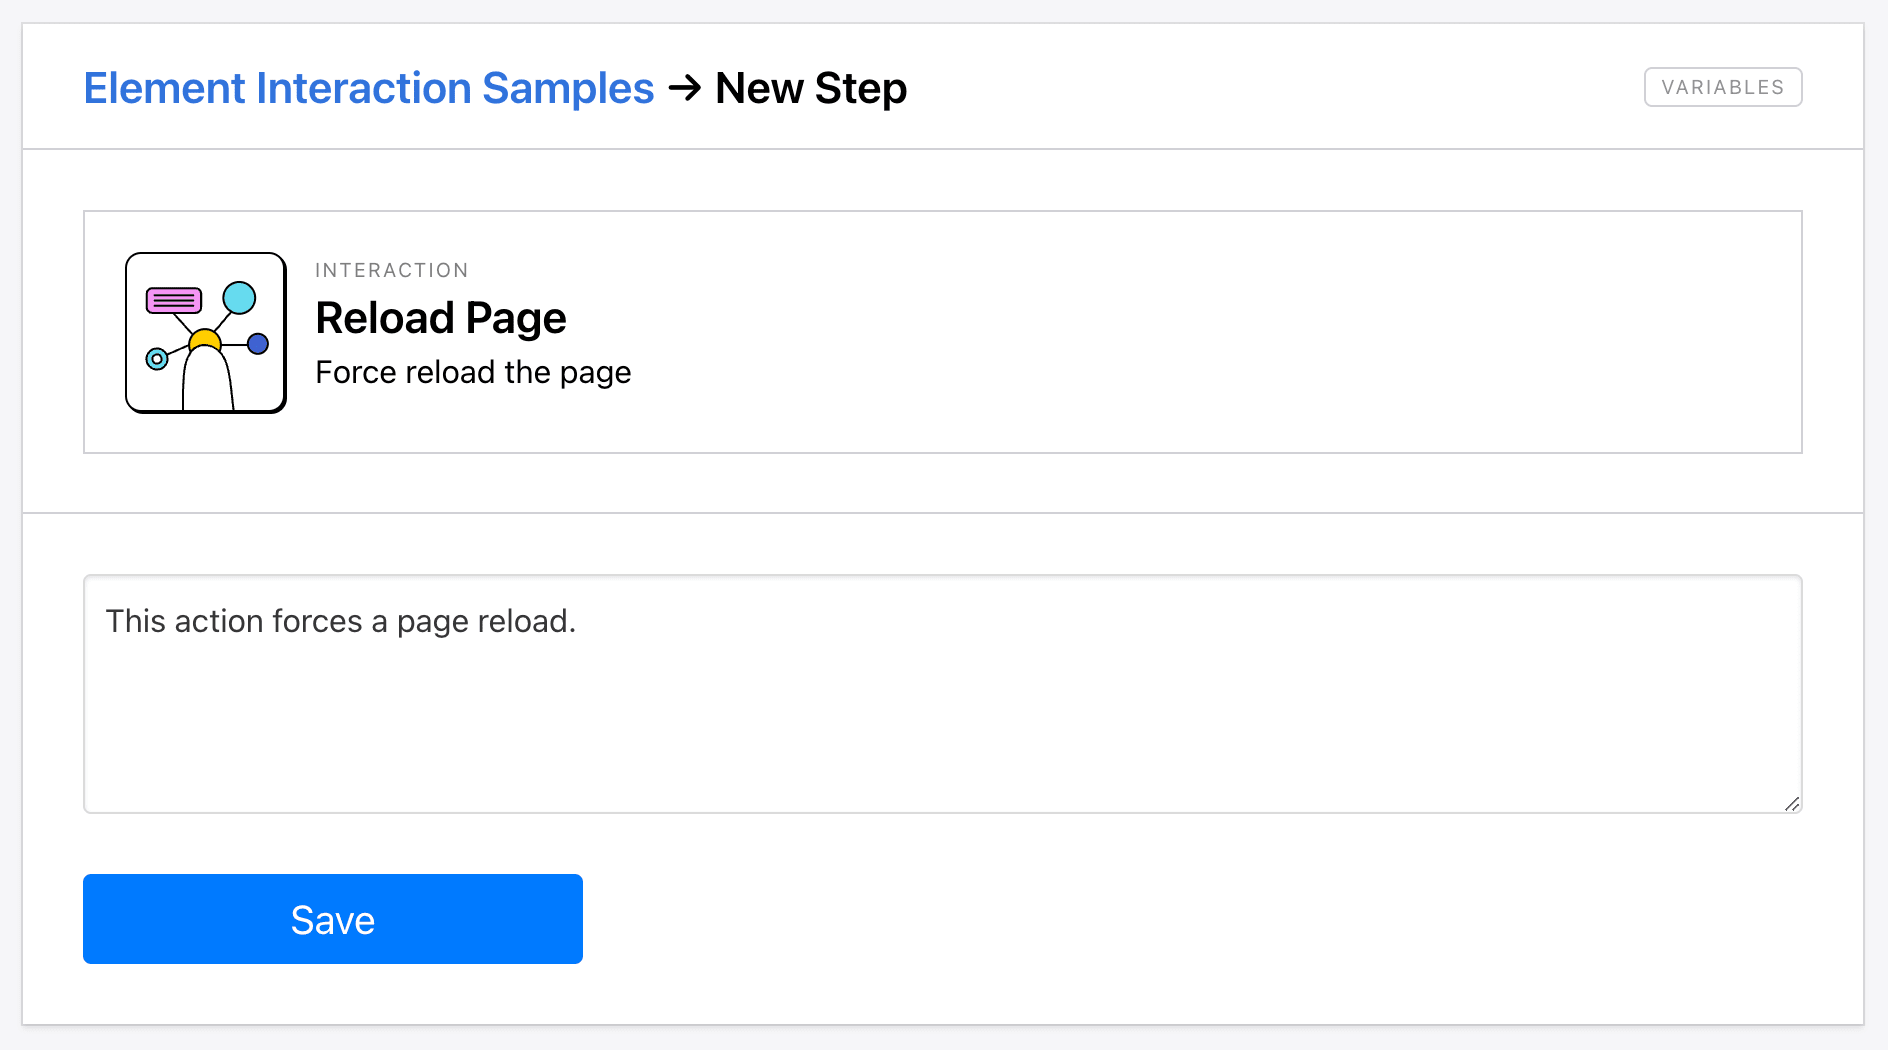
Reload Page
The Reload Page action forces a page reload. This is often used in web testing to determine whether a site’s elements still respond correctly or a flow isn’t disrupted when reloads occur.
Set up the action by adding it to your task at the appropriate stage.
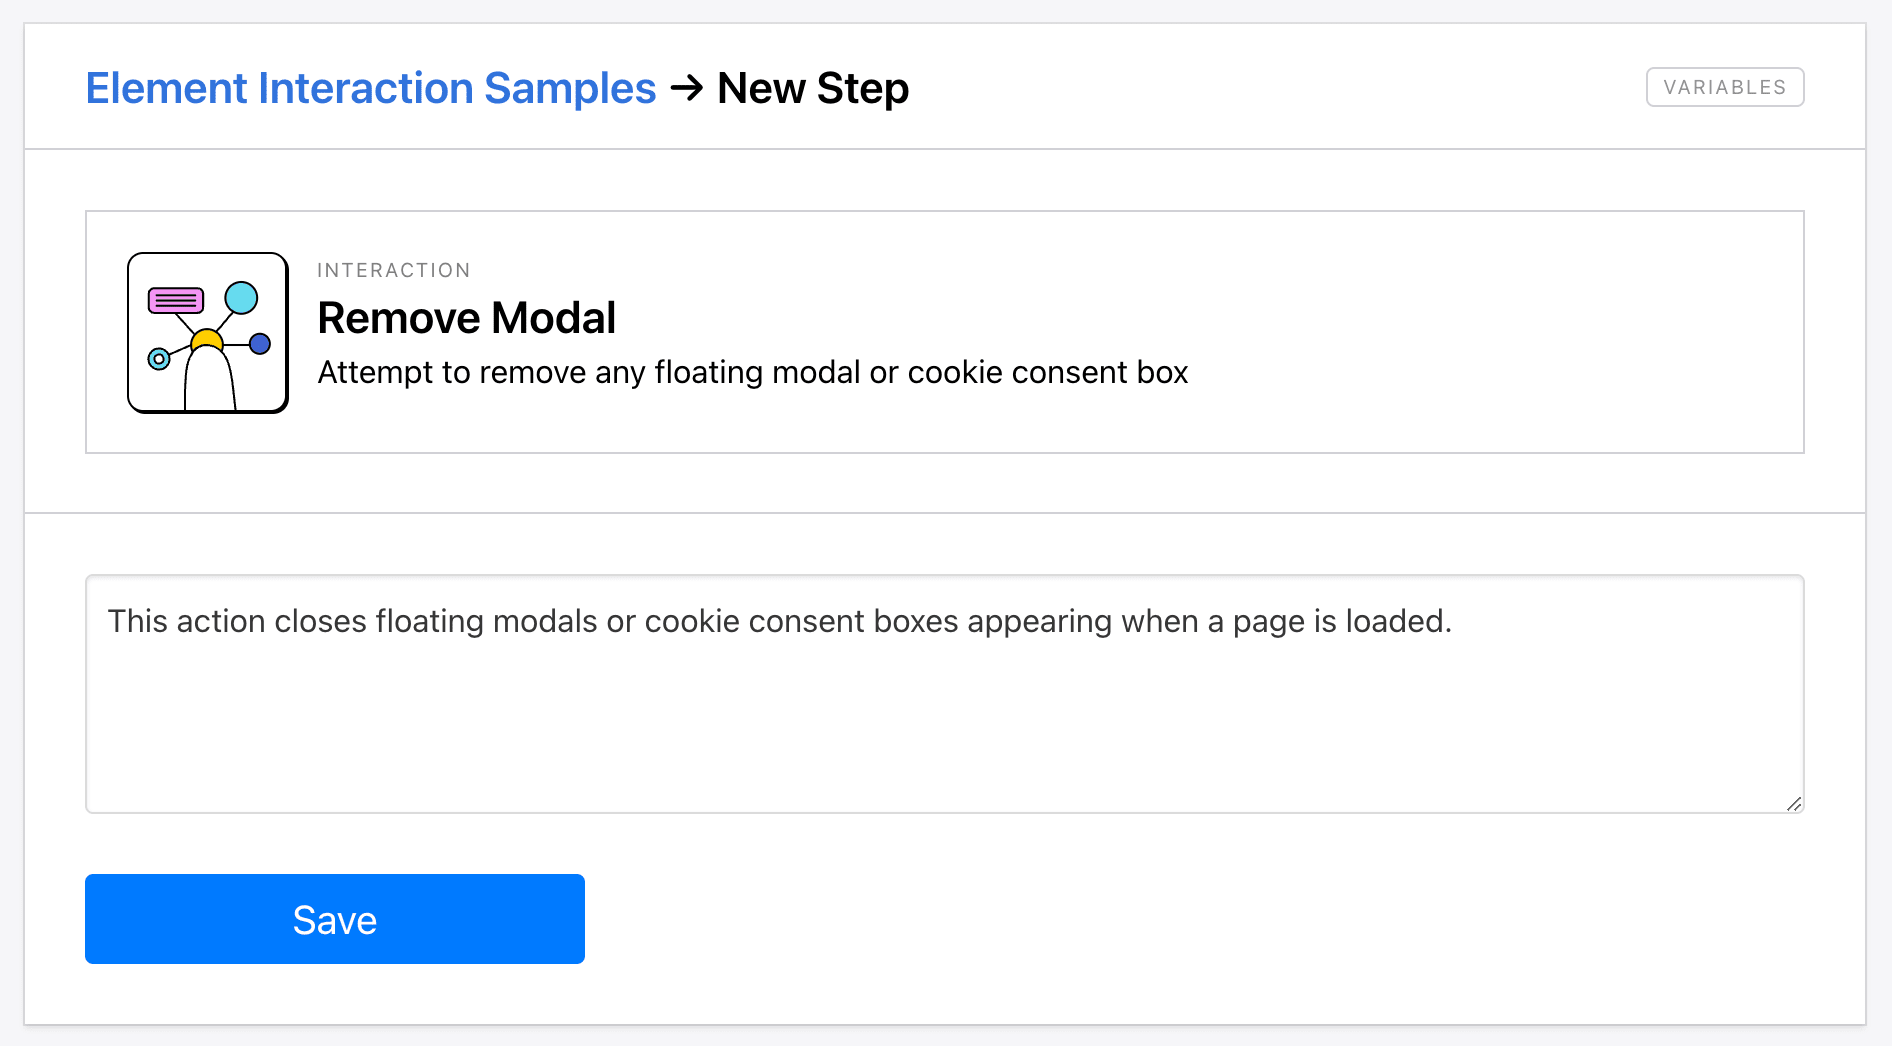
Remove Modal
The Remove Modal action closes any floating modals or cookie consent forms wherever possible. This can be used to test user behavior and makes for cleaner screenshots.
To set up the action, add it to your task after the step that loads the page.
Hare Hint 🐰: Floating modals usually don’t interfere with the webpage’s underlying HTML structure, so they are not necessary in use cases that don’t involve visual proof, such as with data scraping.
Solve Captcha
The Solve Captcha action sends a request to 2Captcha to solve the test, then submits it to gain access to a webpage. This can be used to sidestep bot protective measures.
Set up the action by choosing whether the page requires reCAPTCHA v2 or hCaptcha.
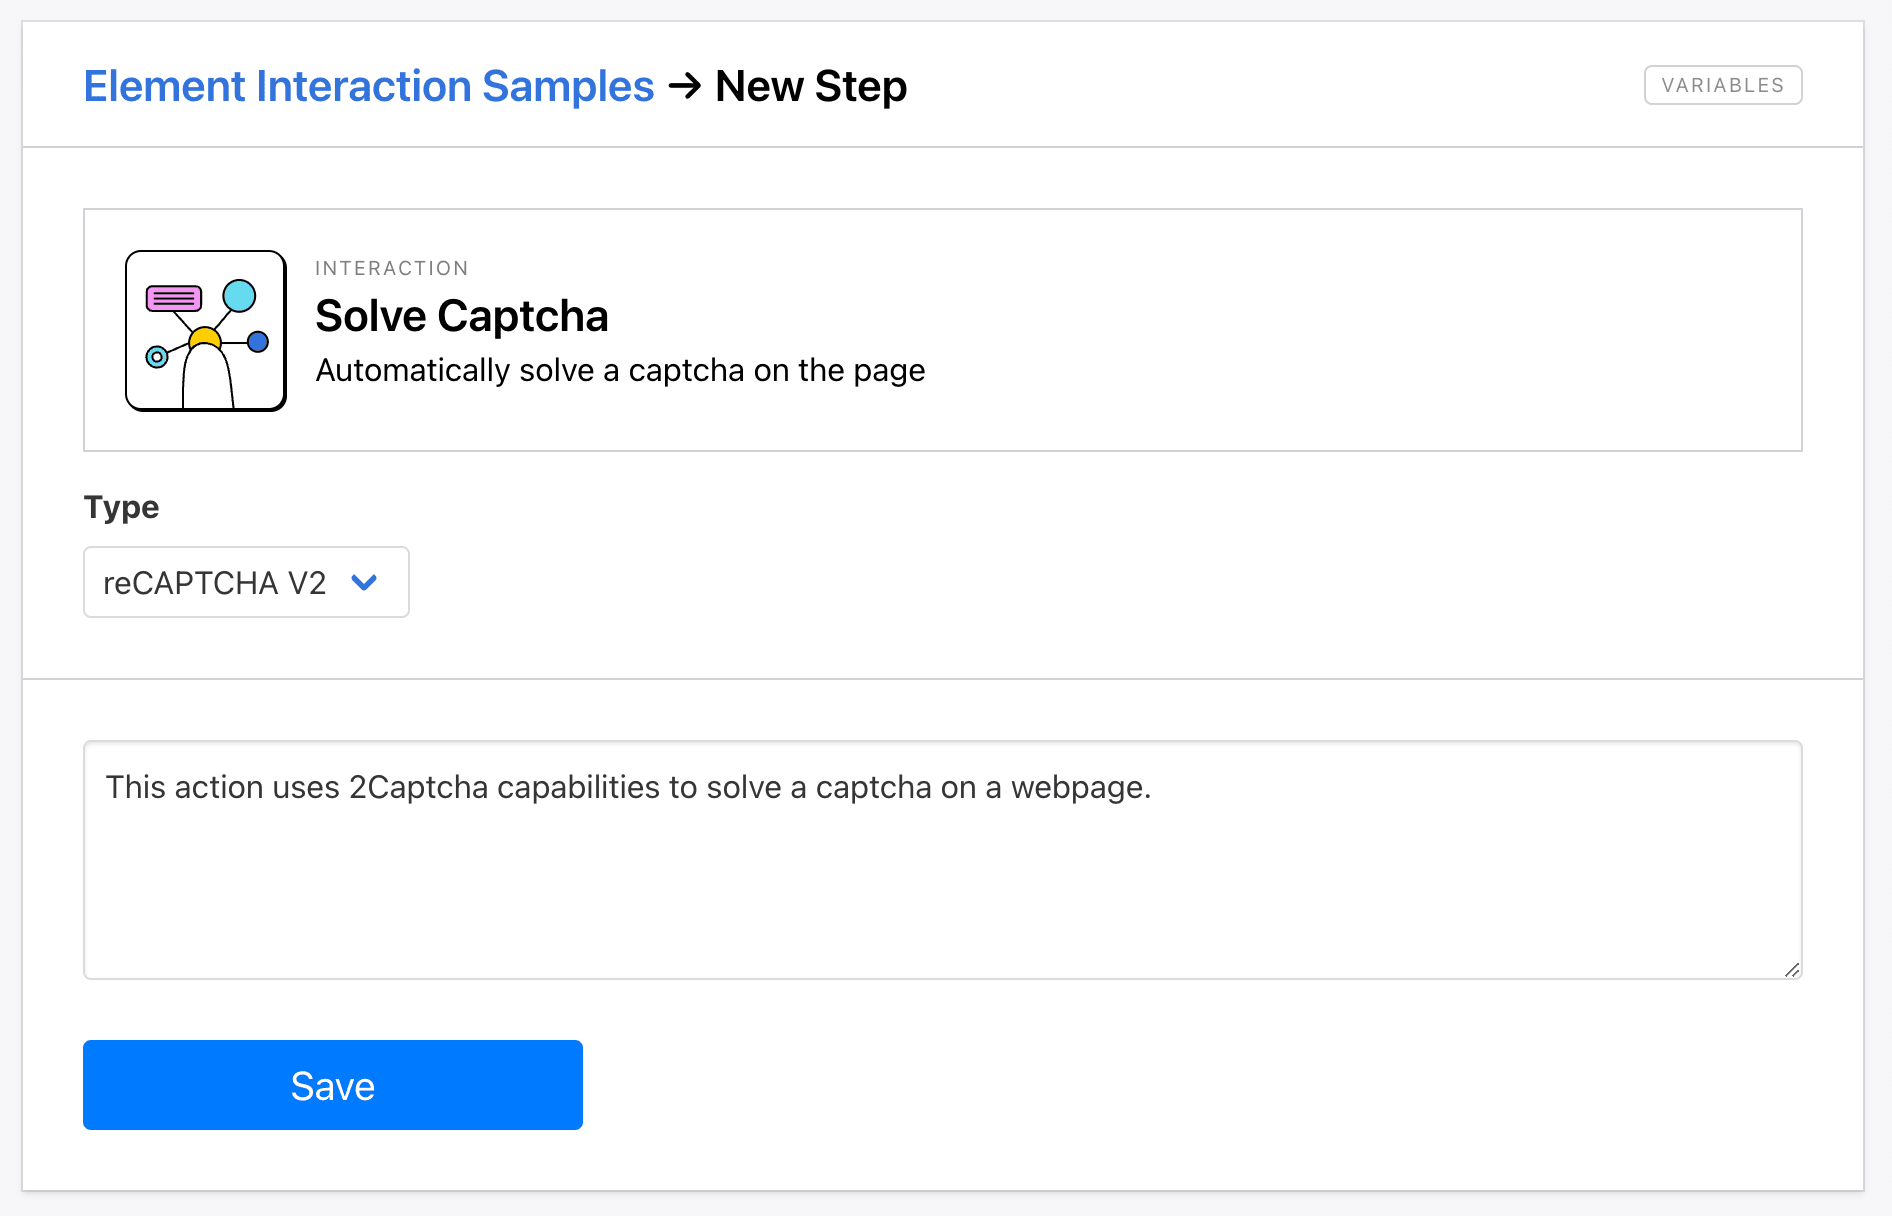
This method does not guarantee success, but it can often help you gain access to a site that would otherwise be blocked to you.
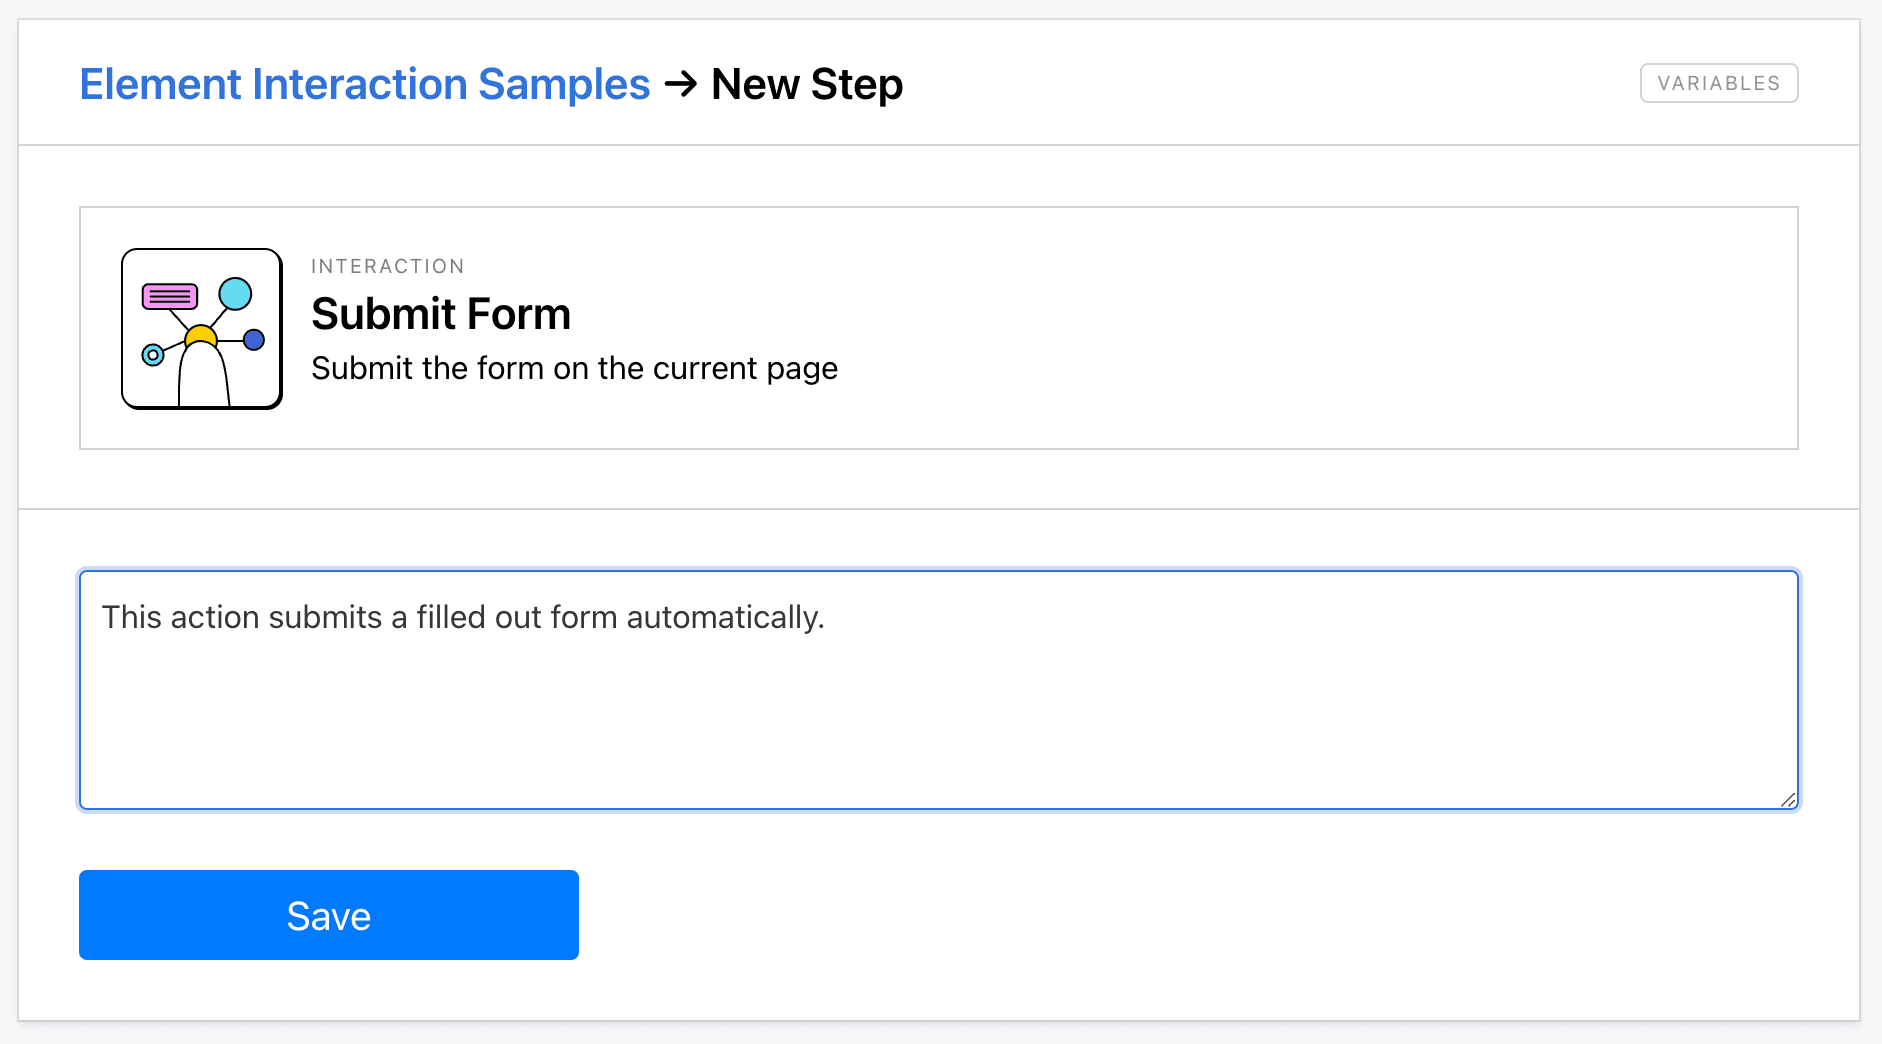
Submit Form
The Submit Form action automatically submits a filled out form on your current page. You might use this to go through a wizard or multi-field forms. In some cases, it might simplify your workflow more than if you were to use Click or Hit Enter.
To set up the step, add it to your task after all of the form fields have been filled out.
Switch Tab
The Switch Tab action moves between different browser tabs during an automation. This allows you to interact with content across multiple tabs, transfer data, and handle popups.
You can choose which tab you want to switch to by specifying its order value during setup.
Hare Hint 🐰: Your tabs are numbered by order from which they are opened. The first tab (1) is associated with the original tab of your task. New tabs will start from (2) onwards.
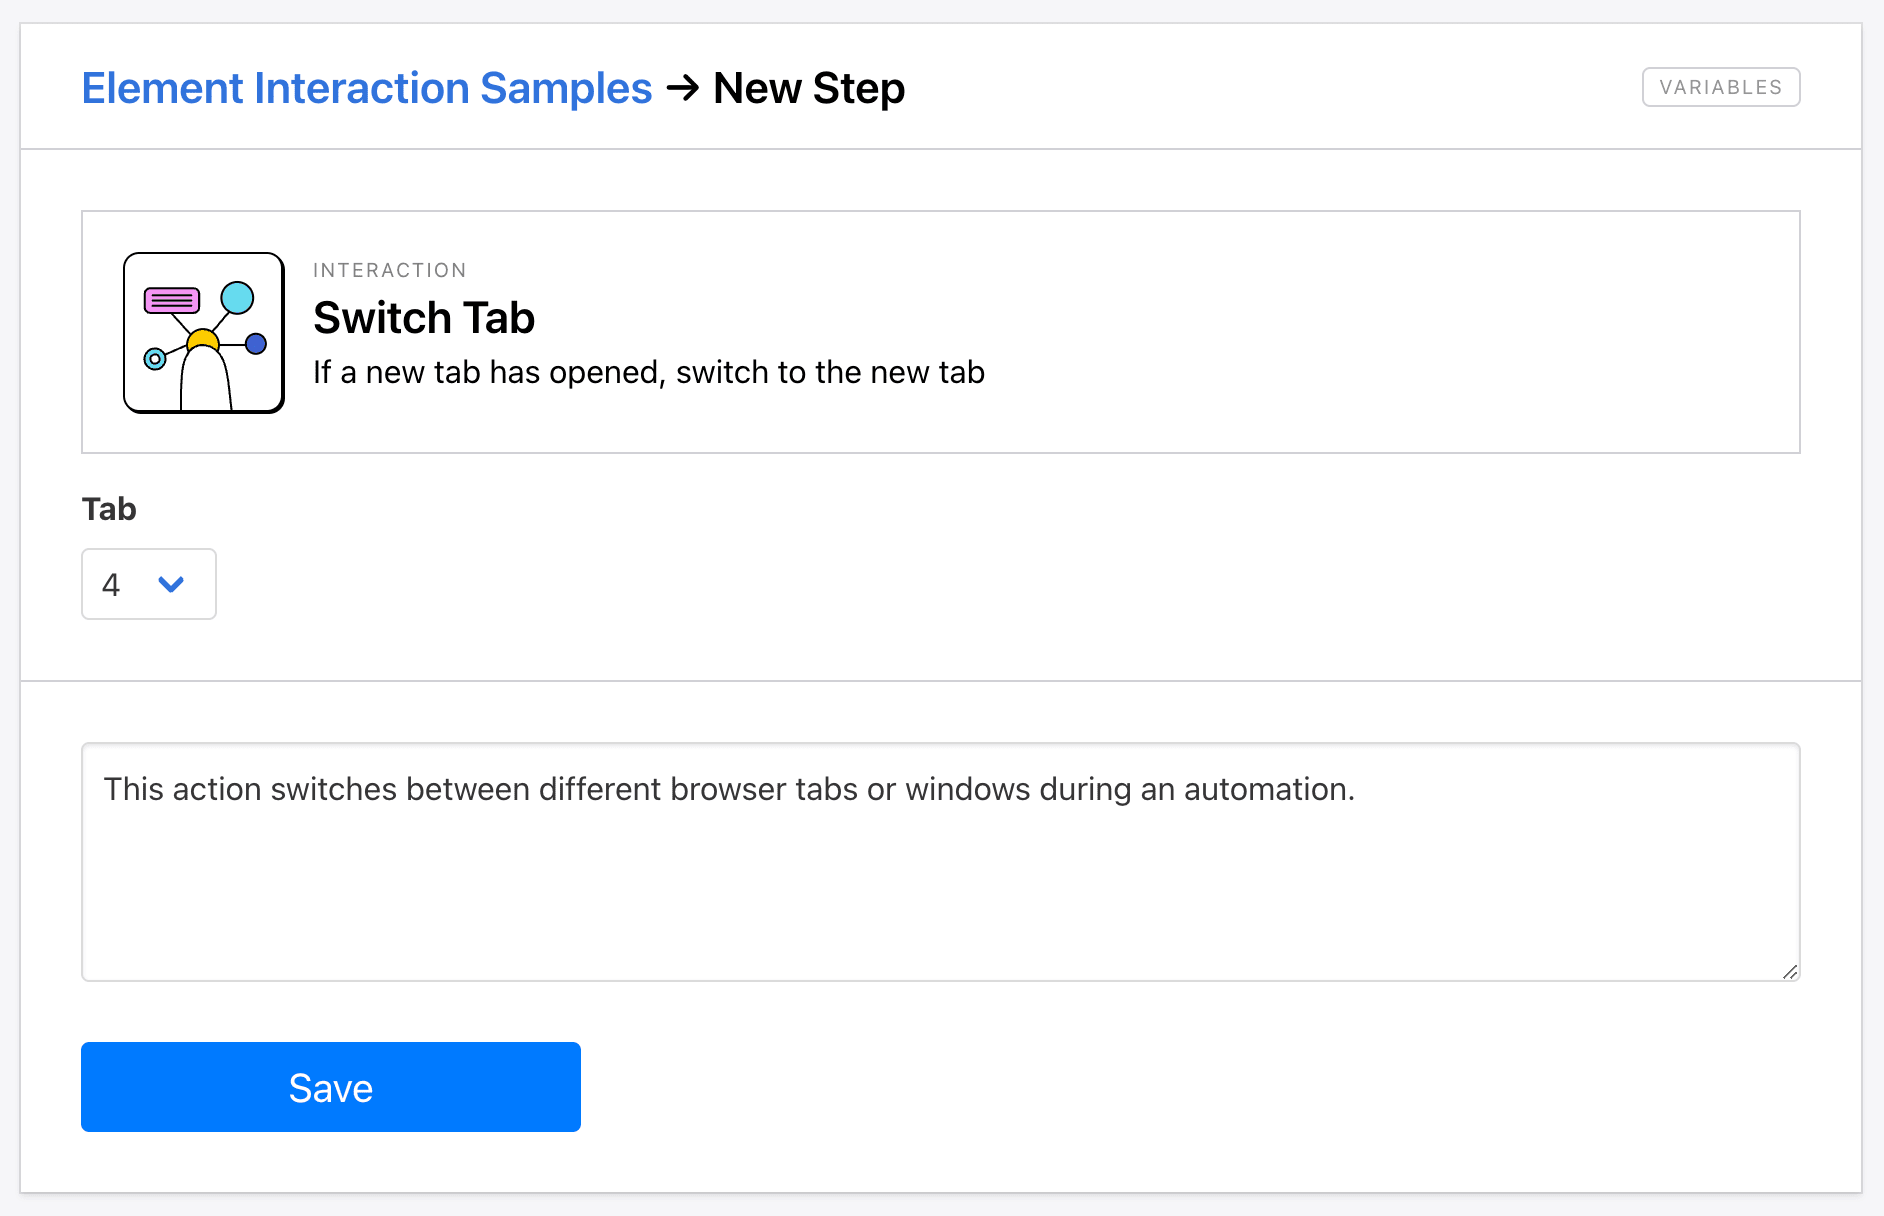
Note that your output video will not show the new tab, but you will still be able to interact with it.
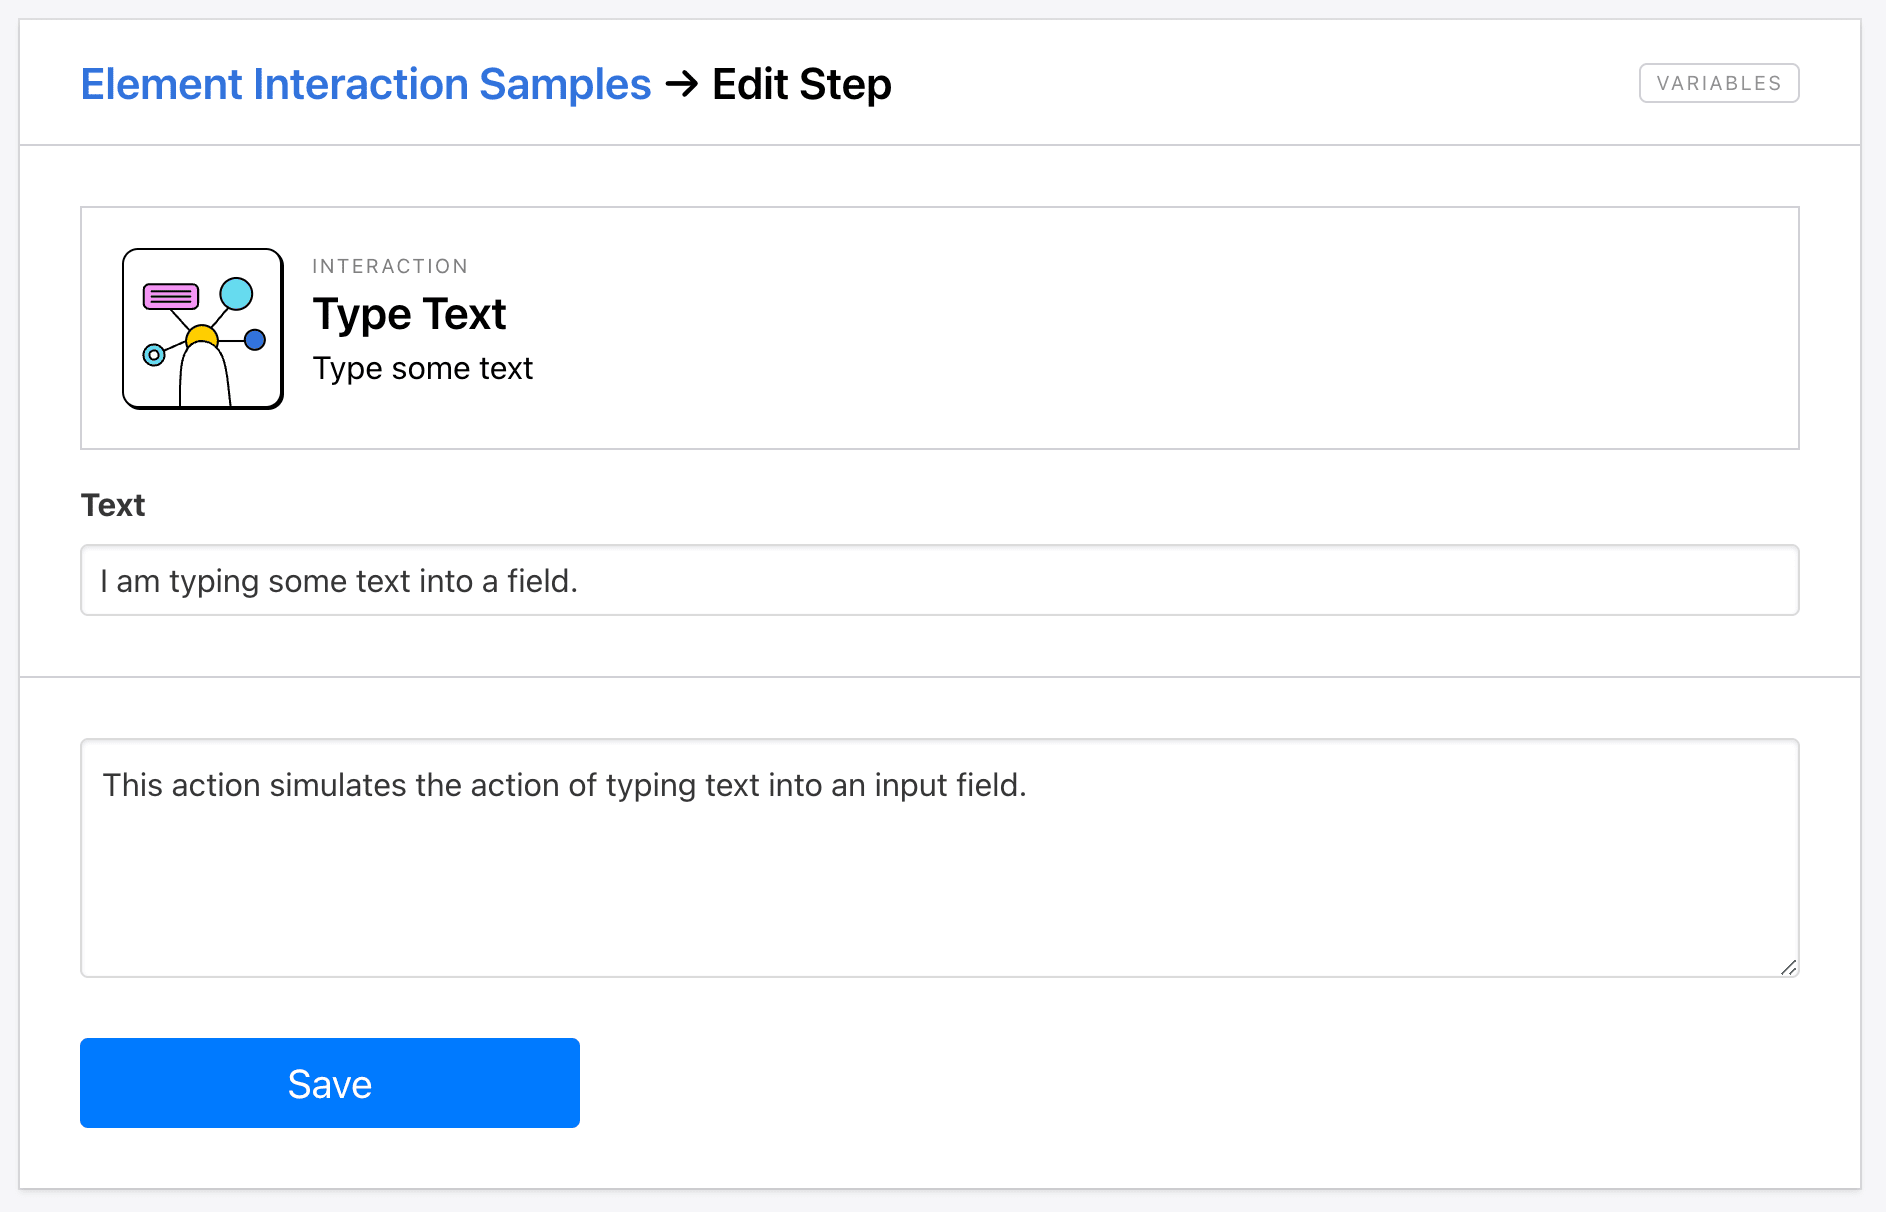
Type Text
The Type Text action simulates the act of typing text into an input field on a webpage. The key difference between Type Text and Enter Text is that the former simulates the actual keystrokes, rather than simply entering it into the field. You can use this to mimic user behavior and test dynamic functionality, such as in the case of autocomplete.
Set up the action by entering the text you want to be typed, keeping in mind that the field will already have to be selected.
Wait
The Wait action pauses the task for a specific amount of time before proceeding to the next step. This more accurately mimics human behavior and allows time for page elements to load.
To set up the step, add it to your task and specify the amount of time (in seconds) you want to delay.
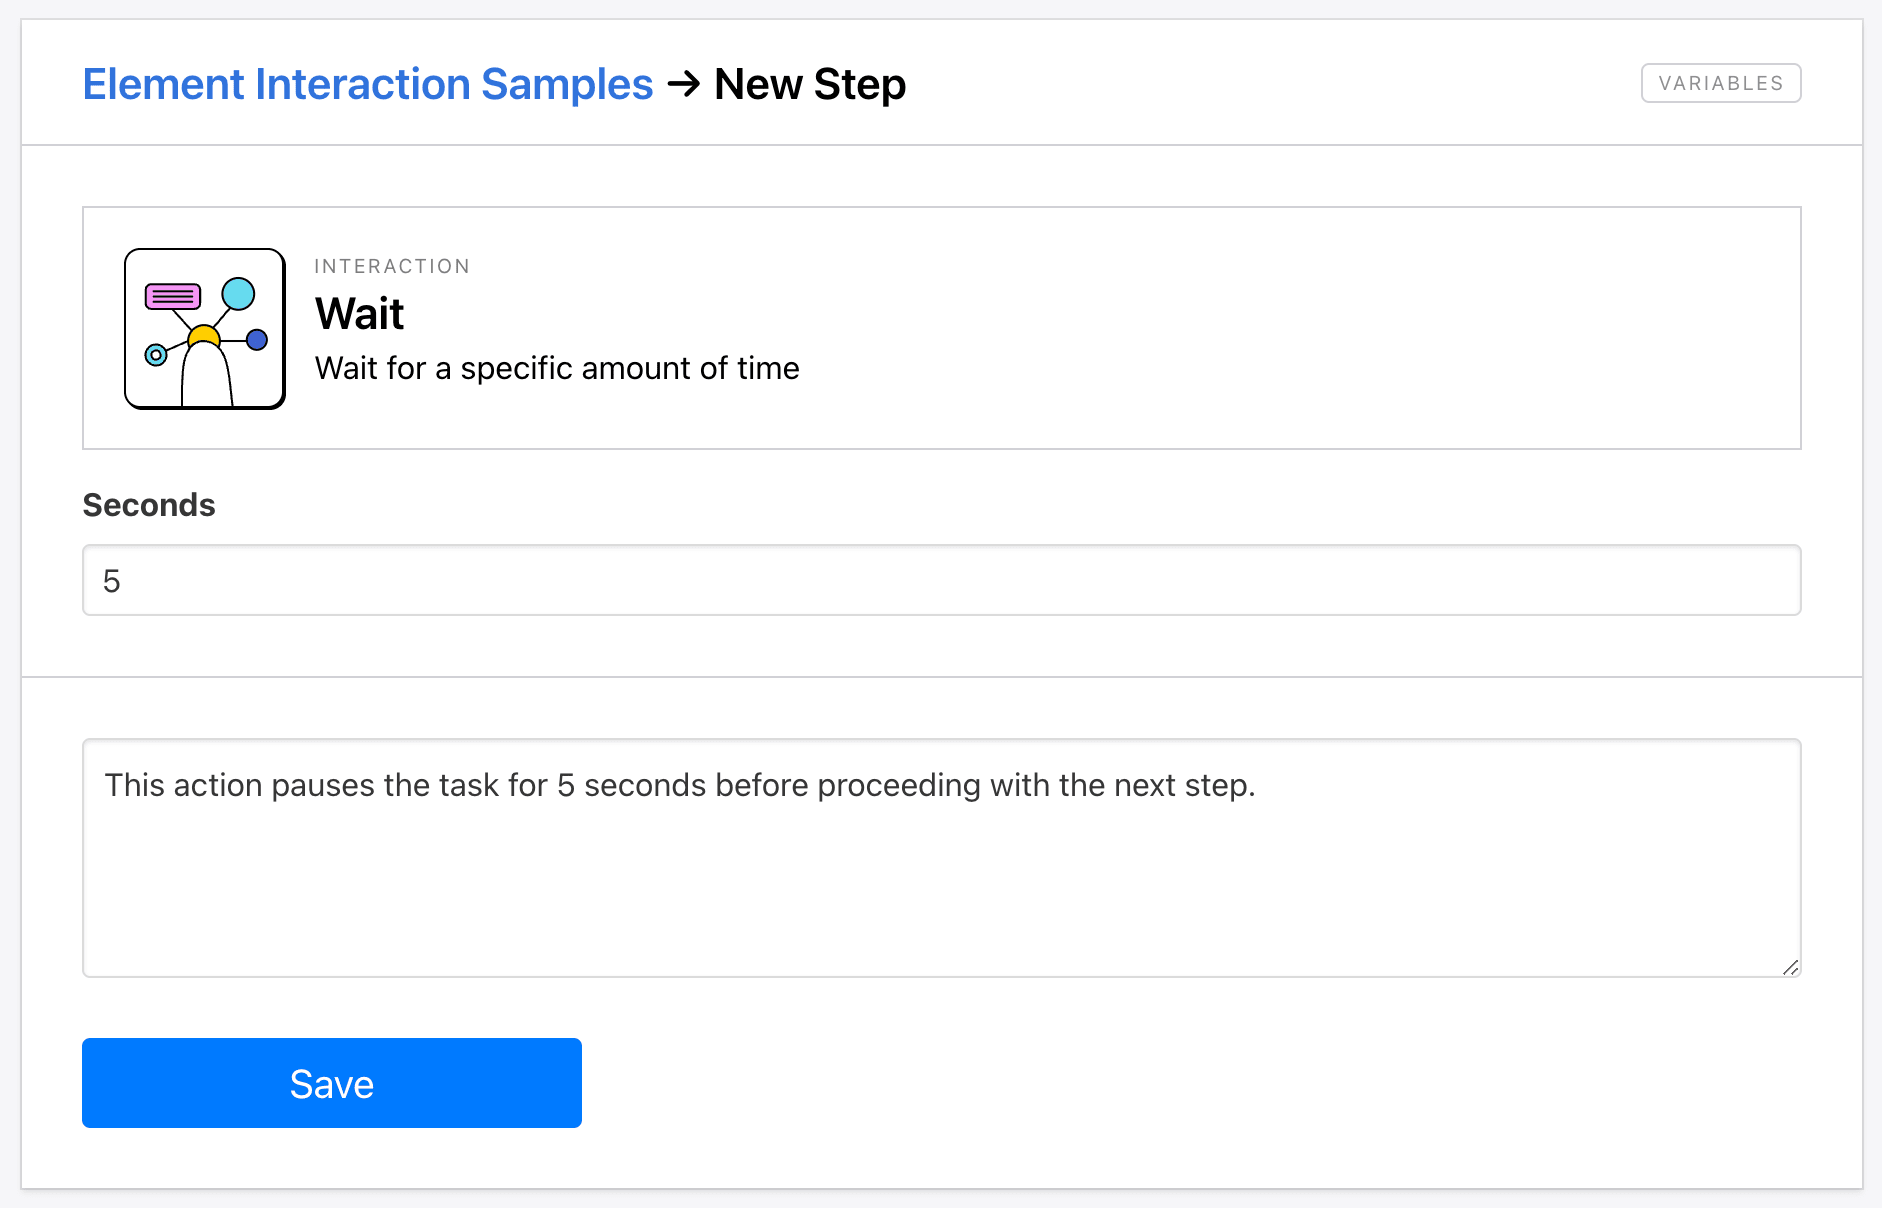
The output video will show your task pausing for that amount of time before proceeding.
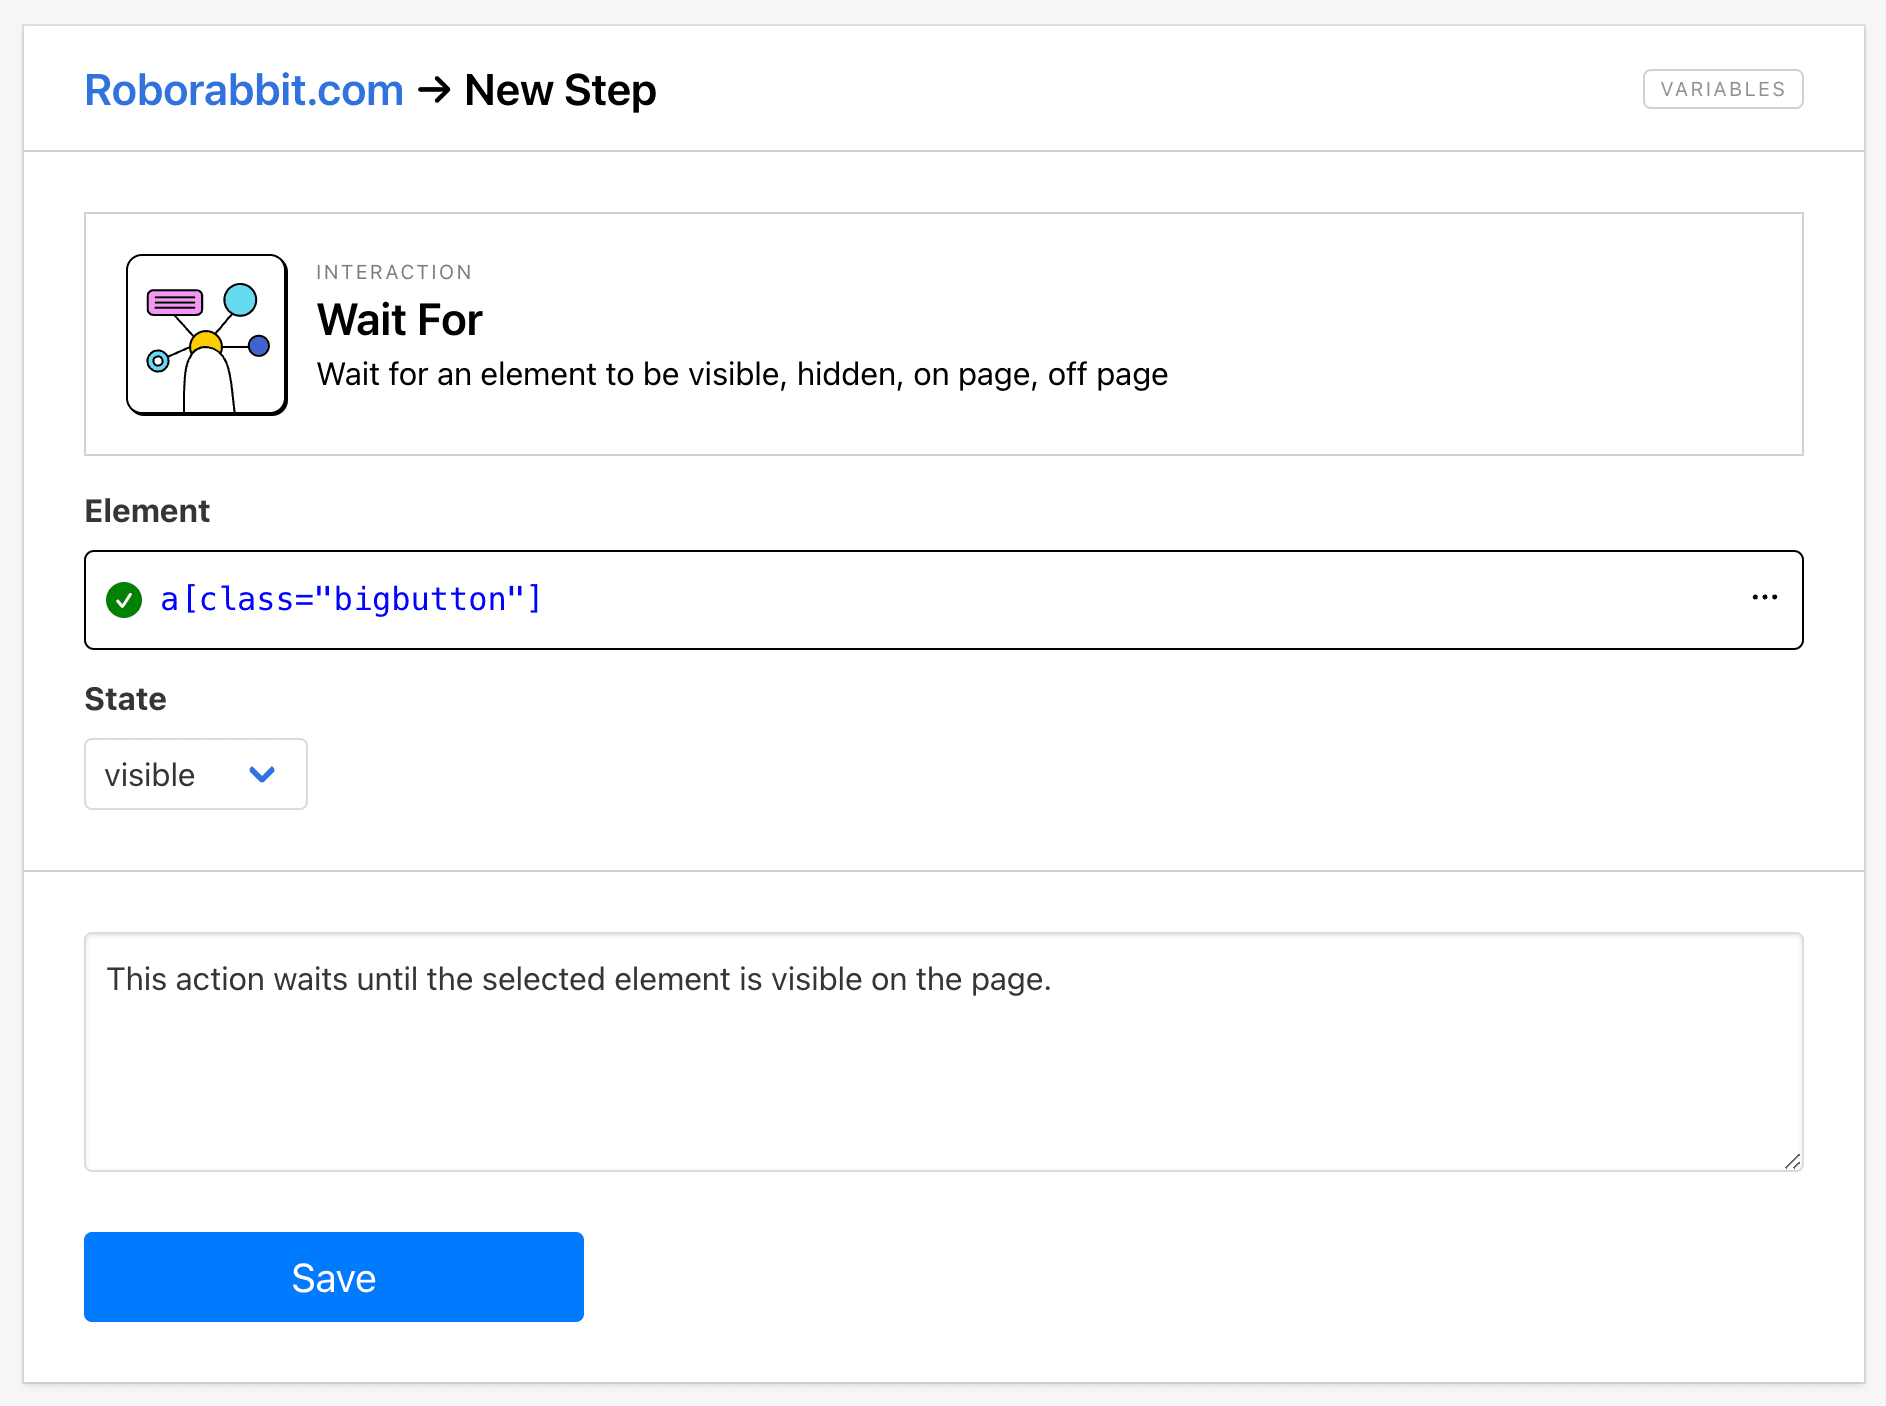
Wait For
The Wait For action pauses the task for as long as it takes for a specific element to reach the desired state— on page, off page, visible, or hidden. This allows time for more complex webpages to load while remaining efficient.
You’ll need Helper config for setup, then you can select the desired state to wait for.
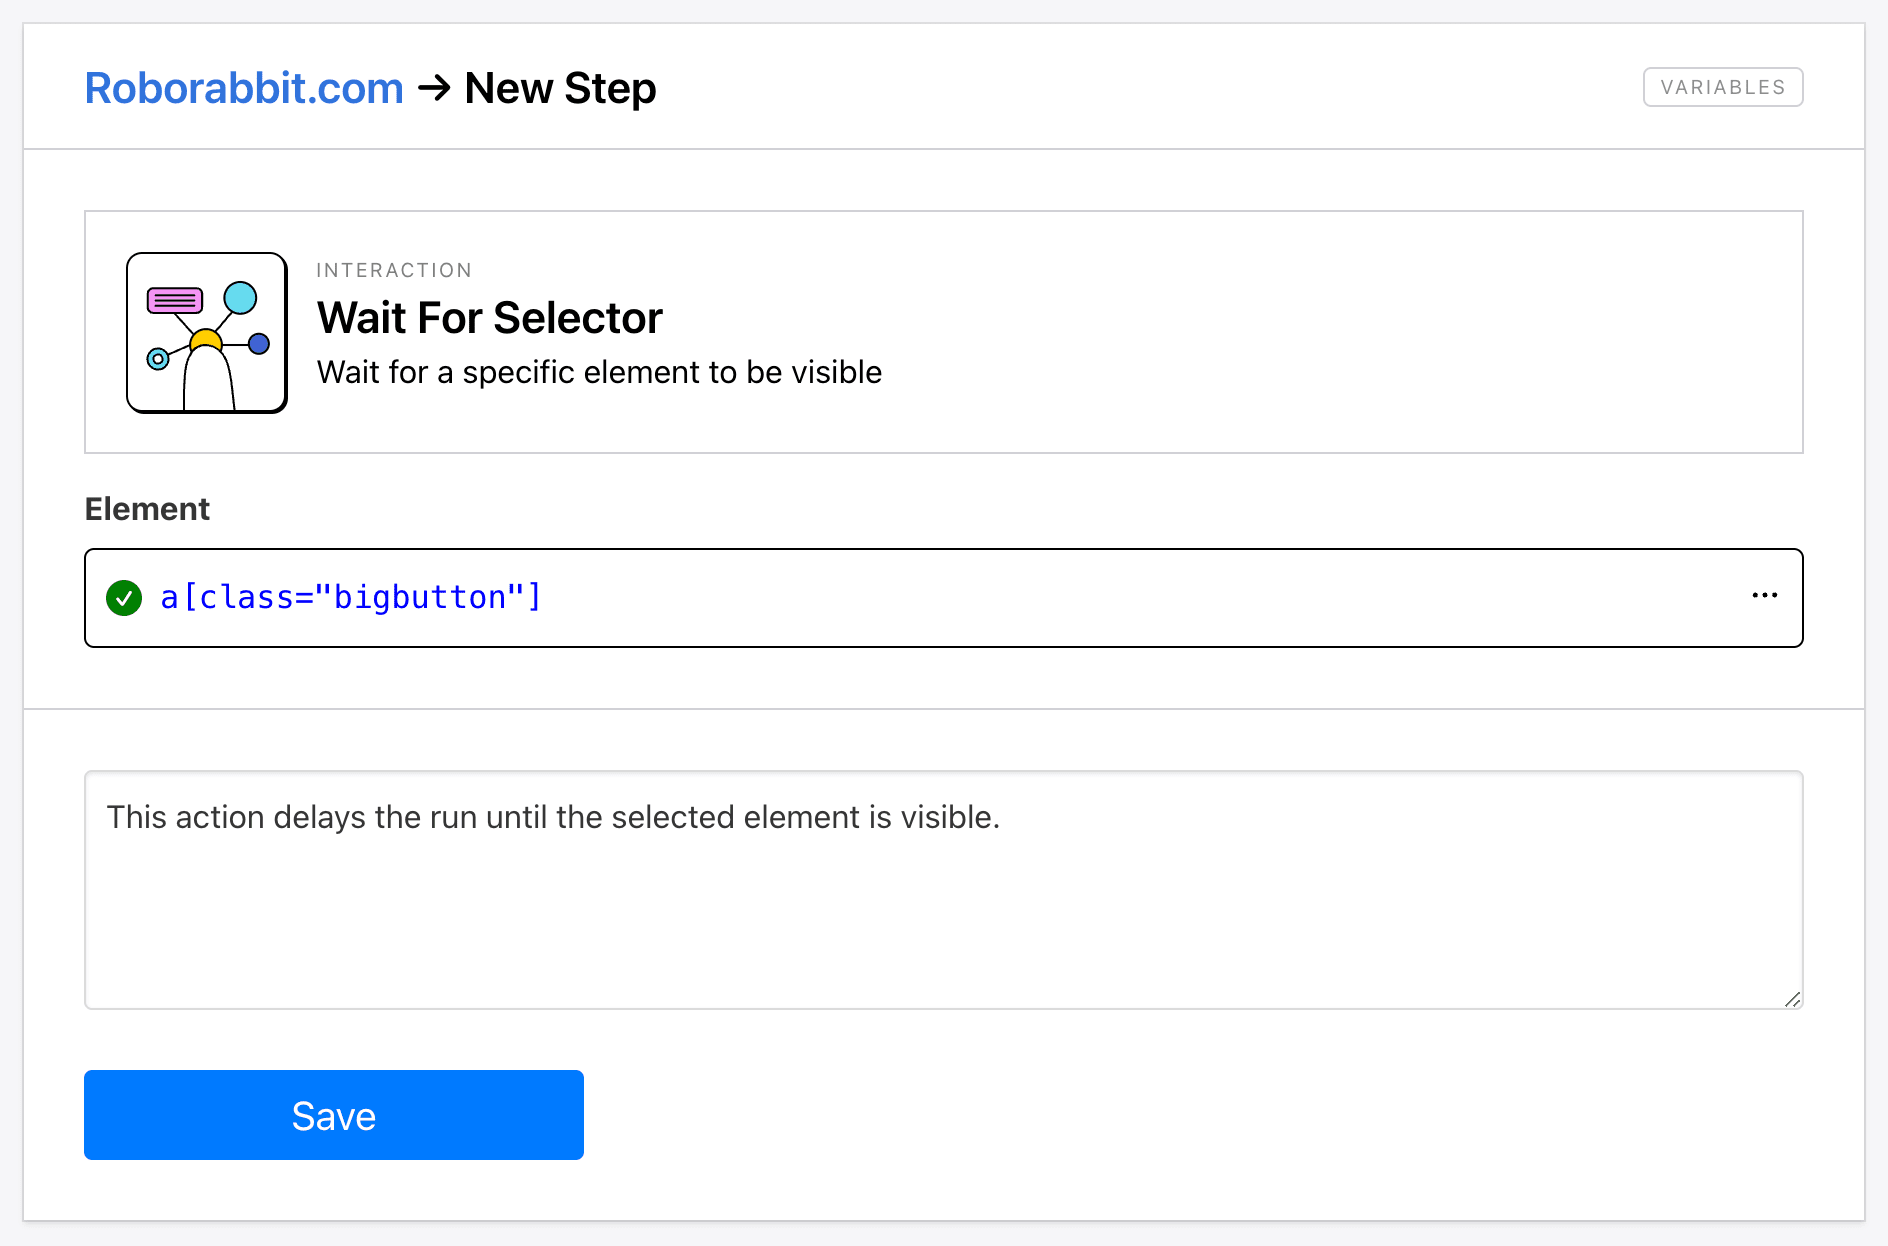
Wait For Selector
The Wait For Selector action delays the task for as long as it takes for a specific element to be visible. This is a simpler version of the Wait For action, and it’s more suitable when you’re just waiting for an element to appear.
To set this step up, add it to your task and insert Helper config for the element.
Conclusion
Roborabbit provides a comprehensive set of actions for interacting with webpage elements during browser automation. From simple clicks and text entry to more advanced functionality like form submission, tab switching, and CAPTCHA solving, Roborabbit gives you the tools to automate a wide range of user interactions. By understanding how to effectively use these actions, you can create efficient, reusable automations that mimic human behavior and produce consistent, high-quality results.
Want to learn more about Roborabbit’s browser automation capabilities? Check these articles out:
👉 How to Clean Scraped Data with Roborabbit
👉 Our Guide to Roborabbit Data Extraction (Data Types & Examples)
👉 A Nocoder’s Guide to the Roborabbit Helper (Element Selection)