How to Scrape Lists of URLs from a Web Page Using Roborabbit
Contents
Scraping lists of URLs from web pages serves several valuable purposes. For SEO, it helps analyze a site's linking structure and uncover potential backlink opportunities. For content aggregation, it enables efficient data collection from multiple sources. Besides that, it also can be useful for tasks like link validation, mapping site structure, and monitoring competitors.
In this article, we'll learn how to effectively scrape URLs from web pages using Roborabbit, a cloud-based web automation tool. Let’s get started!
What is Roborabbit
Roborabbit is a scalable, cloud-based browser automation tool designed to automate various data-related tasks in the browser. With Roborabbit, you can automate website testing, scrapewebsite data, take scheduled screenshots for archiving, and more—all without writing a single line of code.
One standout feature of Roborabbit is its user-friendly interface and ease of use. Unlike other web automation tools, Roborabbit simplifies the setup and navigation process. You can easily locate your target HTML element (the blue box in the screenshot below) by hovering your mouse over it with the Roborabbit Helper extension…

… and add necessary steps to your automation task from the Roborabbit dashboard.

Roborabbit also offers an API that allows you to integrate automation tasks with your codebase. All you need are the project API key and relevant IDs, which can be easily accessed from the dashboard.
Scraping Lists of URLs from a Web Page Using Roborabbit
Step 1. Create a New Task
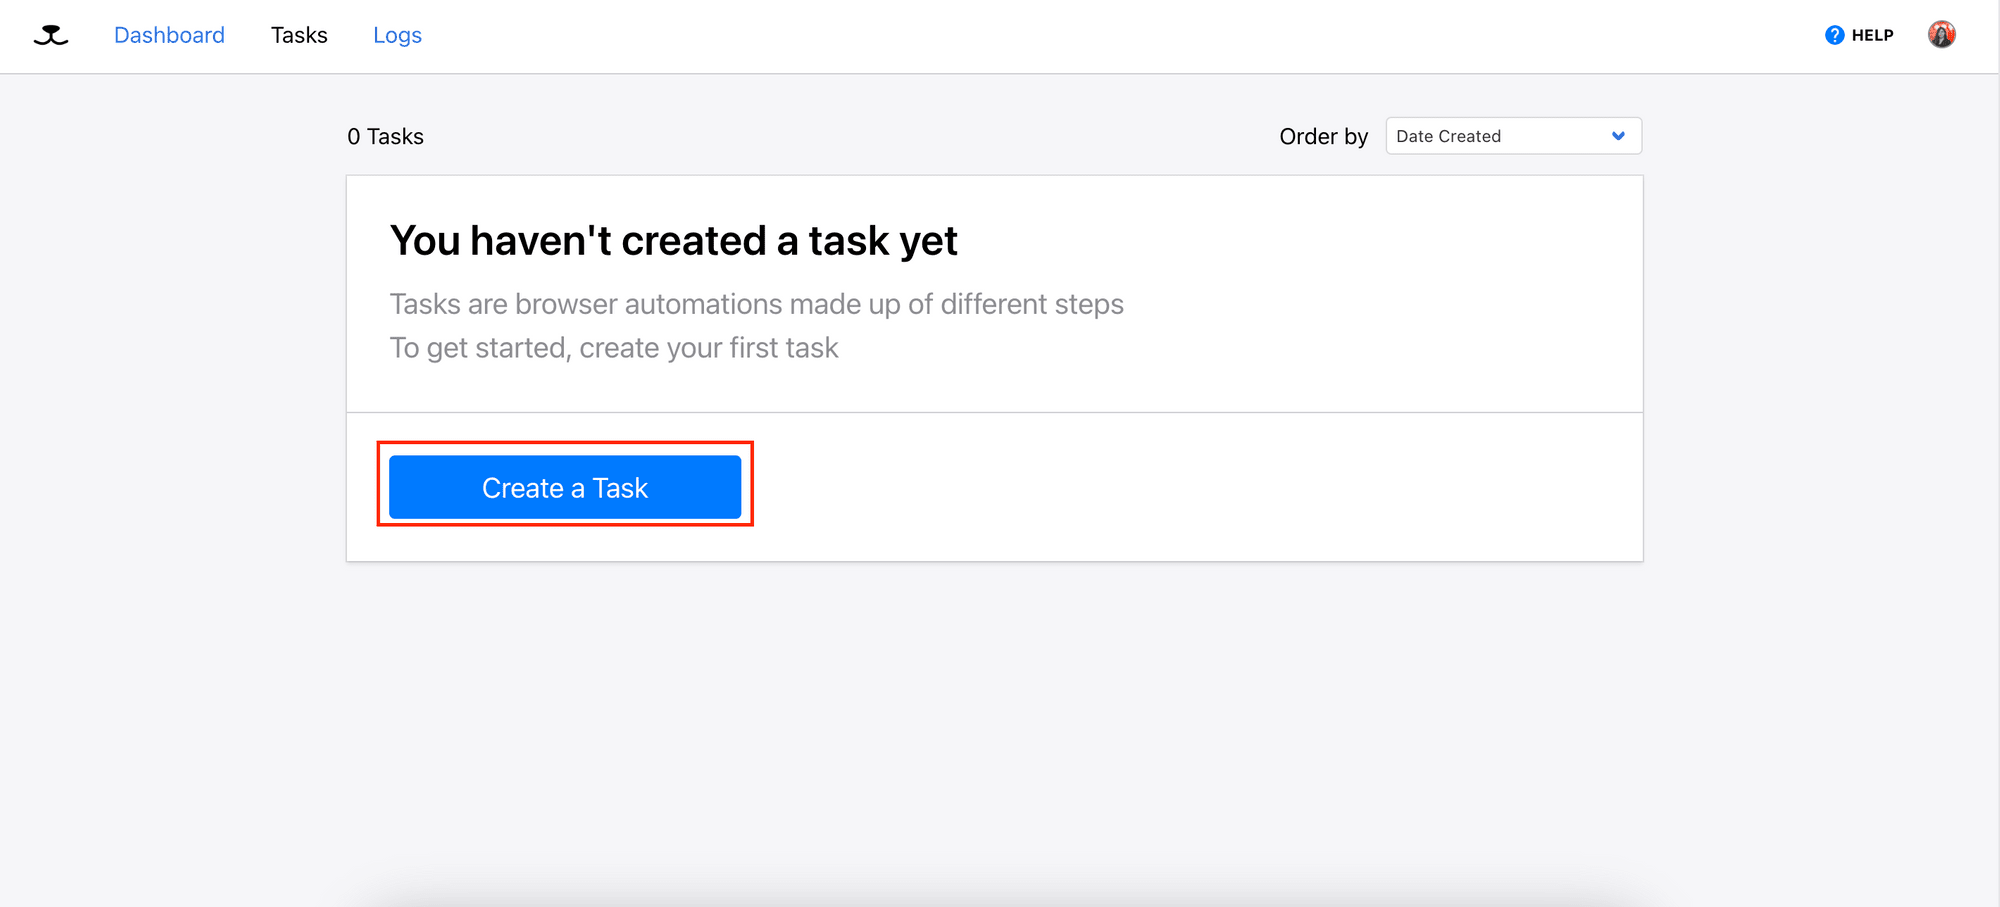
To begin, log in to your Roborabbit dashboard (sign up here if you haven’t already) and create a new task:
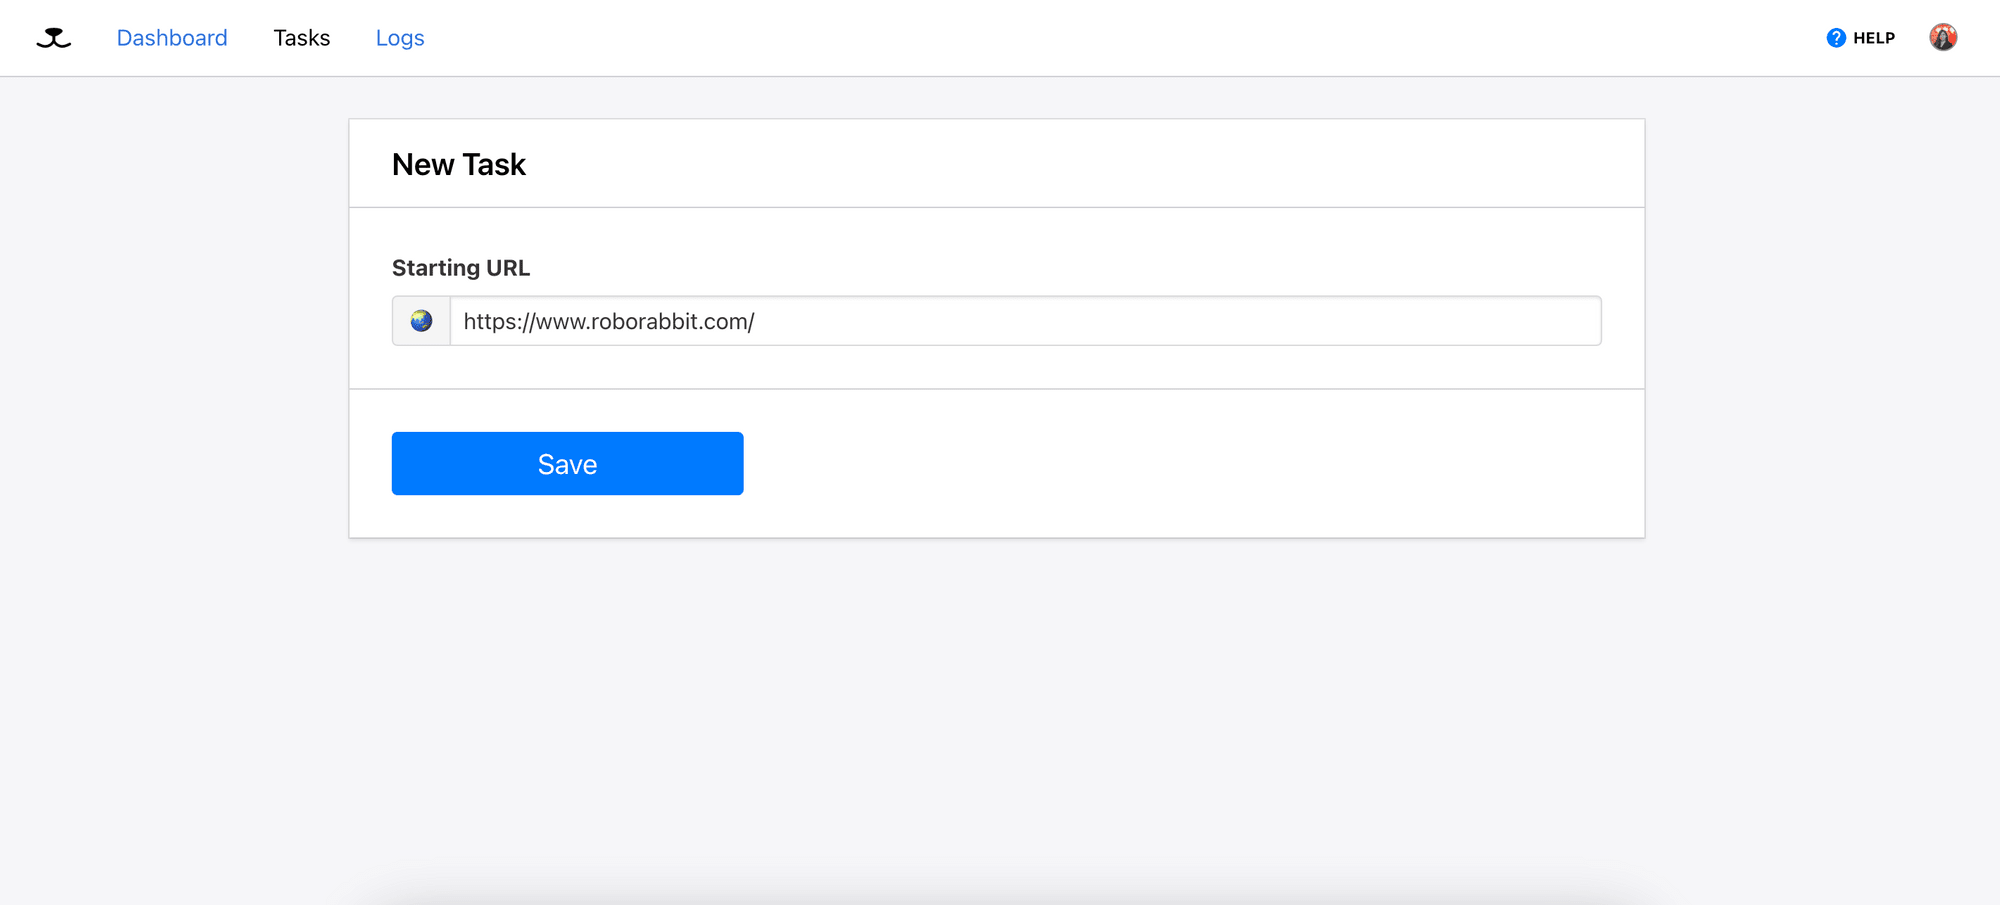
Enter the URL of your target web page and click the “Save” button to initialize the task:
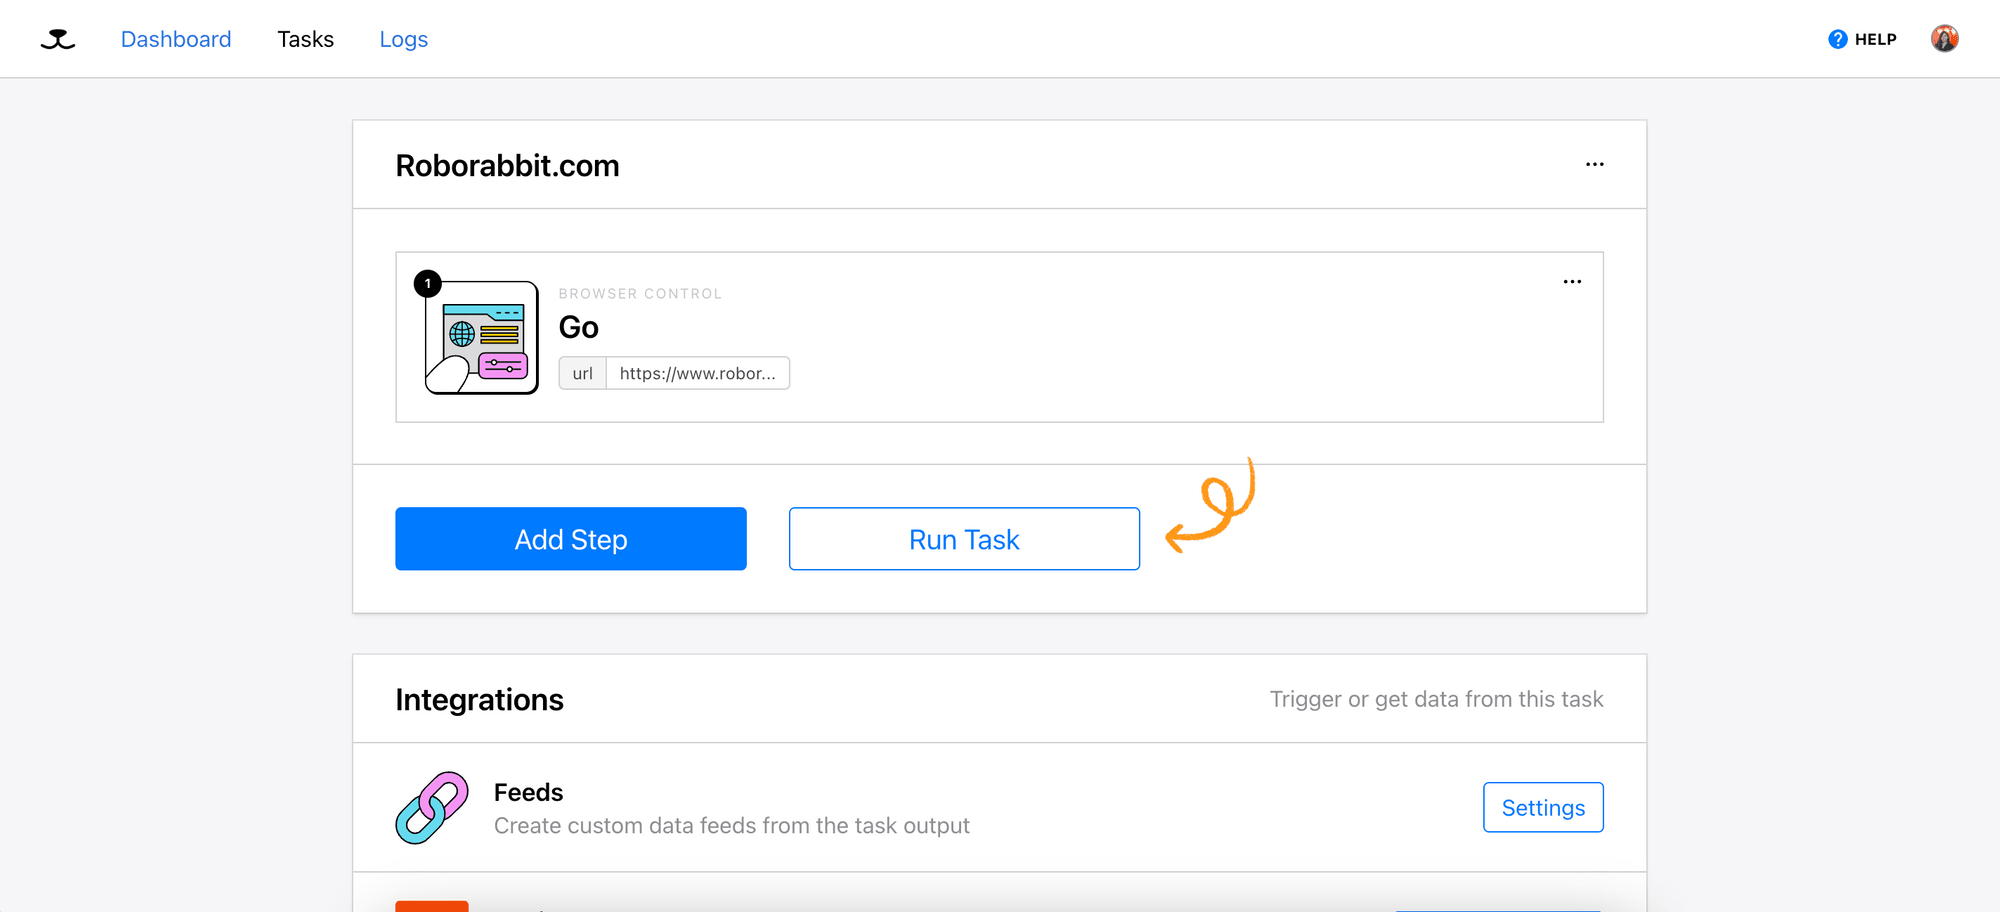
The first step ( “Go” ) will be added to the task automatically:
Step 2. Add Step - Save Attribute
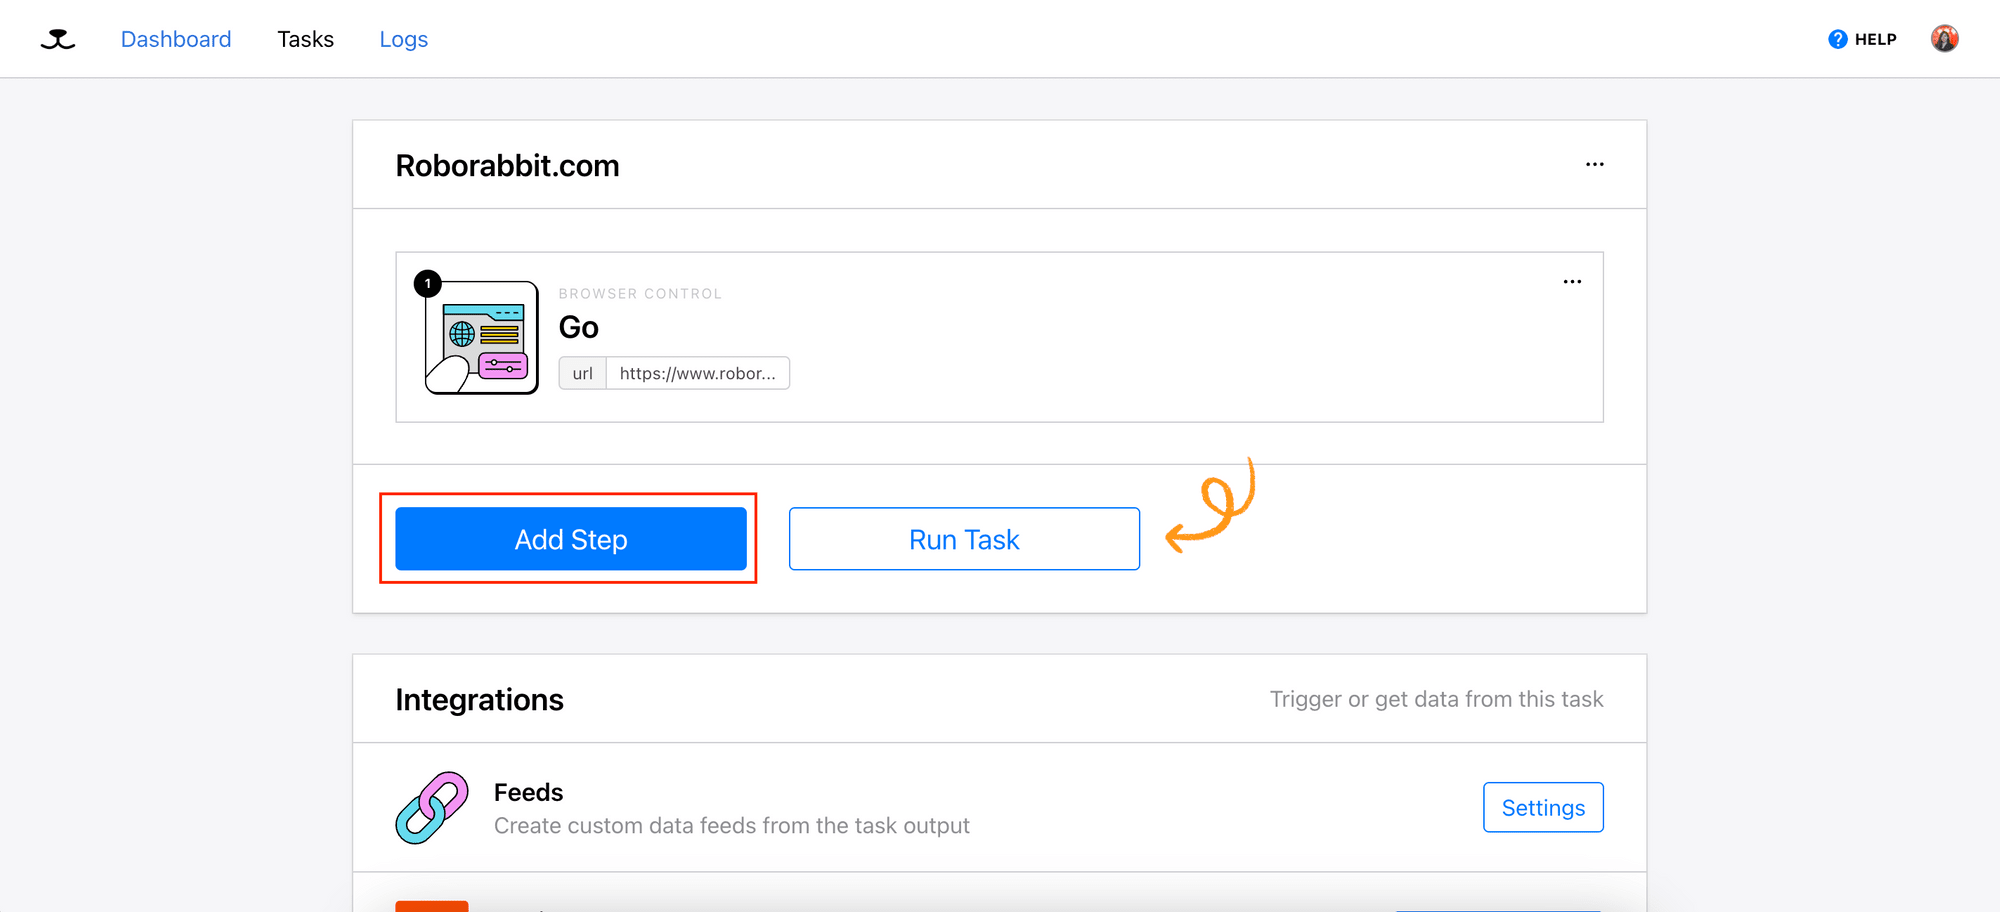
Click the “Add Step” button to add a new action to the task:
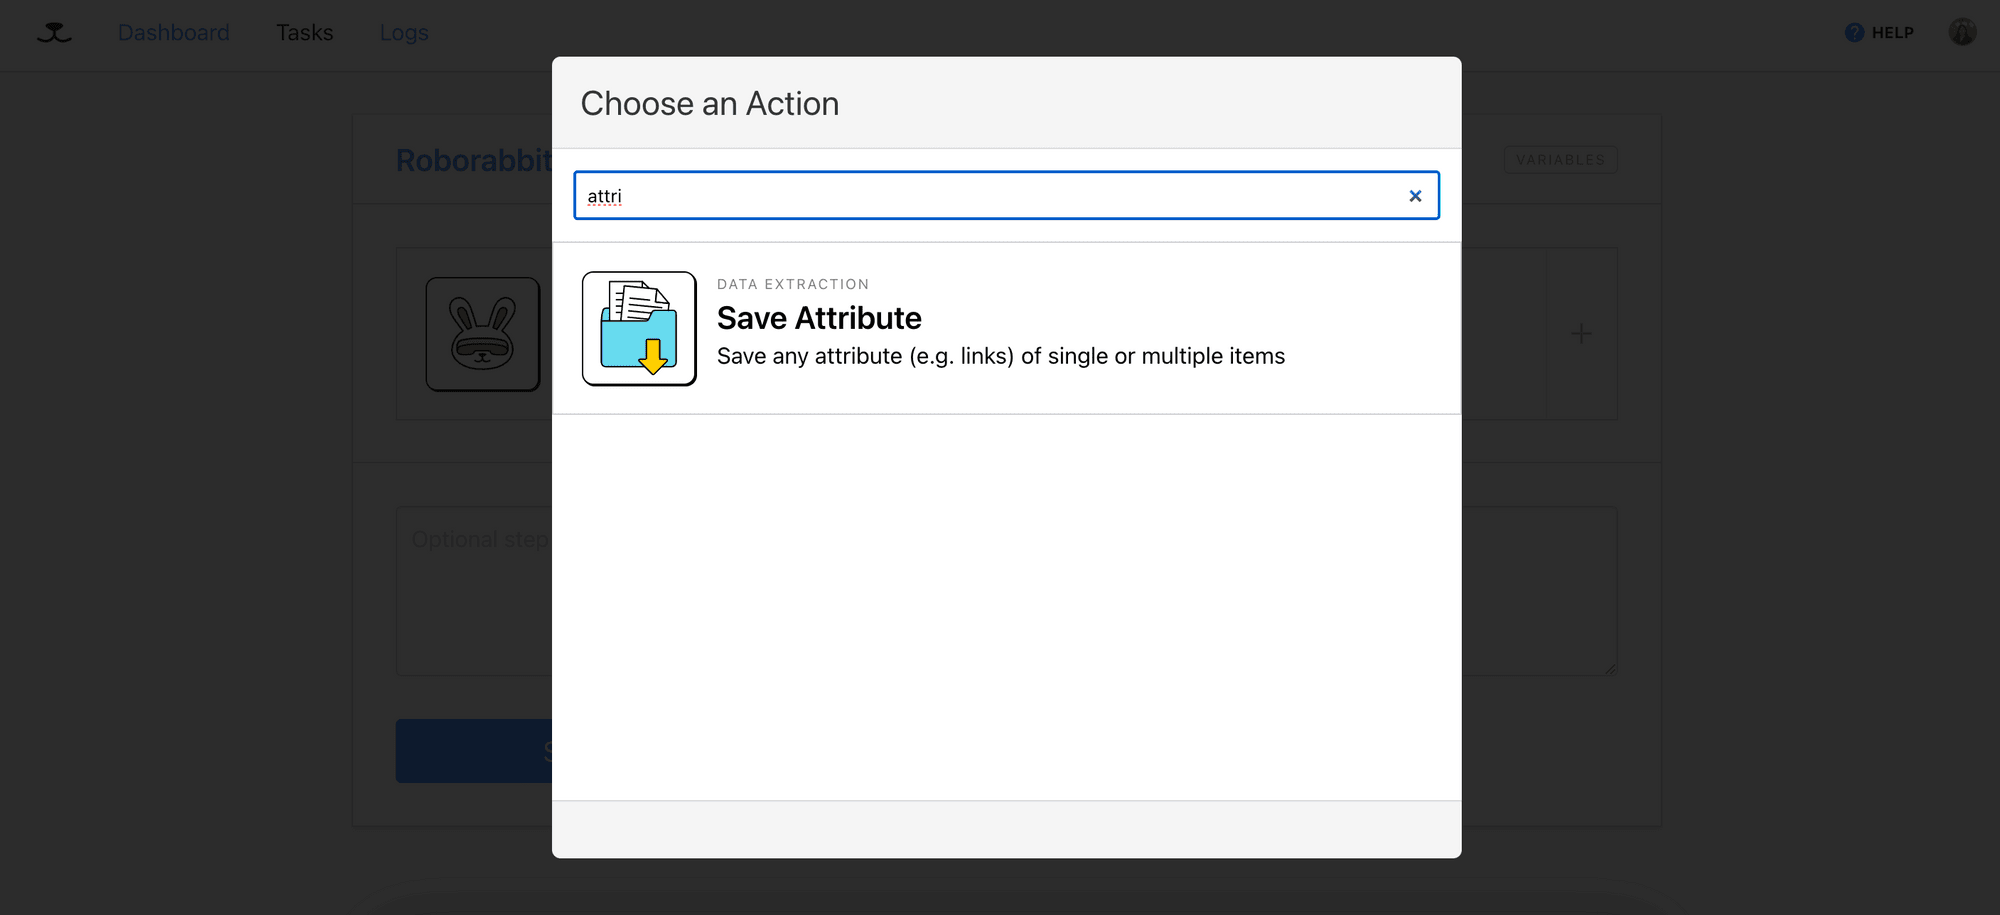
Select “Save Attribute” from the list of actions—this action will save the specified attribute of the selected HTML element on the web page:
In the step configuration page, enter “a” into the Element text area, select “href” from the Attribute dropdown, and tick the “Save All” checkbox. This will locate all <a> elements elements on the page and capture their URLs:
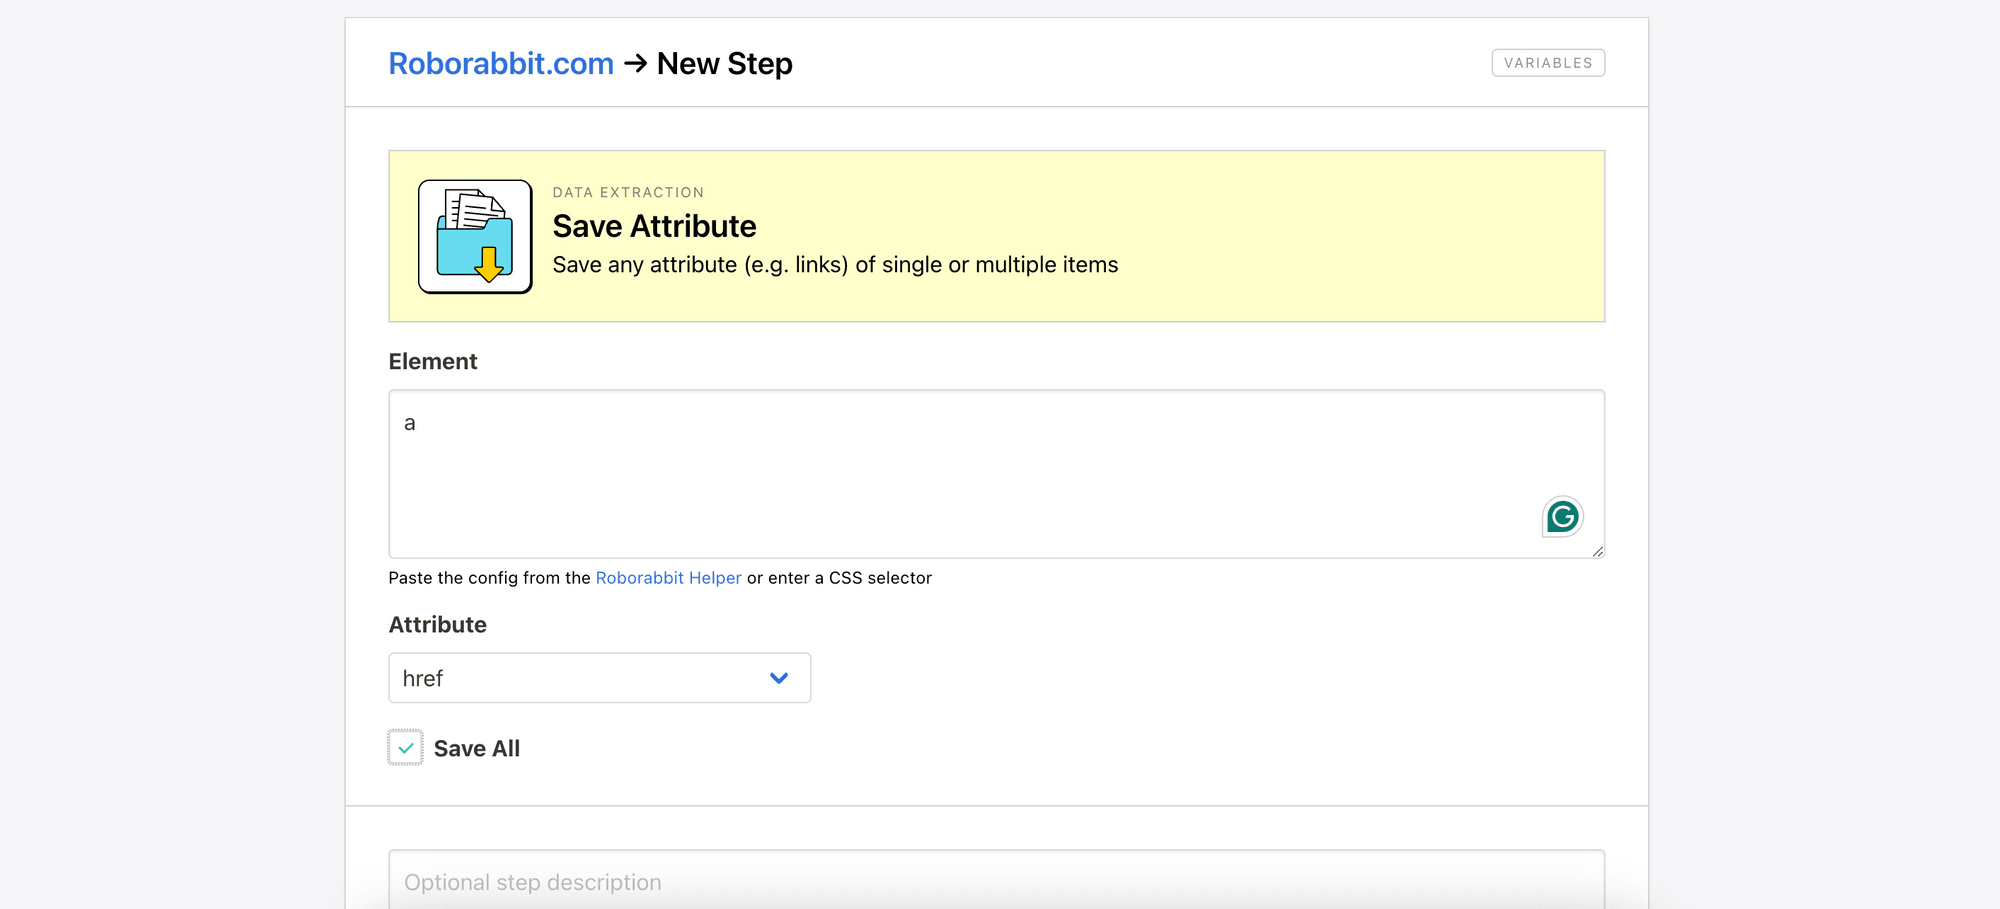
Click “Save” to save the configuration and exit the page.
🐰 Hare Hint: If you want to select only
<a>tags of a specific type, you can refine your selection using standard CSS selectors. For example,h3 aselects only<a>elements within<h3>elements.
Step 3. Add Step - Save Structured Data
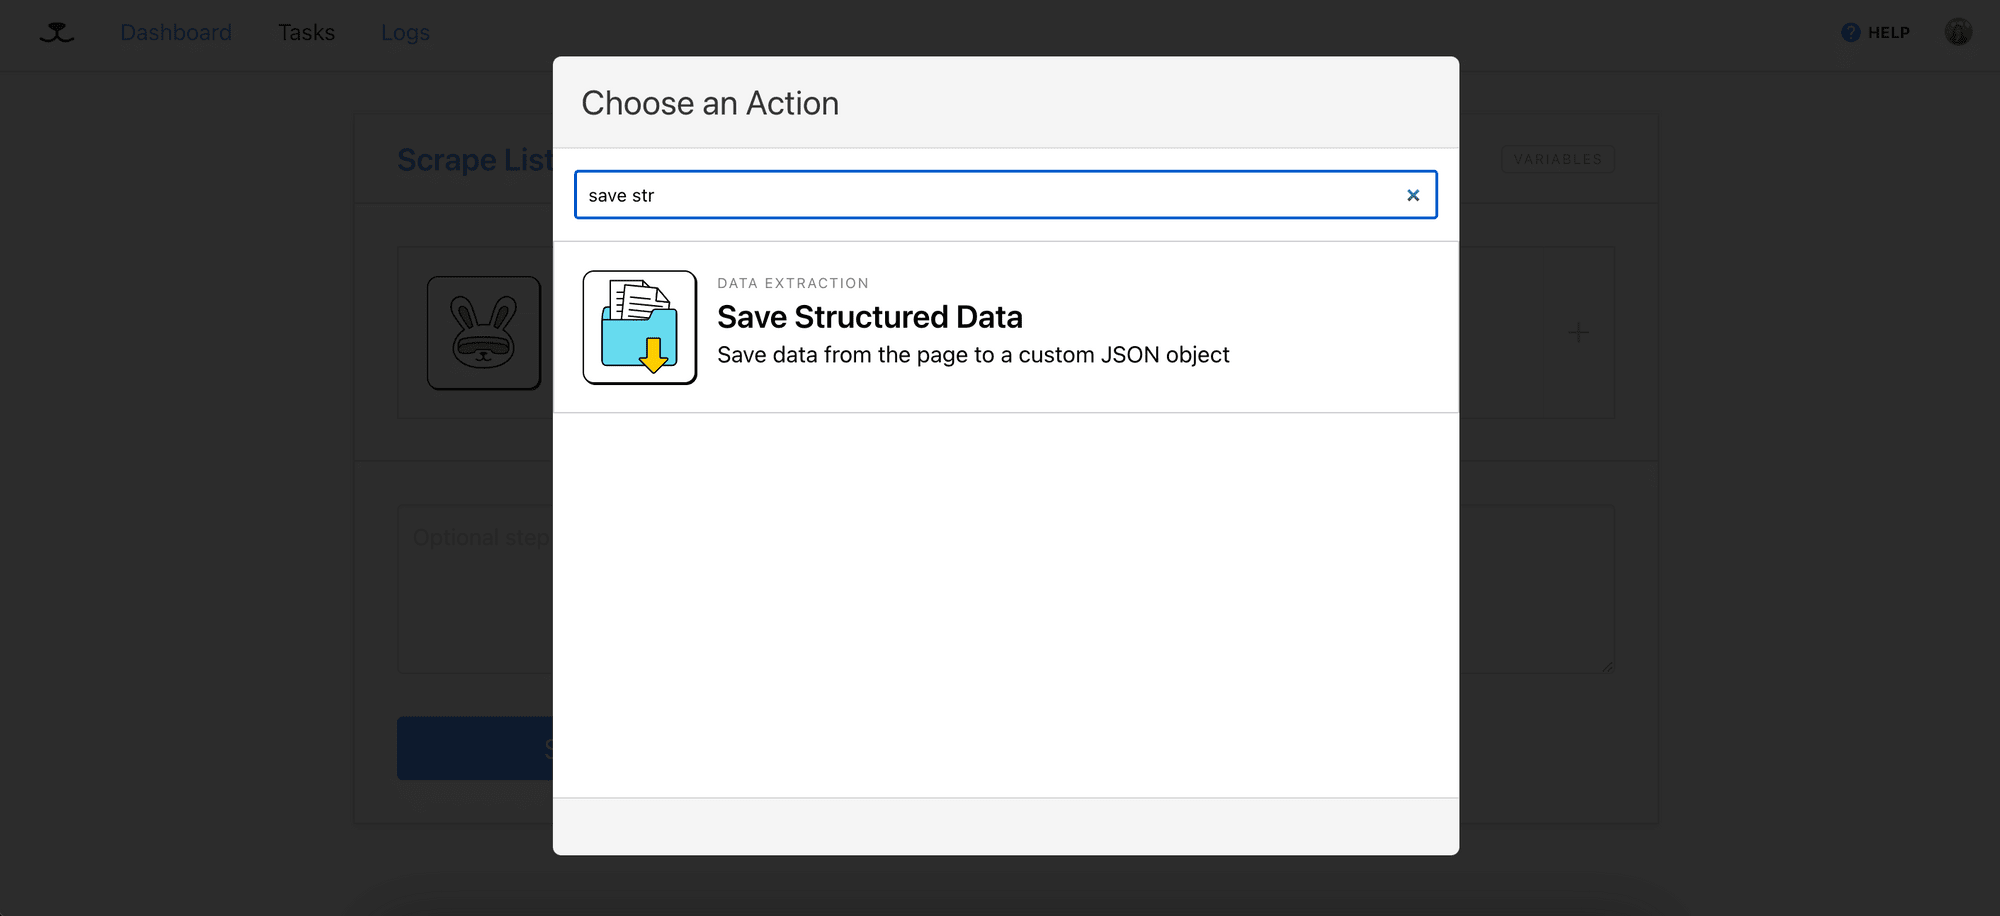
Add the “Save Structured Data” action to your task. This step will loop through each URL saved from the previous step and save the selected data on the web page as a JSON object:
In the step configuration page, enter “body” into the Element text area and “h1” into the Data Picker to select the element with the <h1> tag in the web page’s body. Then, click “Add Data” and “Save” to save the configuration and exit the page:
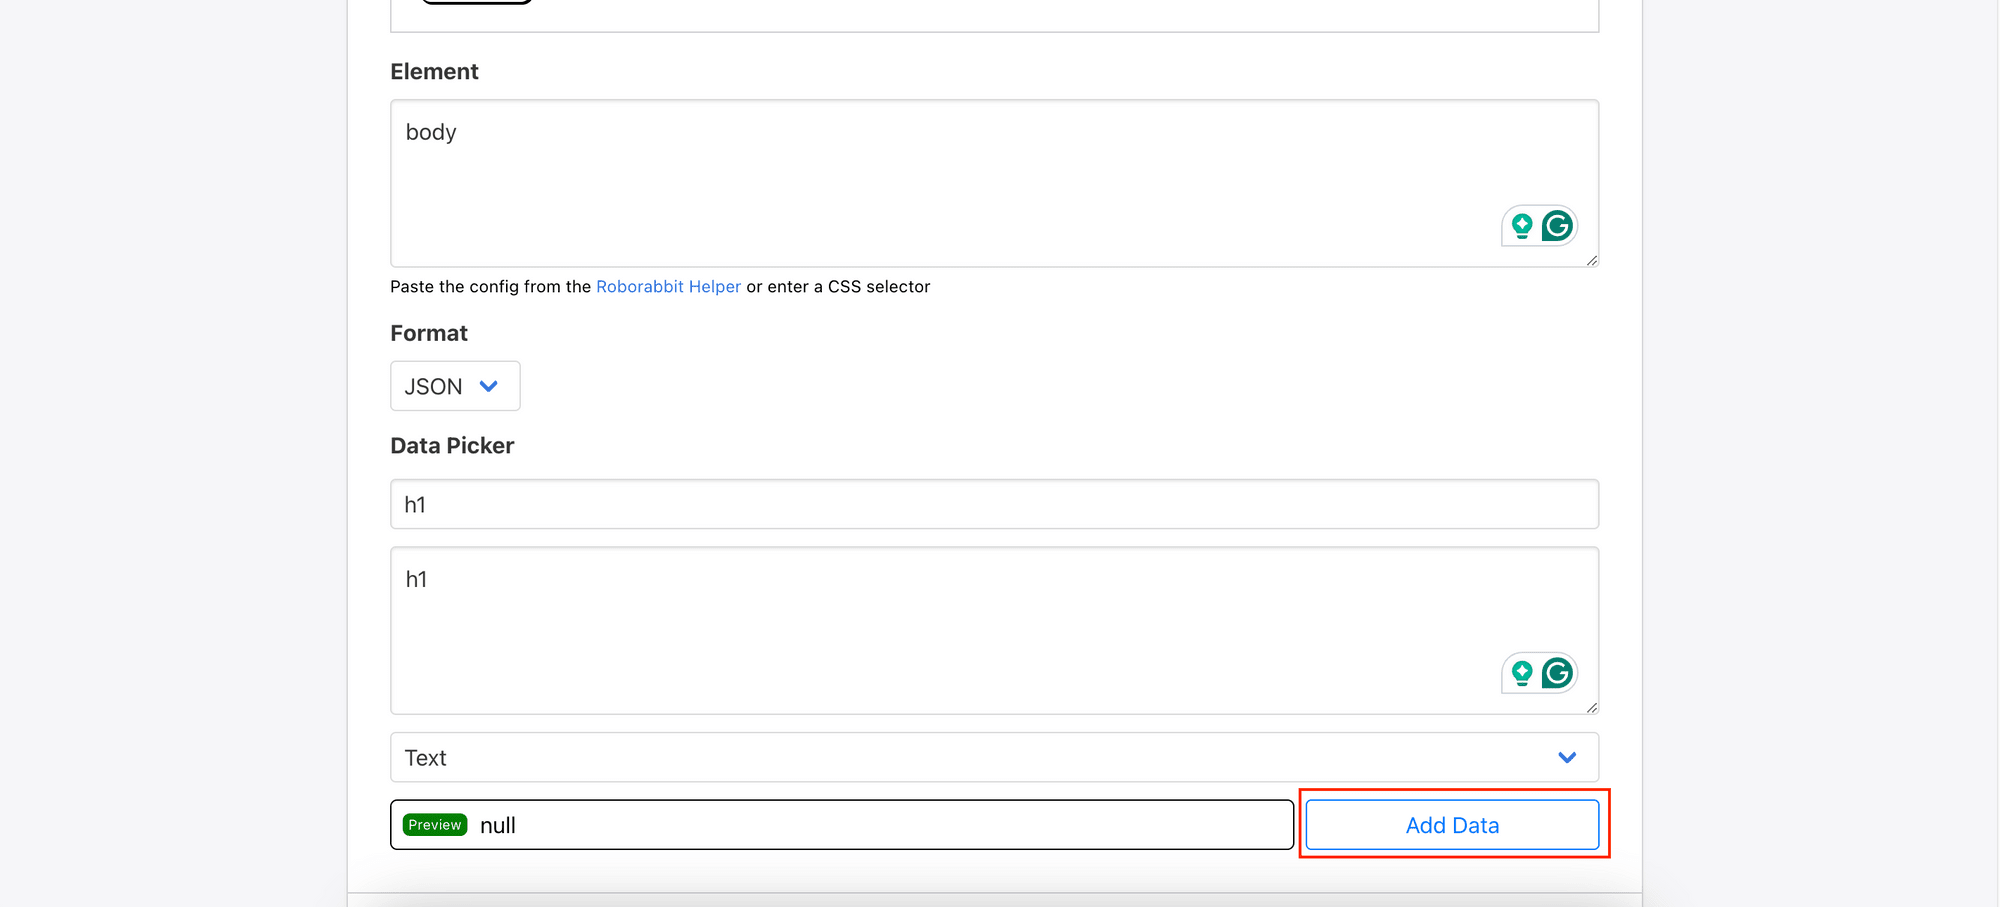
🐰 Hare Hint: It's normal for the data picker result to be
nullin this situation, but it should still produce results in the output log!
Step 4. Run the Task
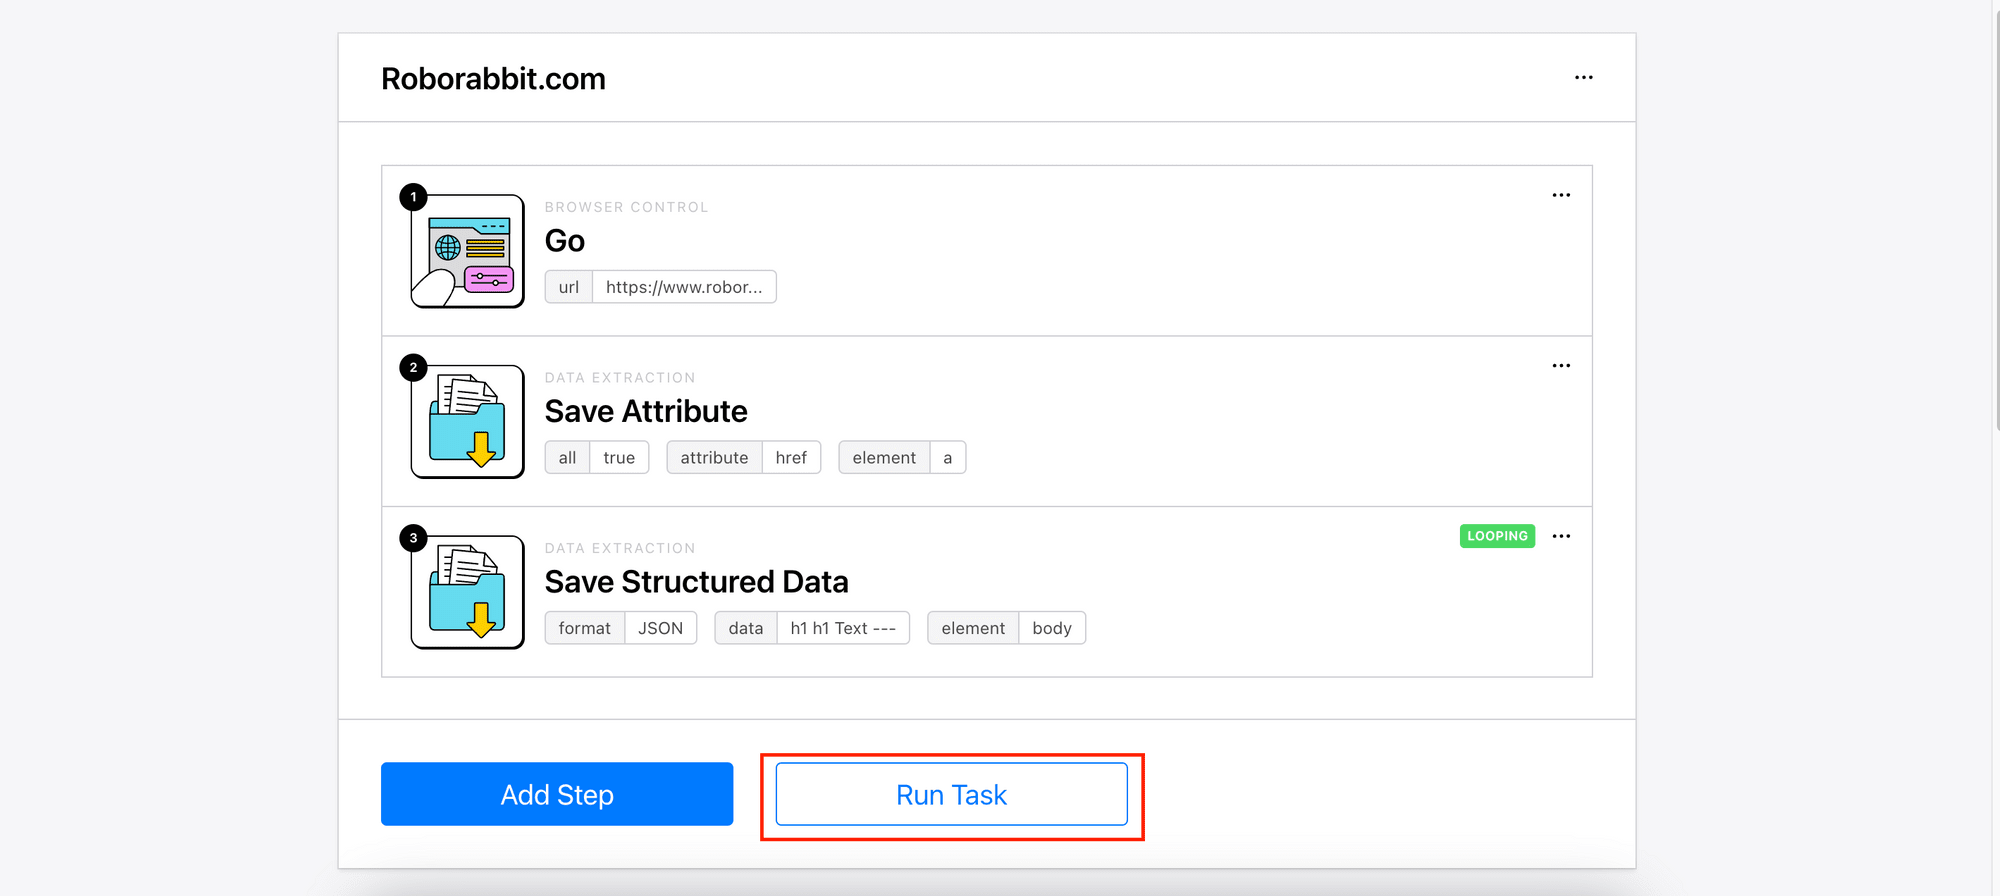
Now that all necessary steps have been added to the task, let's test it by running the task! Click on “Run Task” to execute it:
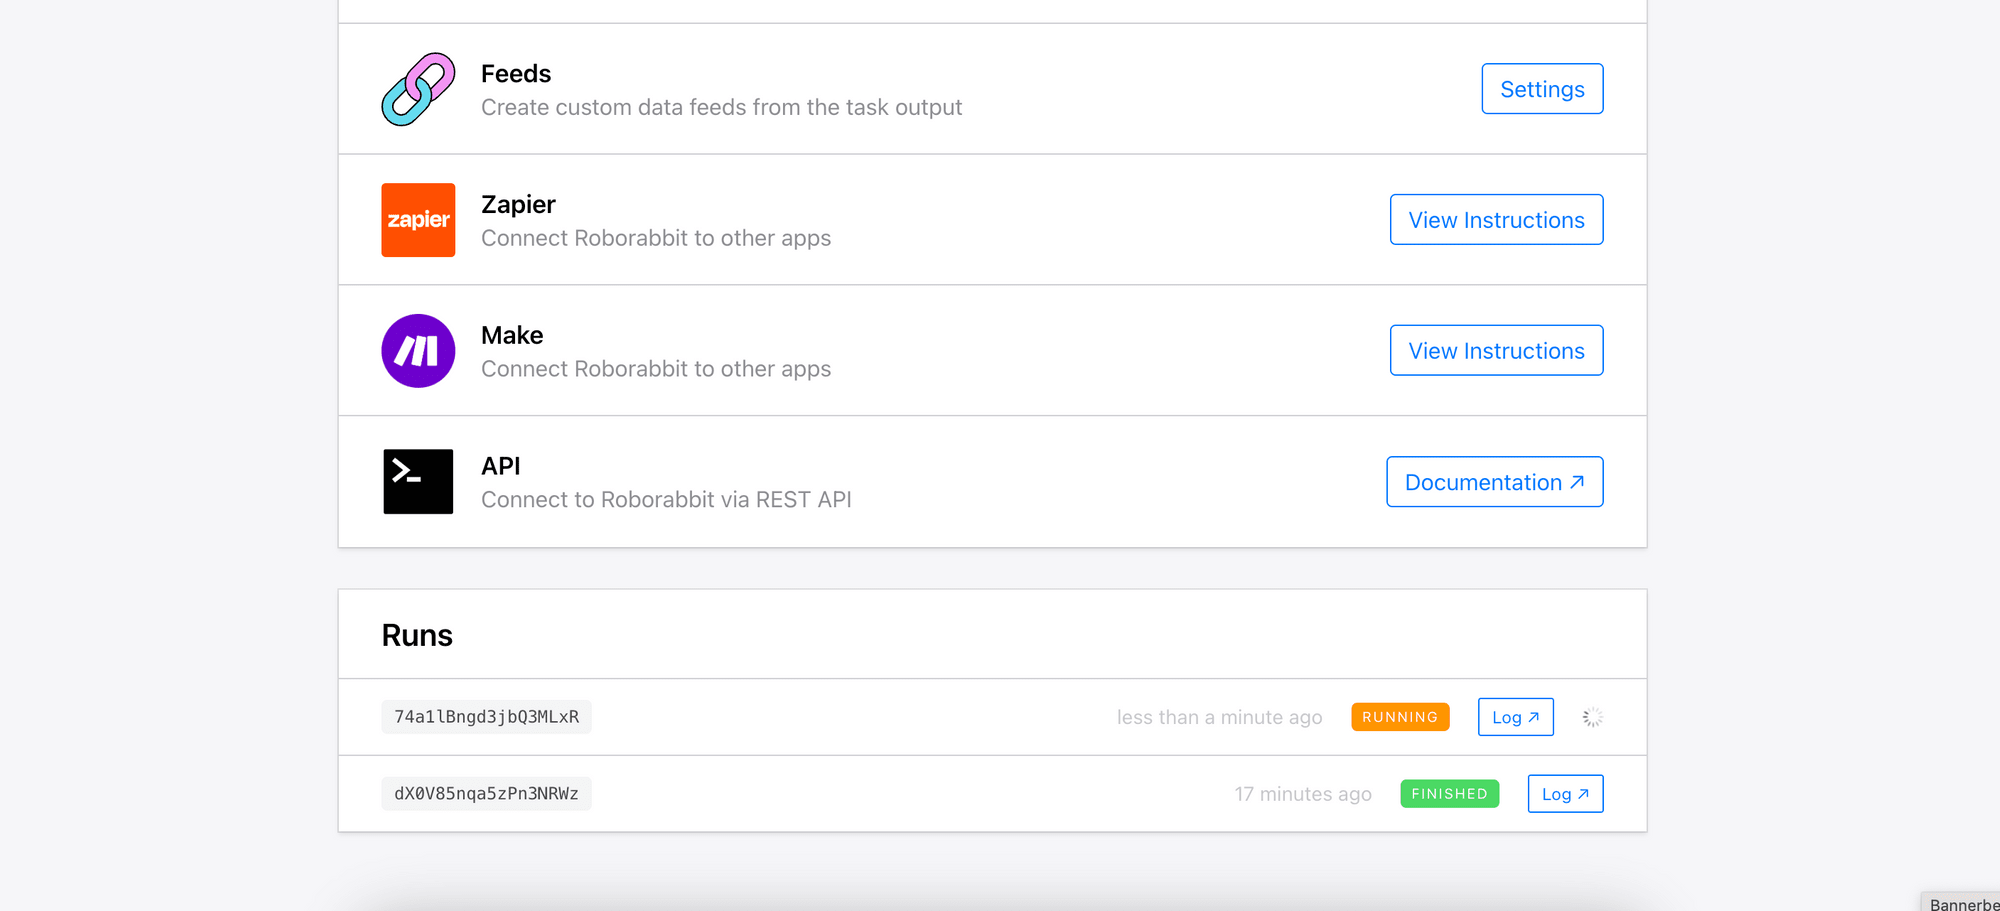
You can scroll down the page to monitor the progress:
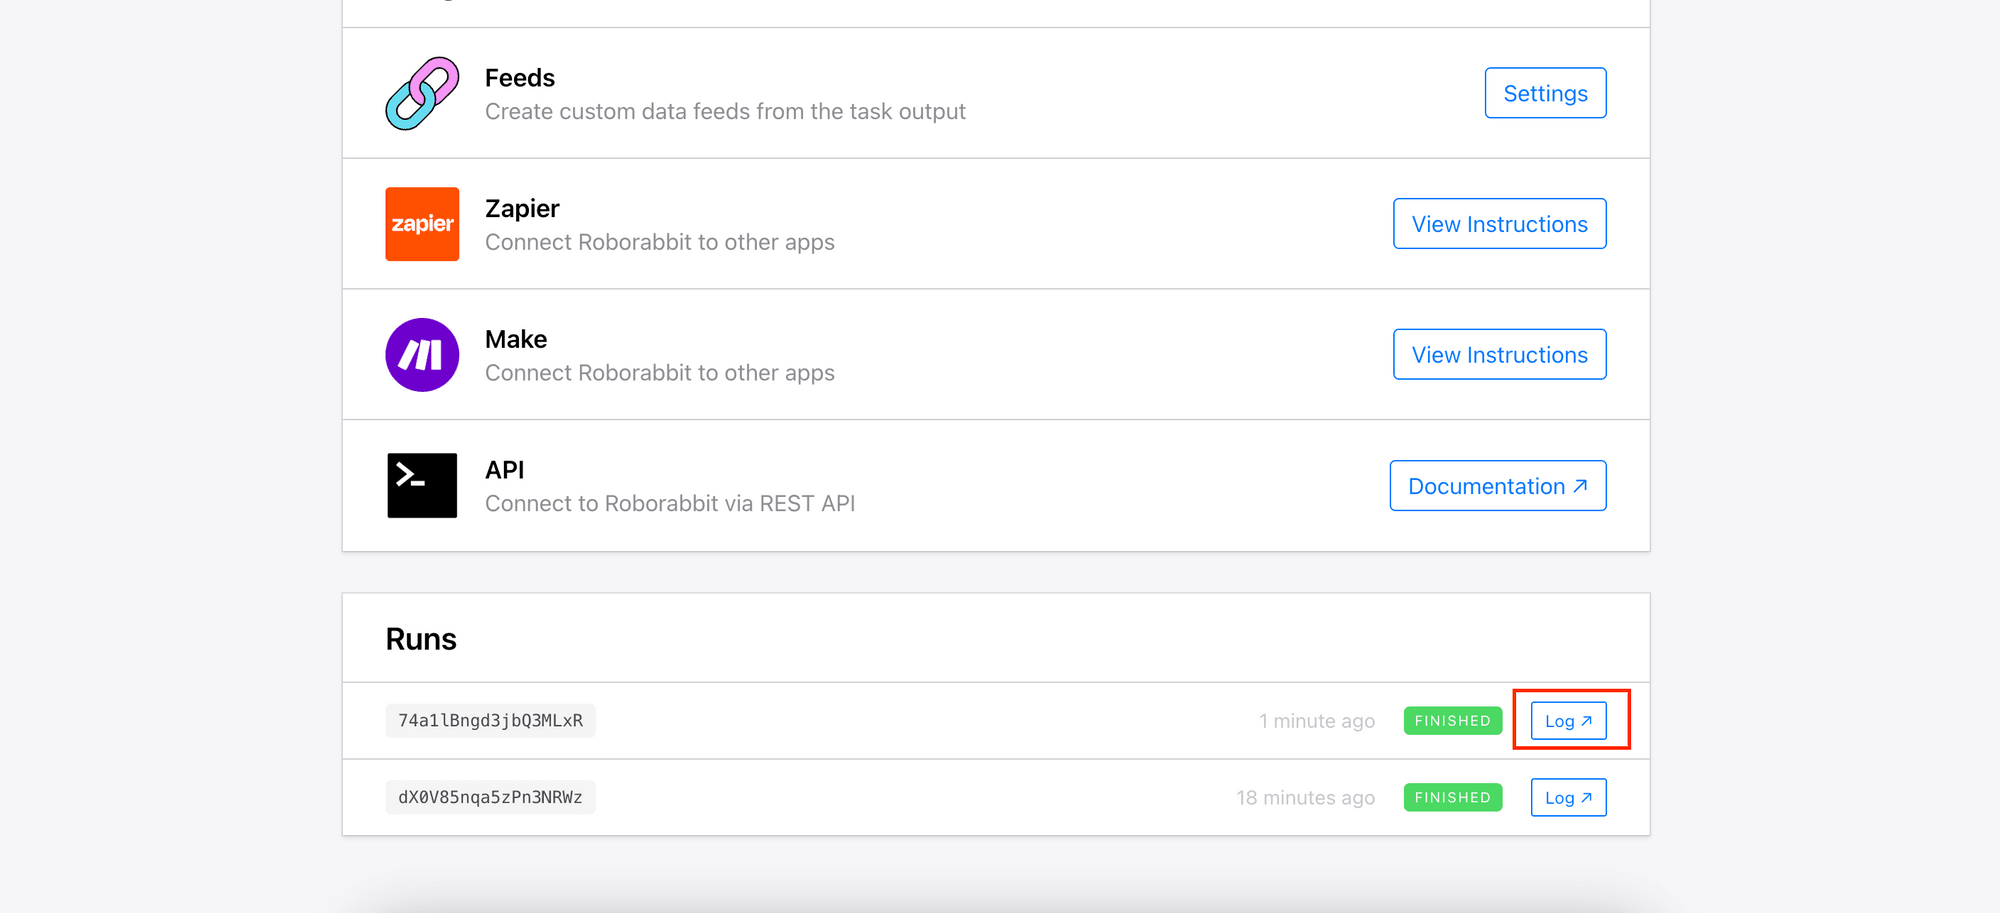
Once the task completes, view the run result by clicking the “Log” button:
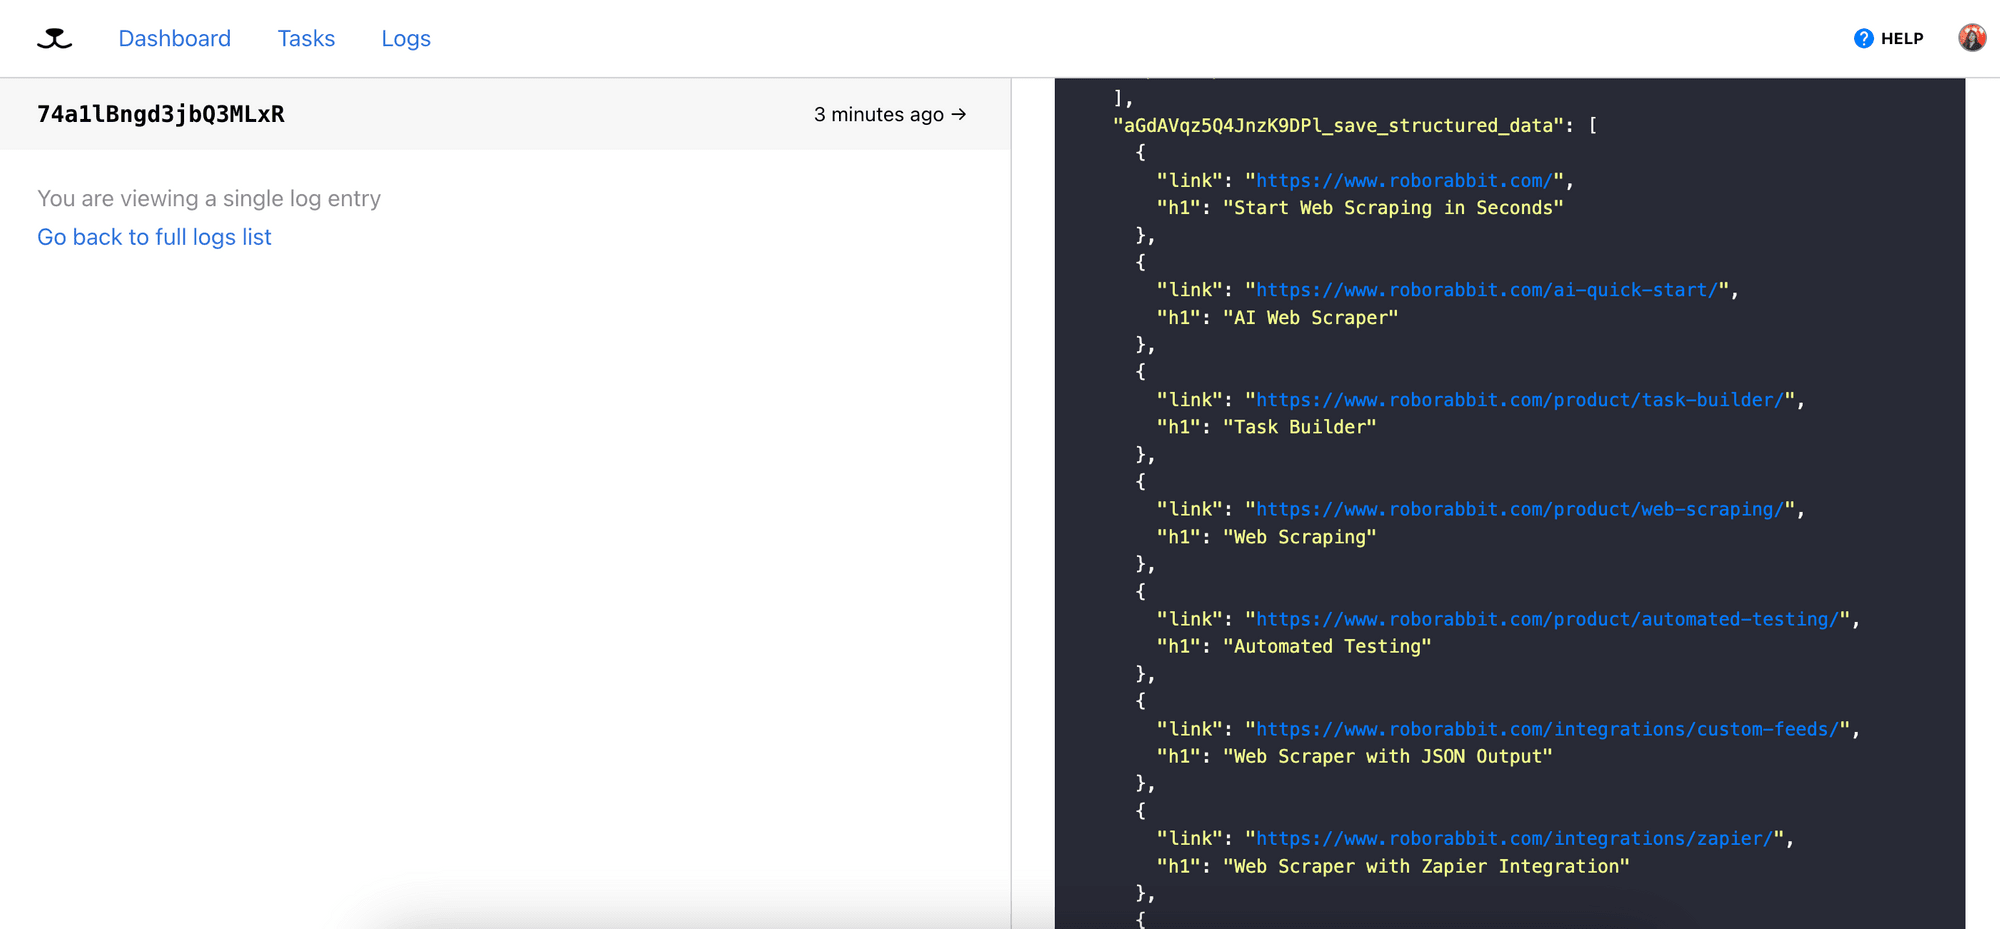
The h1 elements retrieved from the URLs will be stored in the outputs[<step_id>_save_structured_data] array, along with the corresponding URLs:
(Optional) Step 5. Create Custom Data Feeds
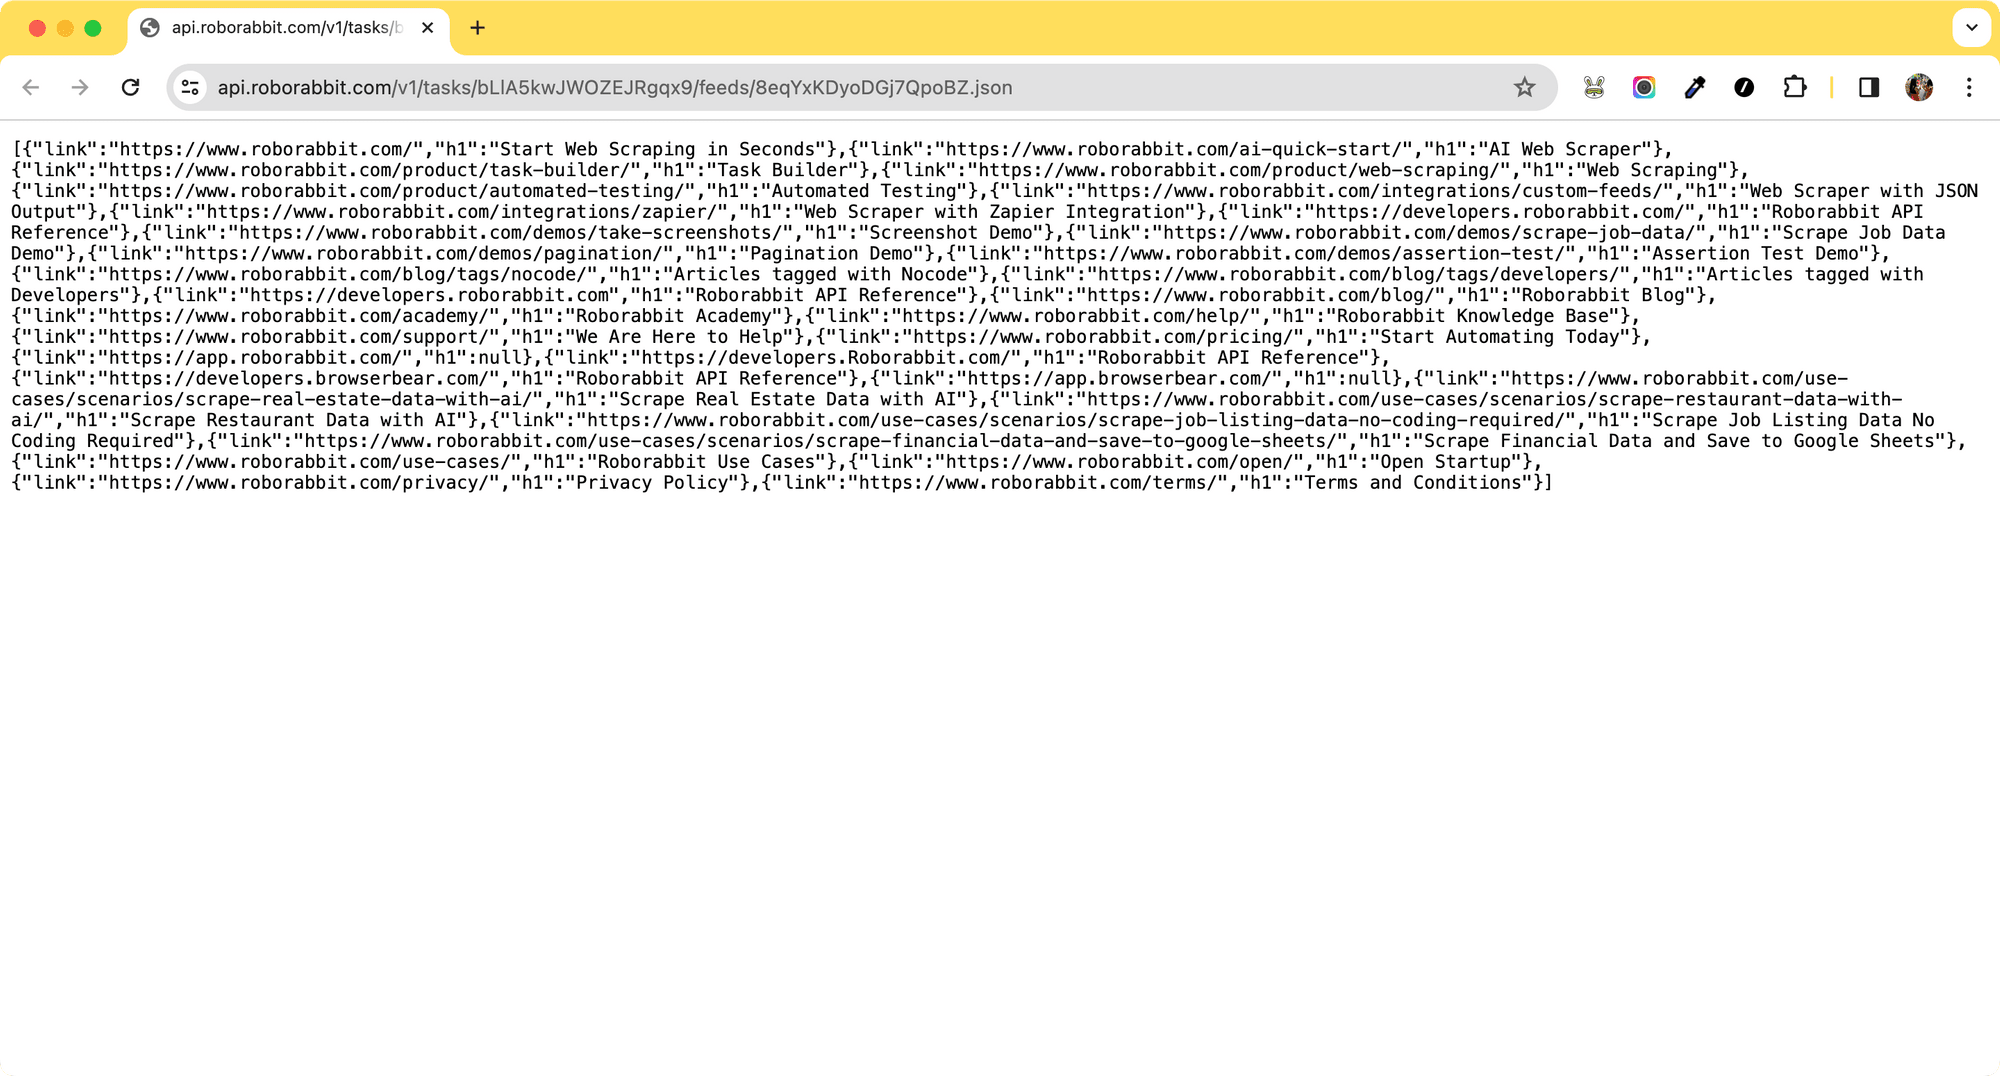
Roborabbit offers custom data feeds to facilitate additional data transformation. While our primary focus is scraping URLs and the <h1> data does not need transformation, we can still utilize this feature to get a JSON file containing only the URLs.
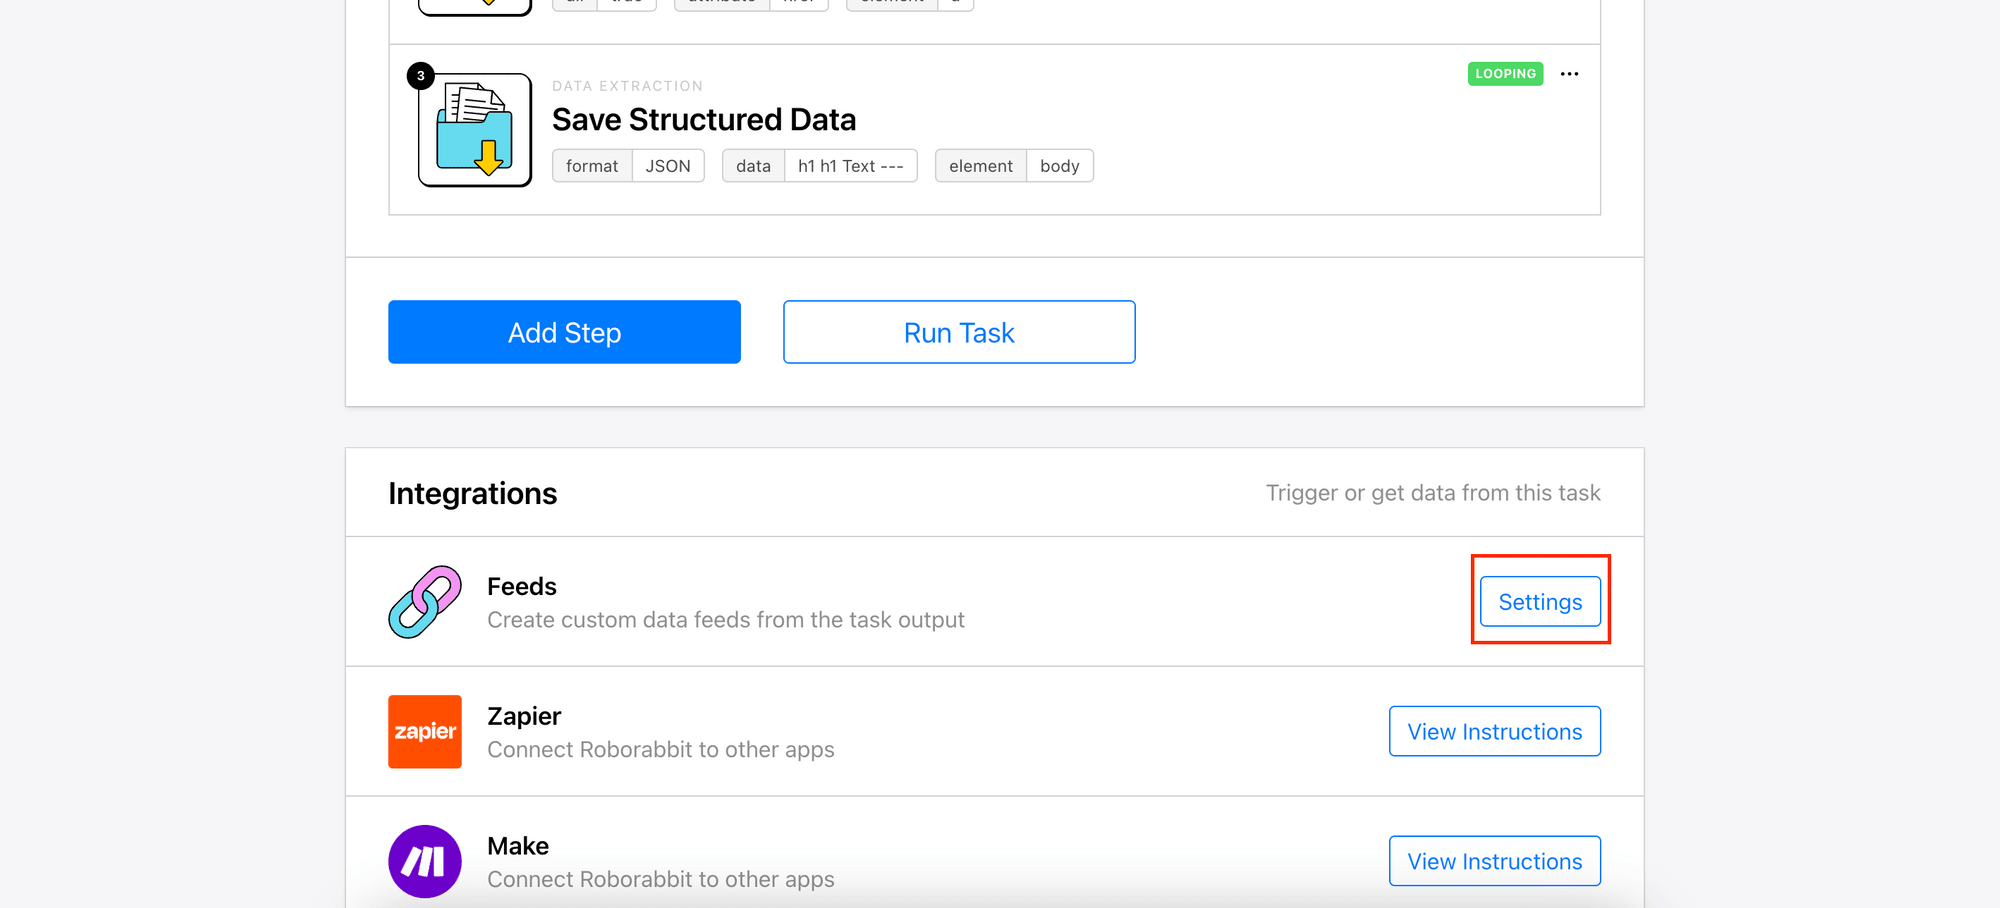
Scroll down to the Integrations section and click Feed’s “Settings” to access the Feeds configuration:
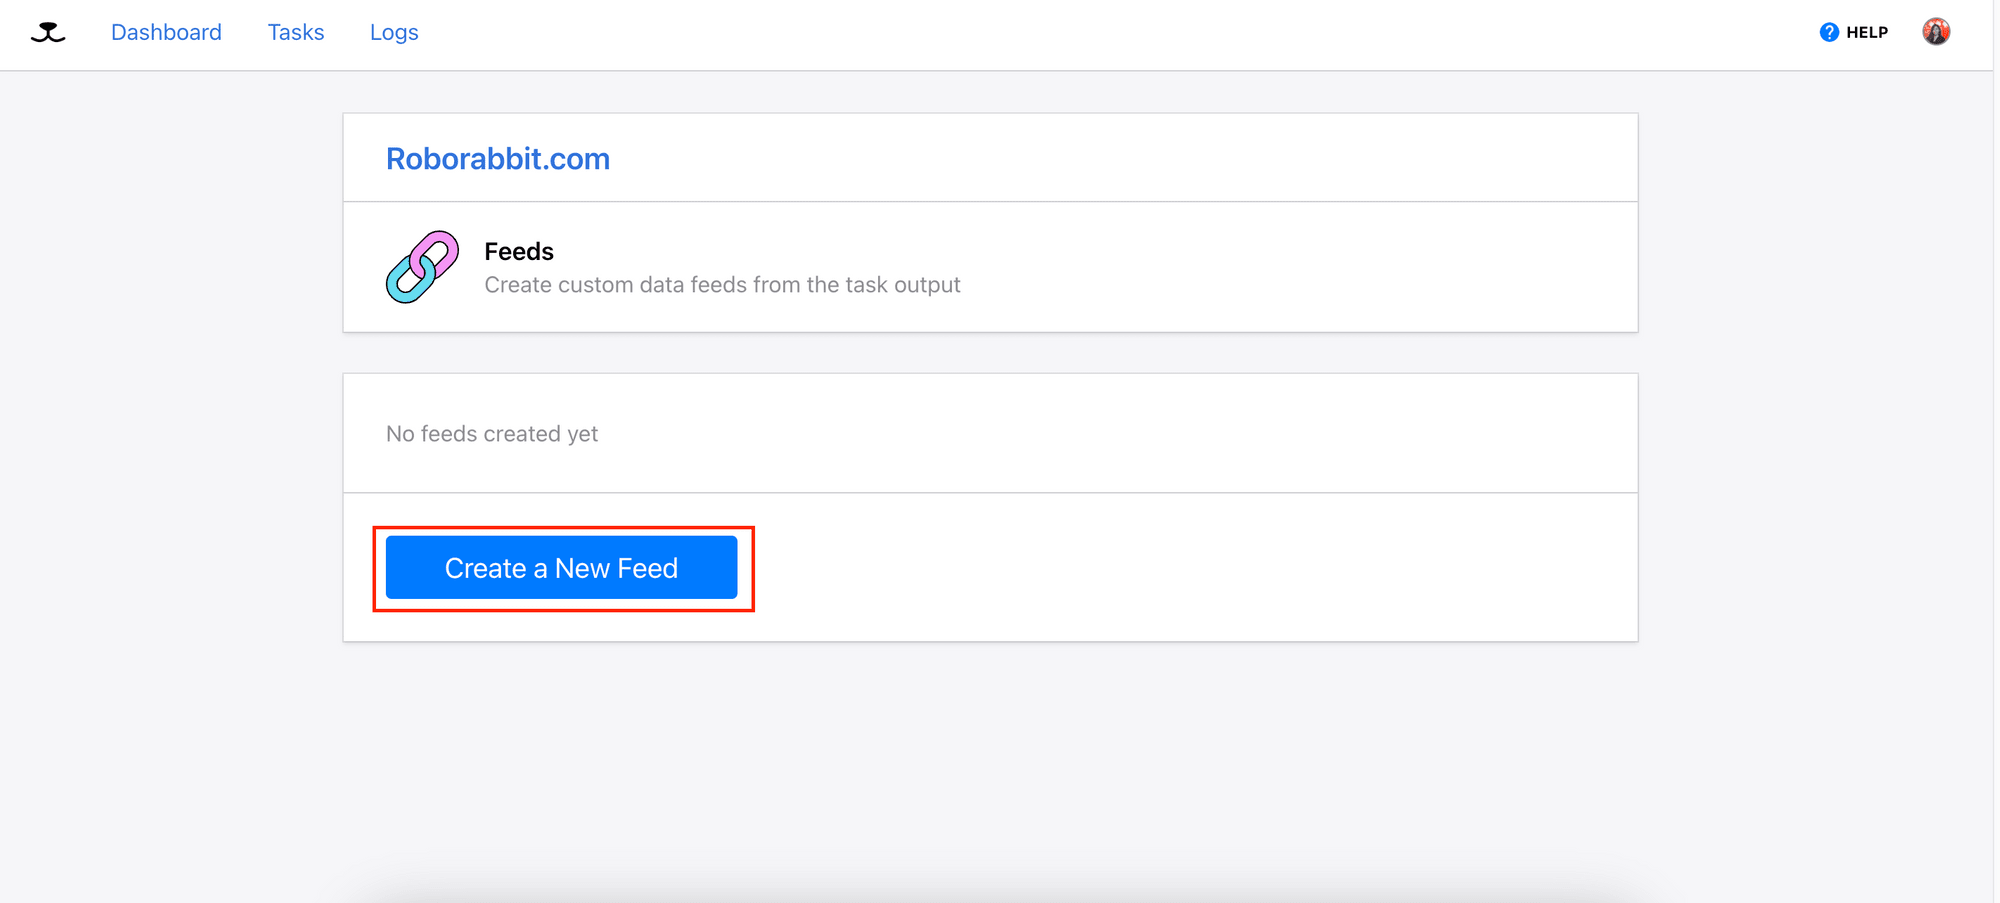
Create a new feed:
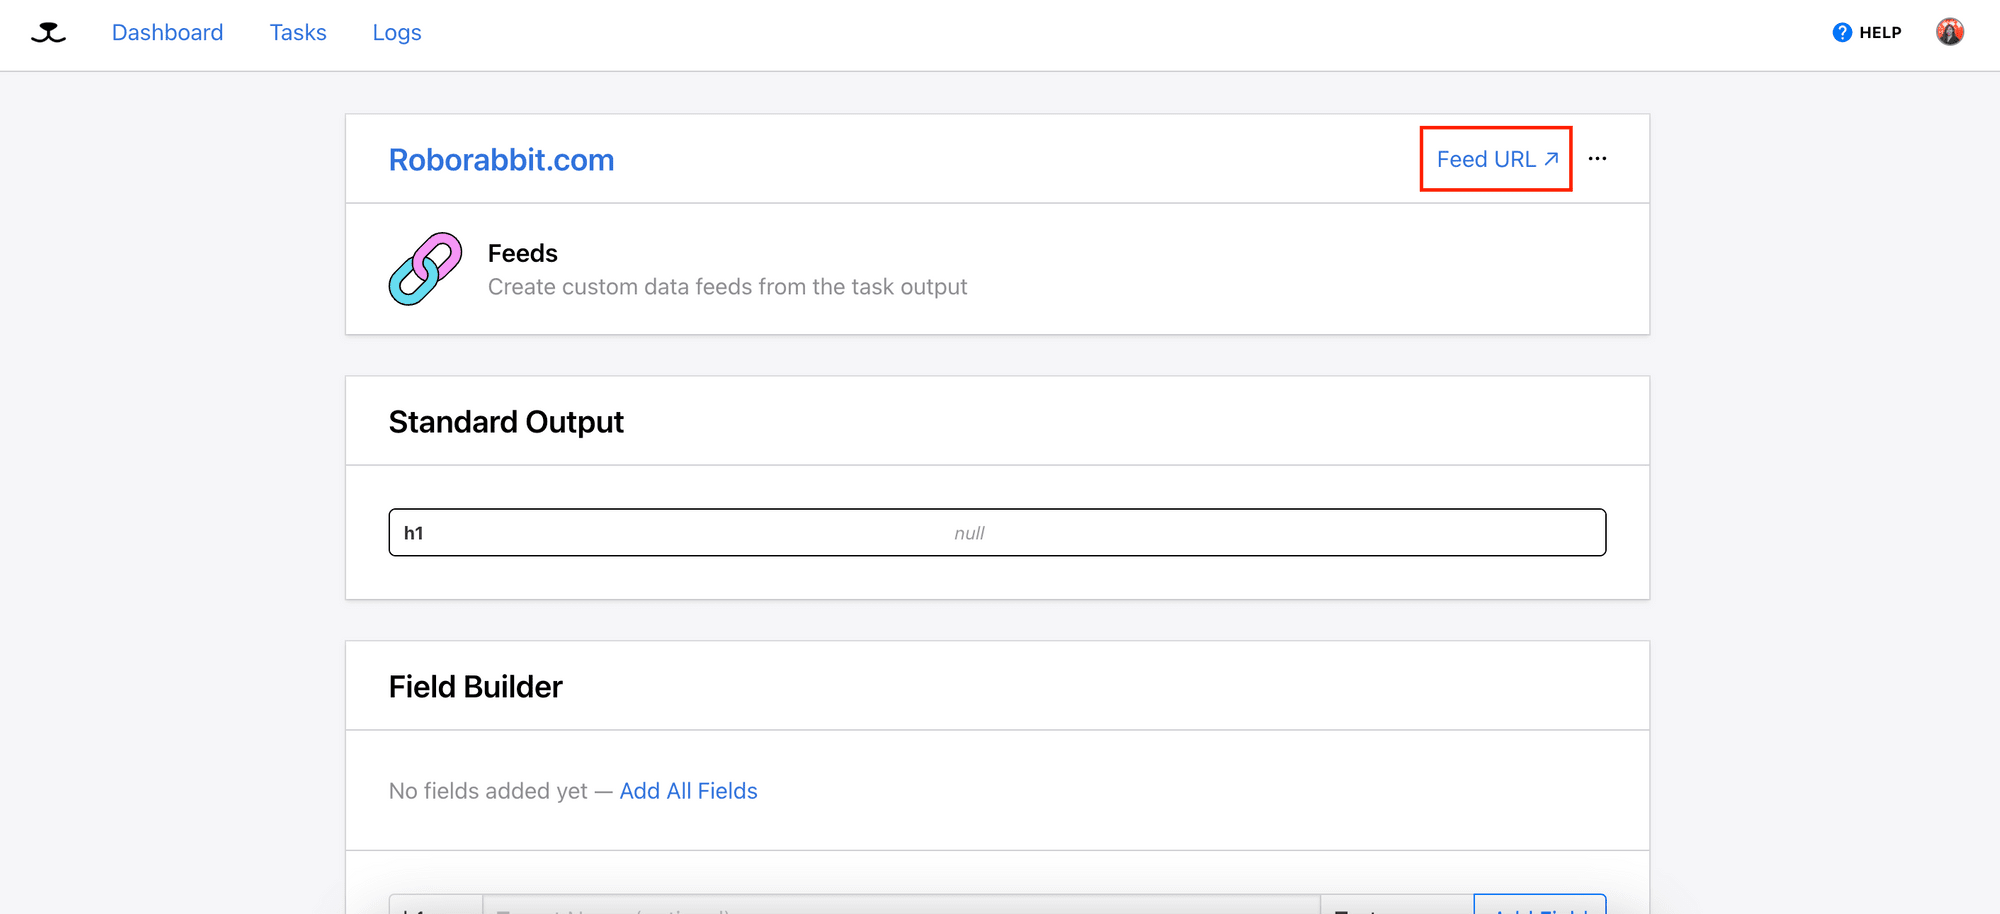
Then, you can click on “Feed URL” to access the JSON file that contains only the URLs:
Using the Roborabbit API
If you’re a developer using the Roborabbit API to integrate the task to your existing codebase, you can follow the guide above up to the “Save Attribute” step. Afterward, you can access and manipulate the resulting data using code.
Here’s how:
Initialize a new Node.js project by running npm init in the terminal/command prompt and create a new file named index.js in the same directory. In this file, declare your Roborabbit API key and task ID as constants, and add a self-invoking function:
const API_KEY = 'your_api_key';
const TASK_ID = 'your_task_id';

(async() => {

})();
🐰 Hare Hint: You can find your API Key in API Keys and your task ID in the task menu.
In the same file, create a function named runTask() to run your Roborabbit task:
async function runTask() {
  const res = await fetch(`https://api.roborabbit.com/v1/tasks/${TASK_ID}/runs`, {
    method: 'POST',
    body: JSON.stringify({}),
    headers: {
      'Content-Type': 'application/json',
      Authorization: `Bearer ${API_KEY}`,
    },
  });
  return res.json();
}
Add another function named getRun() to retrieve the task run result:
async function getRun(taskId, runId) {
  const res = await fetch(`https://api.roborabbit.com/v1/tasks/${taskId}/runs/${runId}`, {
    method: 'GET',
    headers: {
      Authorization: `Bearer ${API_KEY}`,
    },
  });

  return res.json();
}
Since the task may take some time to complete, let's create a function that calls getRun() every 2 seconds until the task finishes running and return the result:
async function getResult(taskId, runId) {
  return new Promise((resolve) => {
    const polling = setInterval(async () => {
      const runResult = await getRun(taskId, runId);

      if (runResult.status === 'running') {
        console.log('Still running.....');
      } else if (runResult.status === 'finished') {
        console.log('Finished');
        resolve(runResult);
        clearInterval(polling);
      }
    }, 2000);
  });
}
Inside the previously created self-invoking function, call runTask() and store the returned run ID, "Save Attribute" step ID, and "Go" step ID as variables:
(async () => {

  const runRes = await runTask();
  const { uid: runId } = runRes;
  const saveAttributeId = `${runRes.steps[1].uid}_${runRes.steps[1].action}`;
  const goId = `${runRes.steps[0].uid}_${runRes.steps[0].action}
})();
Then, call getResult() to continuously check the run result and retrieve the returned URLs:
(async () => {
  ...
  let urlRes = await getResult(TASK_ID, runId);
  const urls = urlRes.outputs[saveAttributeId];
})();
The URLs returned are relative URLs found on the web page. If you want to get the full URLs, append these relative URLs to the domain of the web page:
(async () => {
  ...
  const domain = urlRes.outputs[goId].location;
  const fullUrl = urls.map((url) => (url.charAt(0) === '/' ? domain + url.substring(1) : url));
  console.log(fullUrl);
// [
// 'https://www.roborabbit.com/',
// 'https://www.roborabbit.com/',
// 'https://app.bannerbear.com/',
// 'https://www.roborabbit.com/ai-quick-start/',
// 'https://www.roborabbit.com/product/task-builder/',
// 'https://www.roborabbit.com/product/web-scraping/',
// ...
// ]
})();
The result from the "Save Attribute" action may contain redundant URLs as it saves all URLs found on the web page. If it is necessary, you may want to filter the result to remove duplicates.
🐰 Hare Hint: View the full code on GitHub.
Conclusion
Roborabbit offers a robust solution for automating web data tasks with minimal coding required. For users familiar with coding, its API allows you to access your Roborabbit tasks and tailor the data to meet specific business needs effectively. The no-code approach is ideal for users without programming expertise, or are satisfied with the results from custom feeds. On the other hand, using the API is ideal for users that require greater flexibility and advanced customization options.
Whether you prefer a straightforward no-code approach or need advanced customization capabilities using code, Roborabbit provides a seamless scraping solution. To learn more about Roborabbit, visit their website!


