How to Perform Scheduled Web Scraping with Roborabbit, Cron, and AWS
Contents
Web scraping is a great way to automate data extraction from websites, but running a scraper manually every time you need fresh data is inefficient. If you're tracking frequently updated information, like price changes, news updates, or business insights, scheduling your web scraping tasks can save time and ensure you always have the latest data.
With Roborabbit, a no-code web scraper with built-in scheduling, you can automate your scraping tasks effortlessly. In this guide, we’ll show you:
- How to set up scheduled web scraping with Roborabbit
- How to enhance scheduling with cron jobs and serverless functions
By the end of this article, you’ll know how to automate web scraping in different ways based on your needs, helping you save time and effort. Let’s get started!
What is Roborabbit
Roborabbit is a scalable, cloud-based browser automation tool designed to automate various data-related tasks in the browser. With Roborabbit, you can automate website testing, scrape website data, take scheduled screenshots for archiving, and more—all without writing a single line of code.
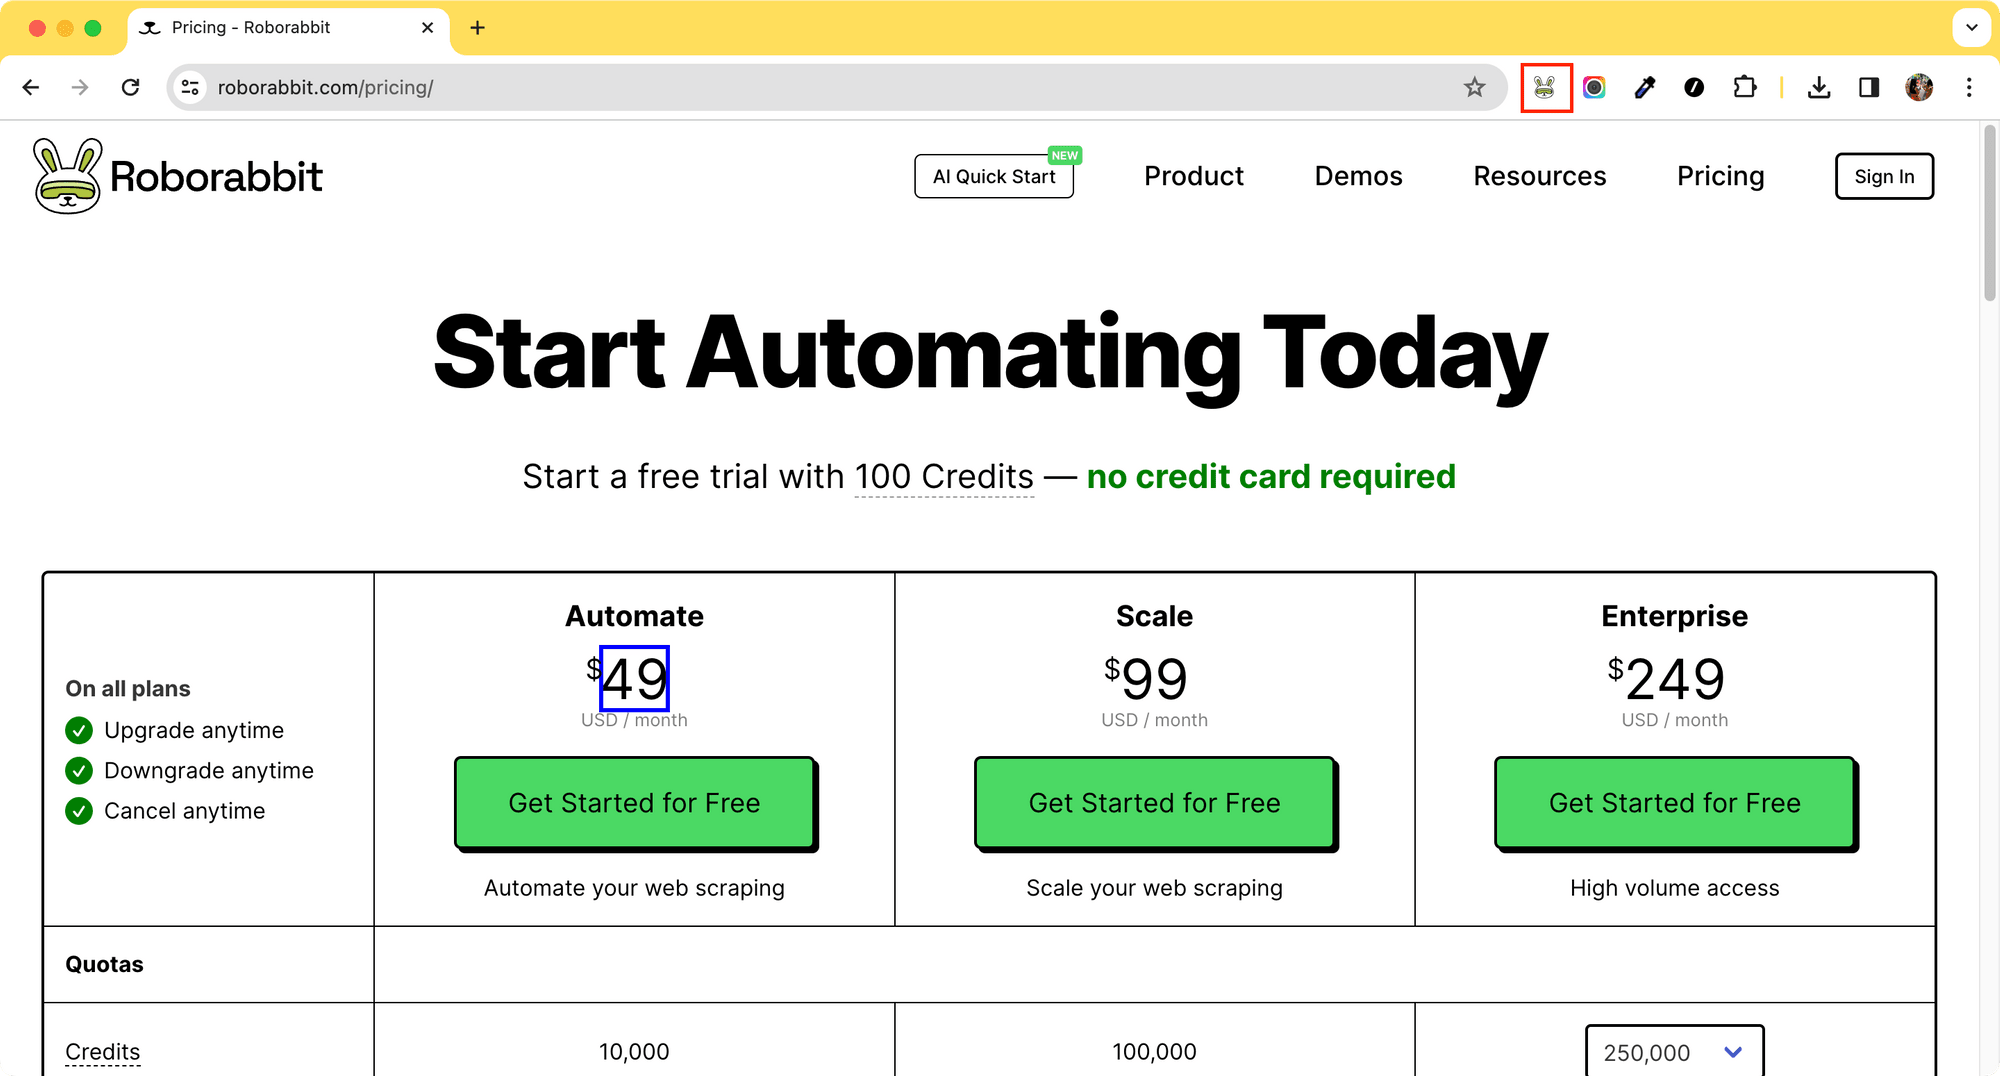
Unlike other web automation tools, Roborabbit simplifies the setup and navigation process with its user-friendly interface. You can easily locate your target HTML element (the blue box in the screenshot below) by hovering your mouse over it with the Roborabbit Helper extension…
… and add the necessary steps to your automation task from the Roborabbit dashboard:

Roborabbit also offers APIs that let you integrate automation tasks directly into your codebase. All you need is the project API key and relevant IDs, which you can easily find in the dashboard. We’ll cover the details in a later section of this article.
How to Perform Scheduled Web Scraping with Roborabbit’s Built-in Scheduling Feature
🐰 Hare Hint: If you haven't signed up yet, create a Roborabbit account—you'll get 100 free credits to test out web scraping tasks!
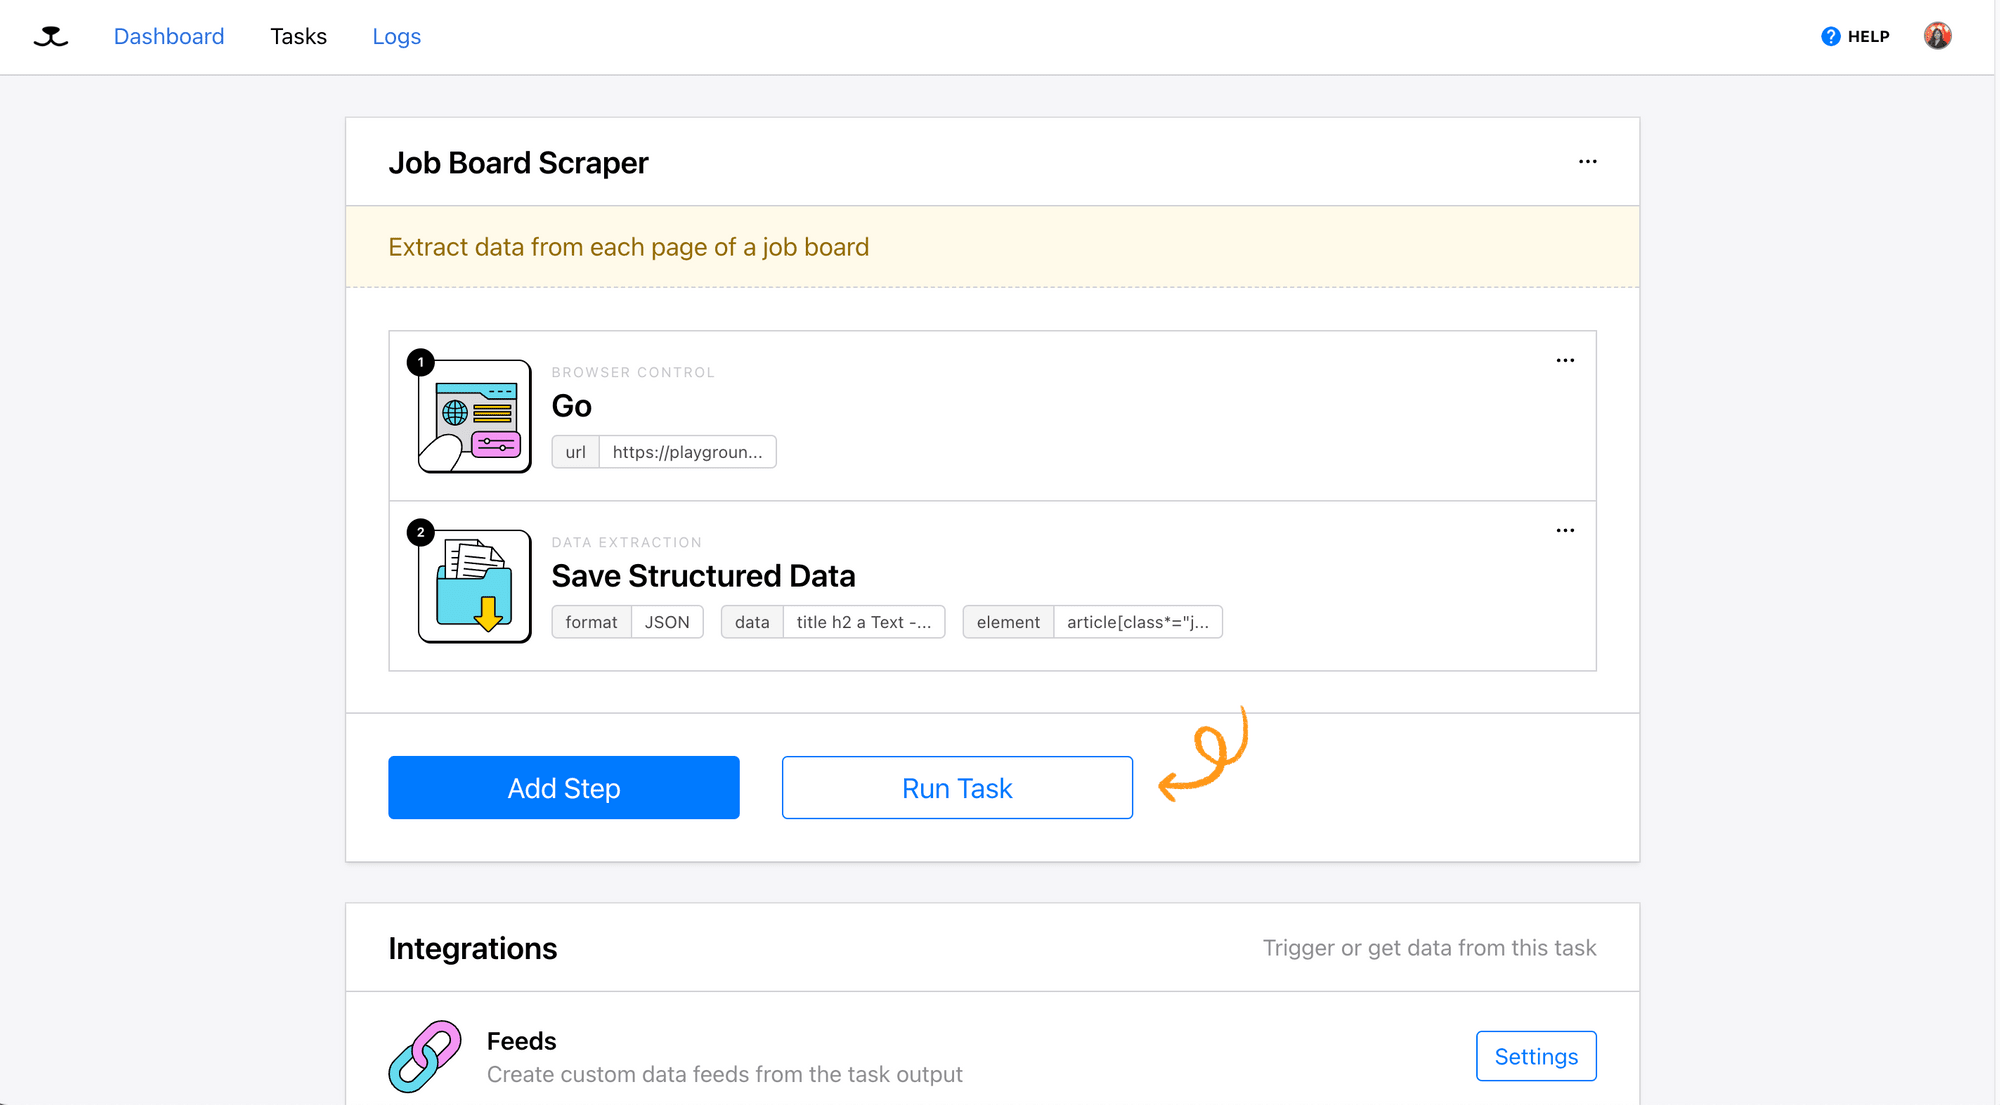
Step 1. Create a Web Scraping Task
Log in to your Roborabbit account and create a new web scraping task. Alternatively, you can add the task below to your account and follow along with this tutorial:
After clicking “Use This Task”, the task will be added to your account:
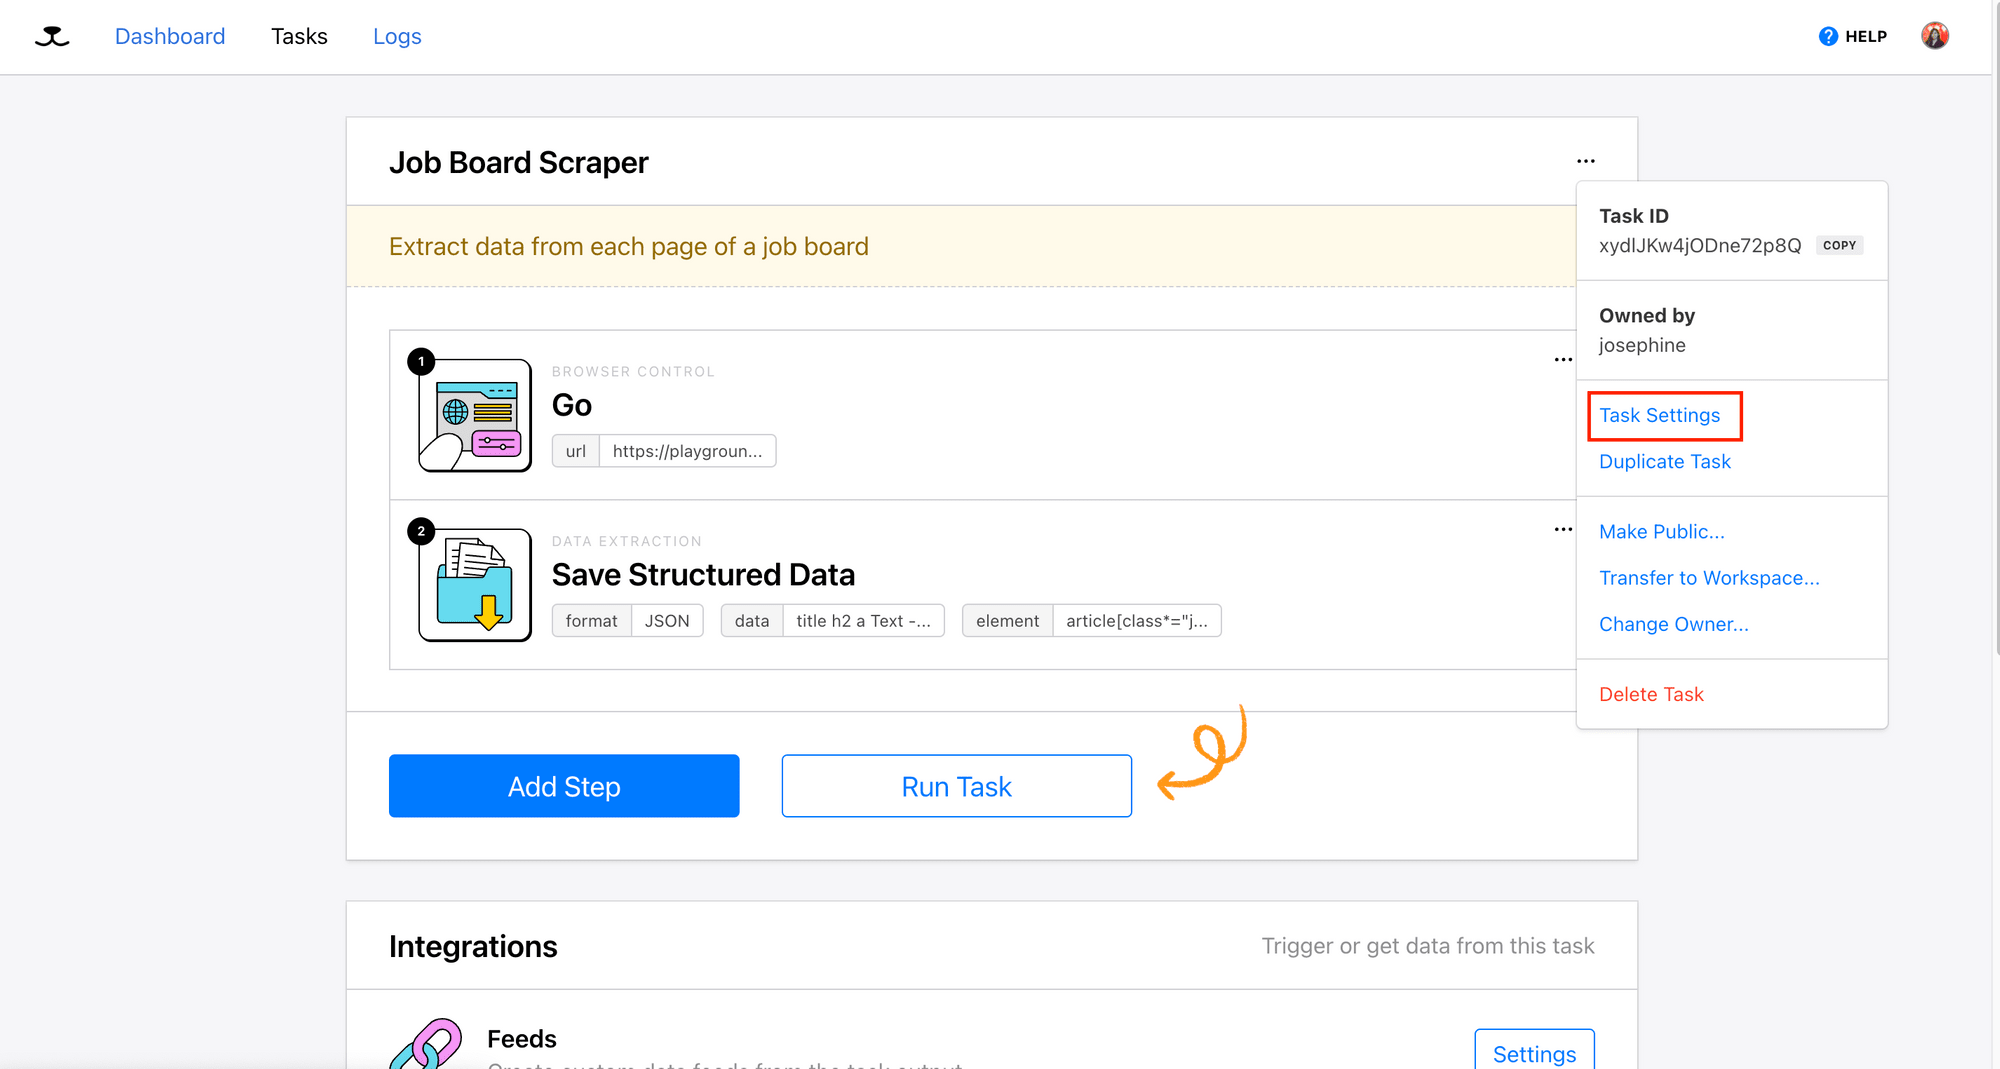
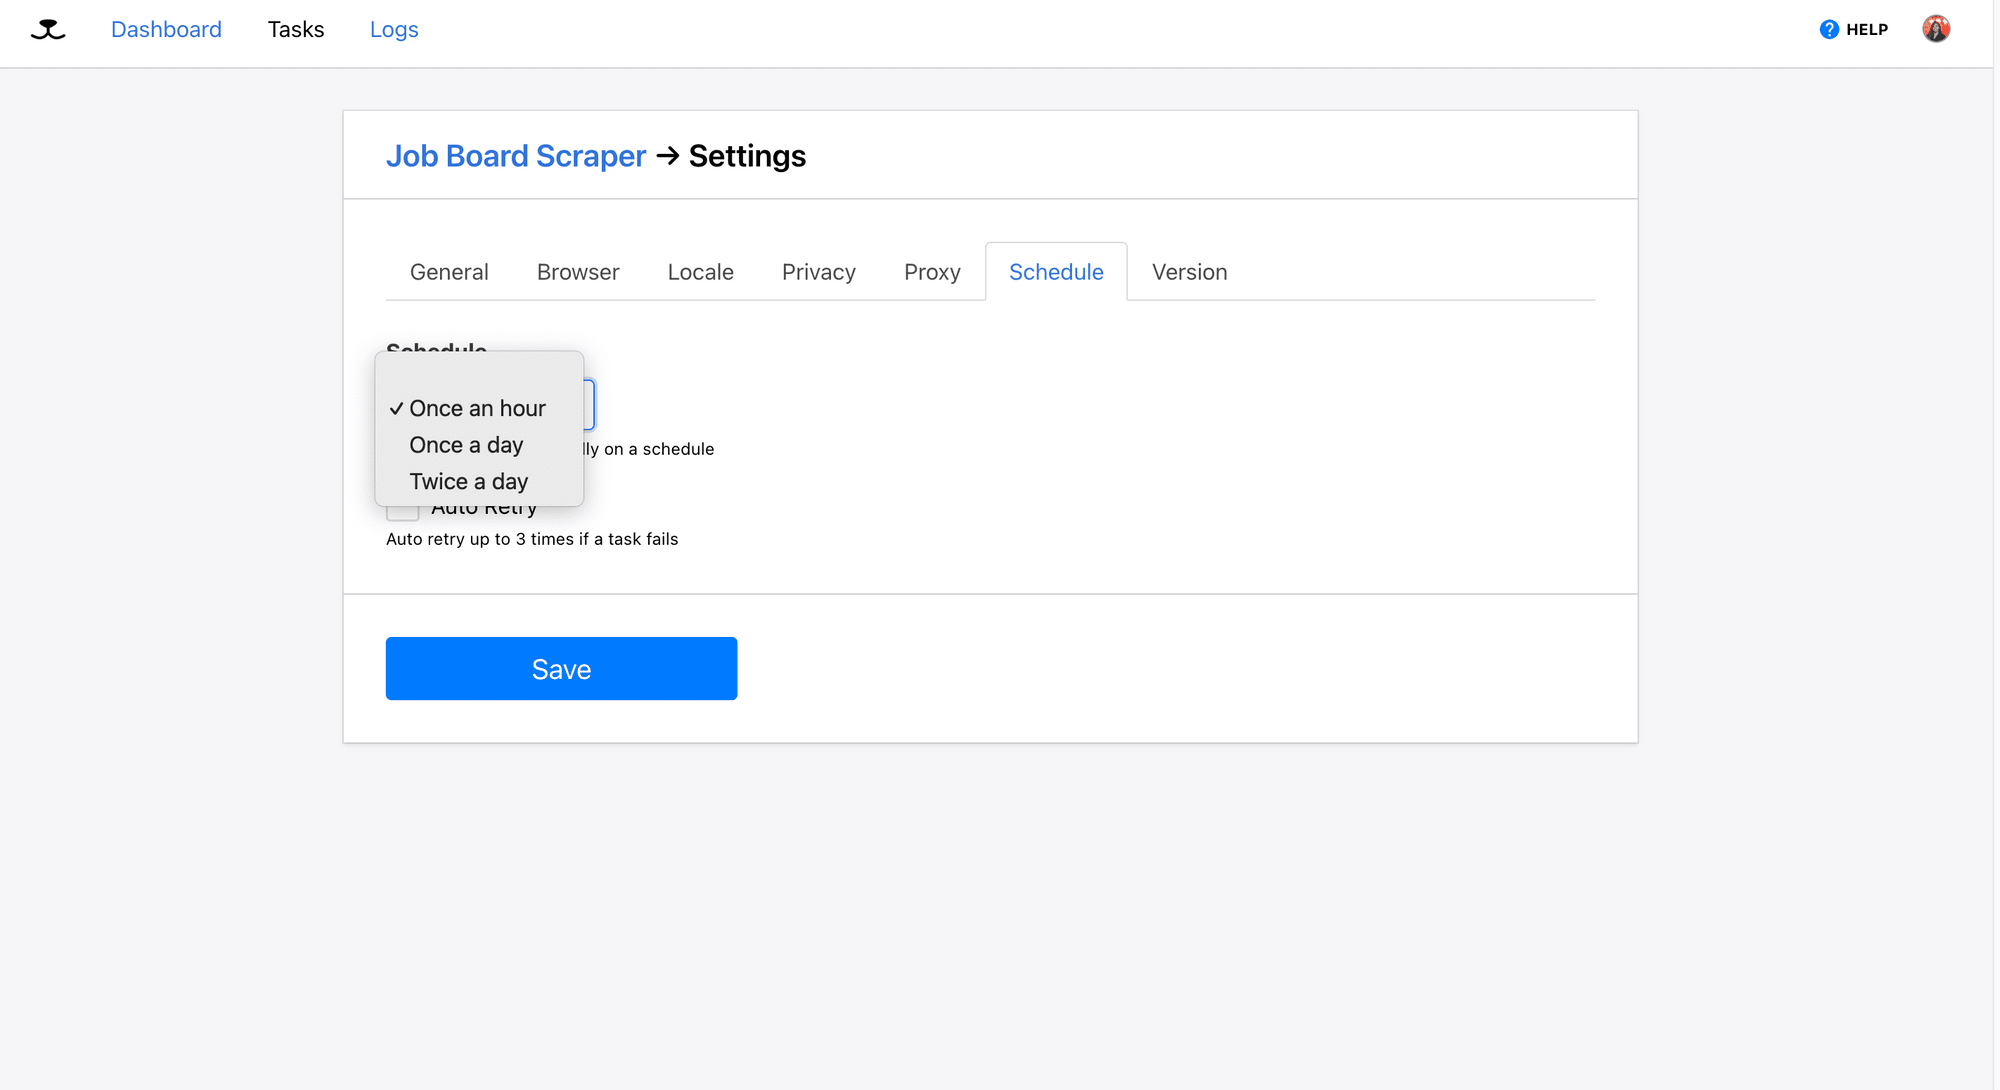
Step 2. Set Up a Schedule
To run the task automatically on a schedule, go to “Task Settings” and find the “Schedule” tab:
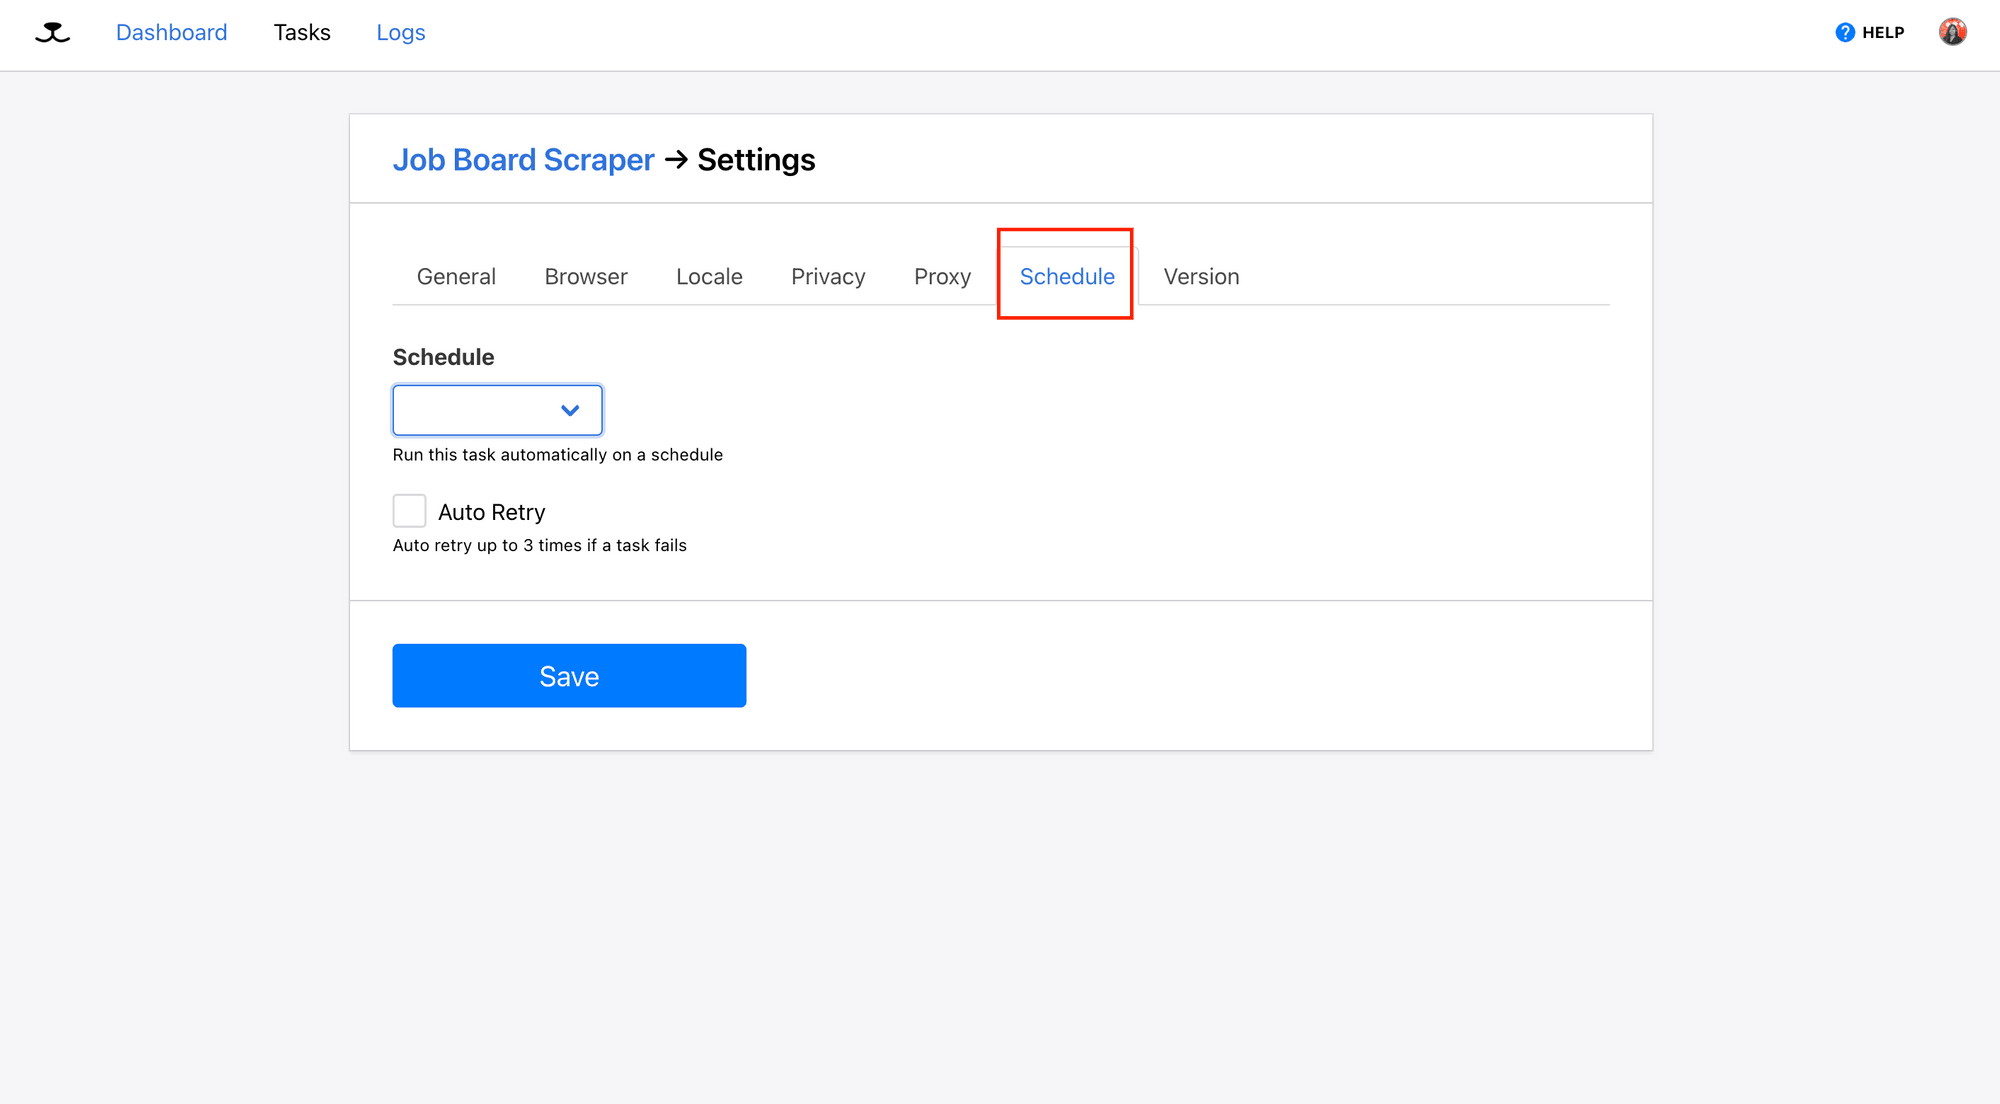
Roborabbit offers three common scheduling options. Simply choose the one that suits your needs and click "Save" to apply the settings:
If these fixed intervals work for you, that’s great! But if you need more flexibility, like running your scraper every 30 minutes or at a specific time each day, you can use Roborabbit’s API with external scheduling tools to trigger your web scraping tasks.
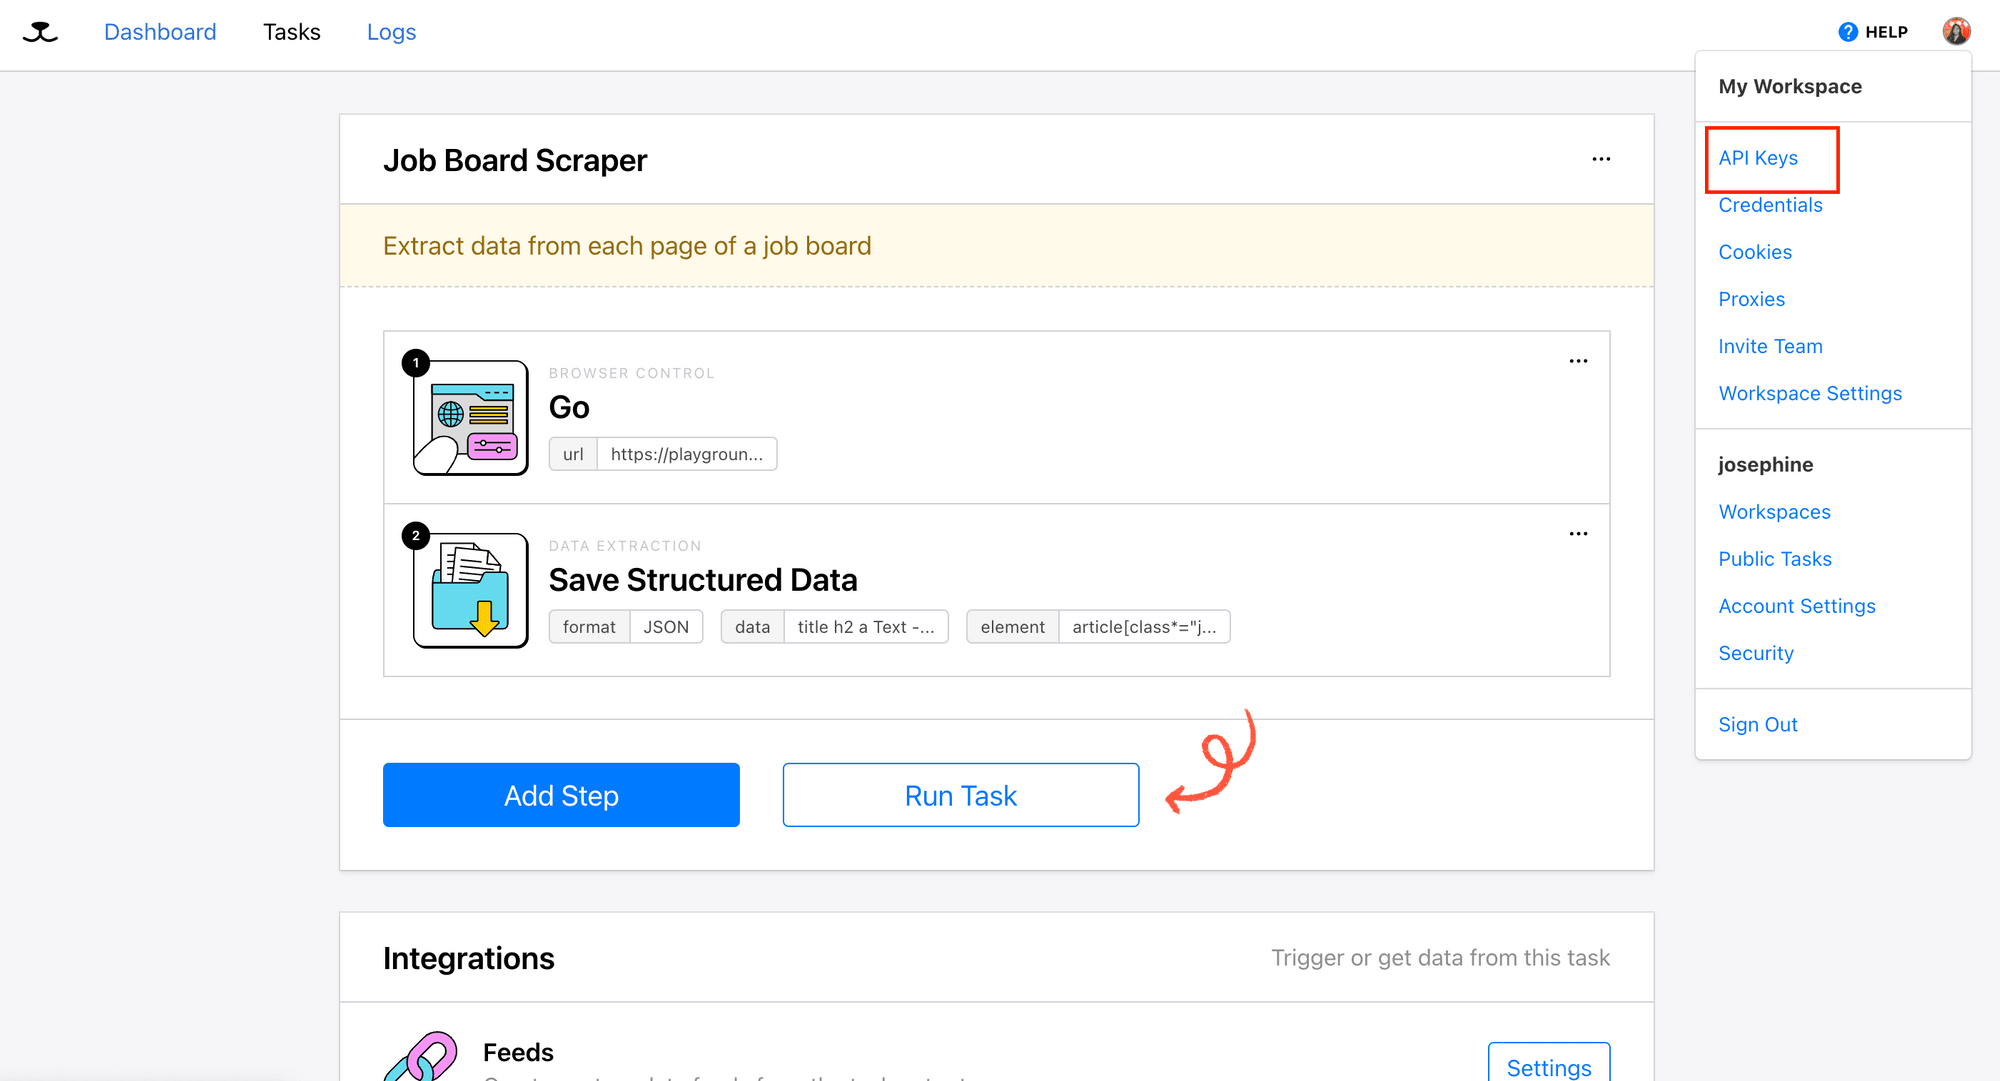
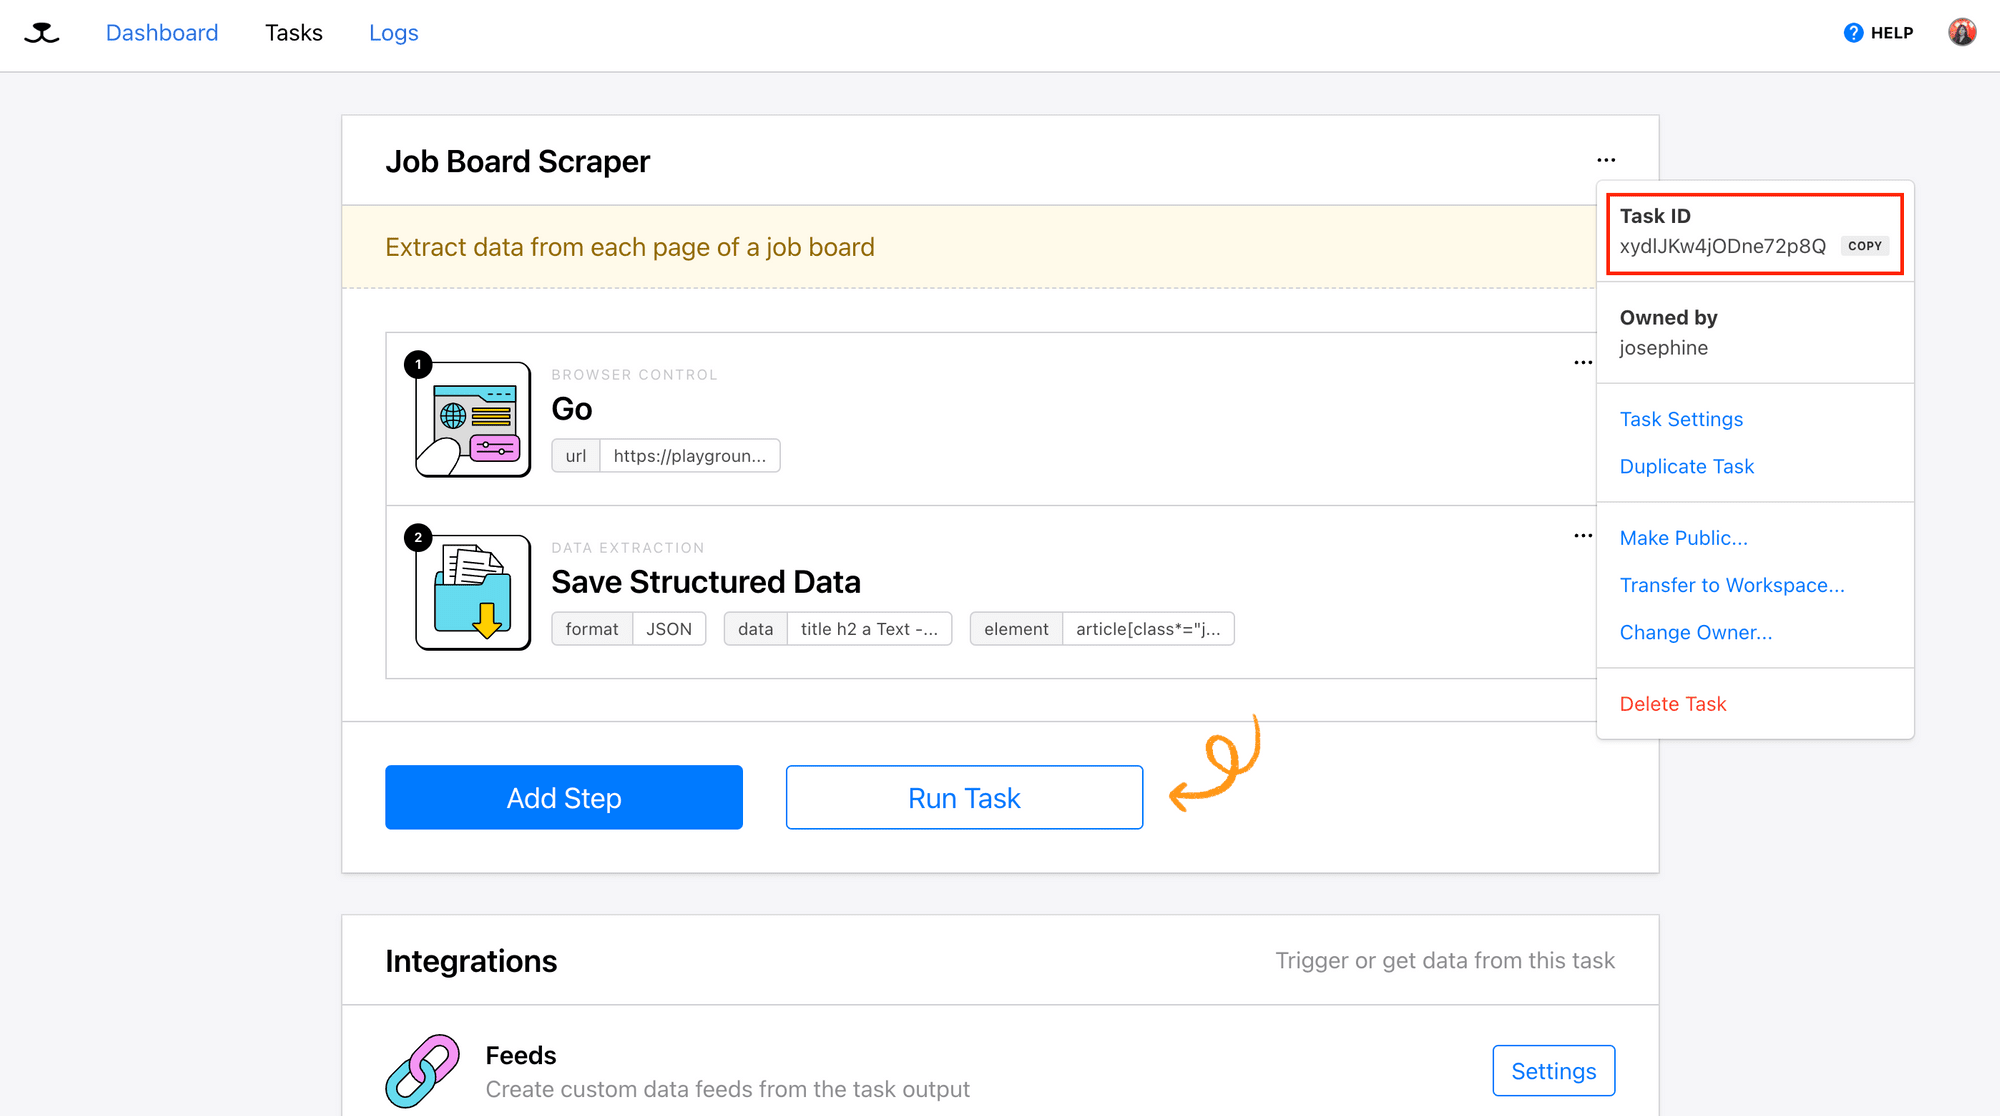
Retrieving Your Roborabbit API Key and Task ID
To access your web scraping task using Roborabbit’s API, you’ll need your API key and task ID. You can find them in your account dashboard, as shown in the screenshots below:
Enhancing Scheduling with External Tools
If the default scheduling options in Roborabbit aren’t enough, you can take things a step further by using cron jobs or serverless functions to trigger your web scraping tasks.
Method 1: Using Cron Jobs
If you have a running Linux or Unix-based server, you can use a cron job to trigger your web scraper automatically. Cron jobs give you full control over scheduling without relying on third-party services, and best of all, they’re free to use!
Here’s how you can set up a cron job to trigger your web scraping task:
Step 1. Create a Script
Create a script (e.g., script.sh) and add the following command to send a request to Roborabbit’s API to trigger the task:
curl -X POST "https://api.roborabbit.com/tasks/YOUR_TASK_ID/run" -H "Authorization: Bearer YOUR_API_KEY"
🐰 Hare Hint: You can also use other scripting programming languages like Python for this step!
Step 2. Set up a Cron Job
To add a cron job, run the command below to open the crontab (cron table):
crontab -e
Add this line to your crontab to schedule the script to run every 30 minutes, or modify the cron expression to run it at your desired times or intervals:
*/30 * * * * /path/to/script.sh
To save and exit, type :wq and press Enter. Your script will now run automatically based on the schedule.
If your script isn’t running, ensure that it has execute permissions by running the command below:
chmod +x /path/to/script.sh
🐰 Hare Hint: If you need help with defining the cron expression, use a cron expression generator.
Method 2: Using Serverless Task Schedulers (AWS Lambda + EventBridge )
If you don’t want to manage a server, you can use AWS Lambda andEventBridge (formerly CloudWatch Events) to schedule web scraping tasks in the cloud instead. While it requires a bit of setup, it offers better scalability and integrates easily with other cloud services or third-party APIs.
Here are the steps to set up them:
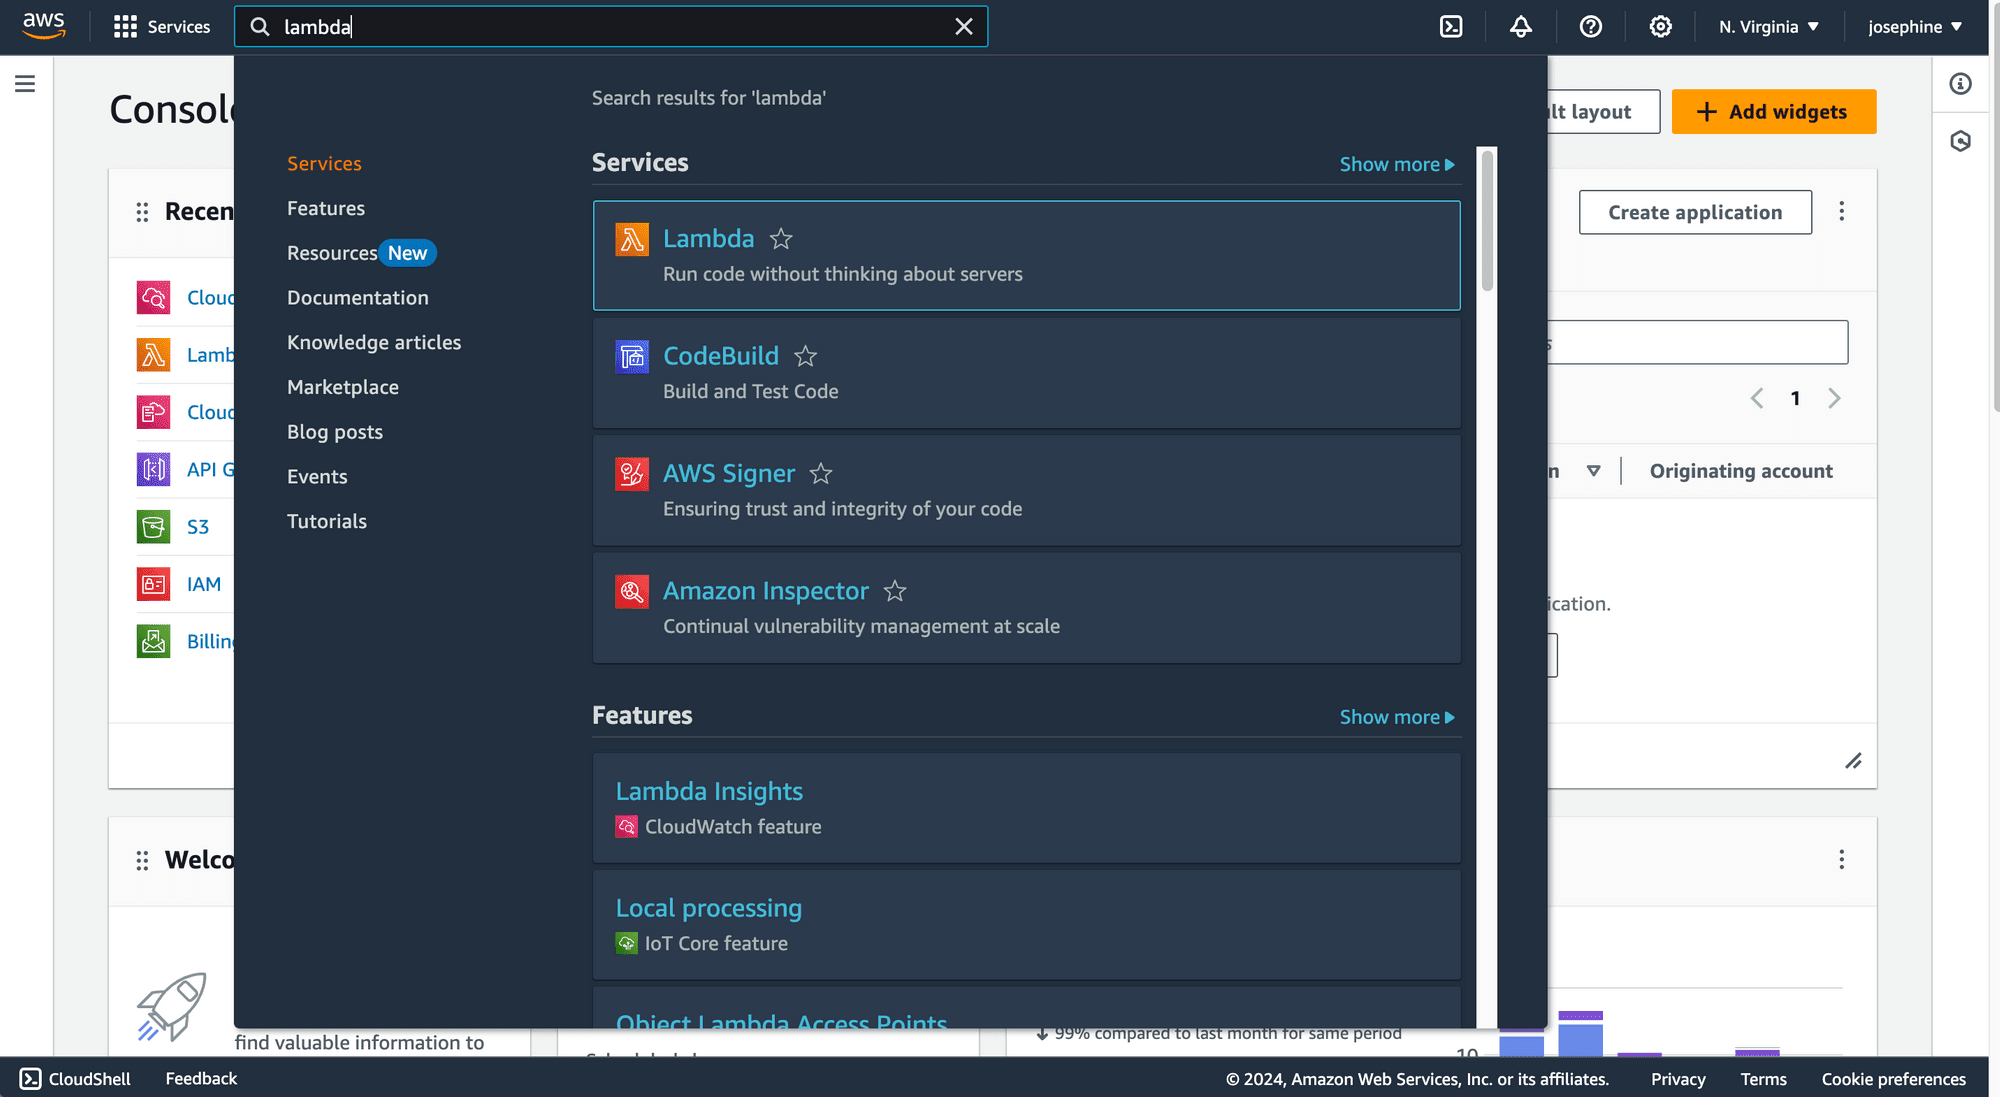
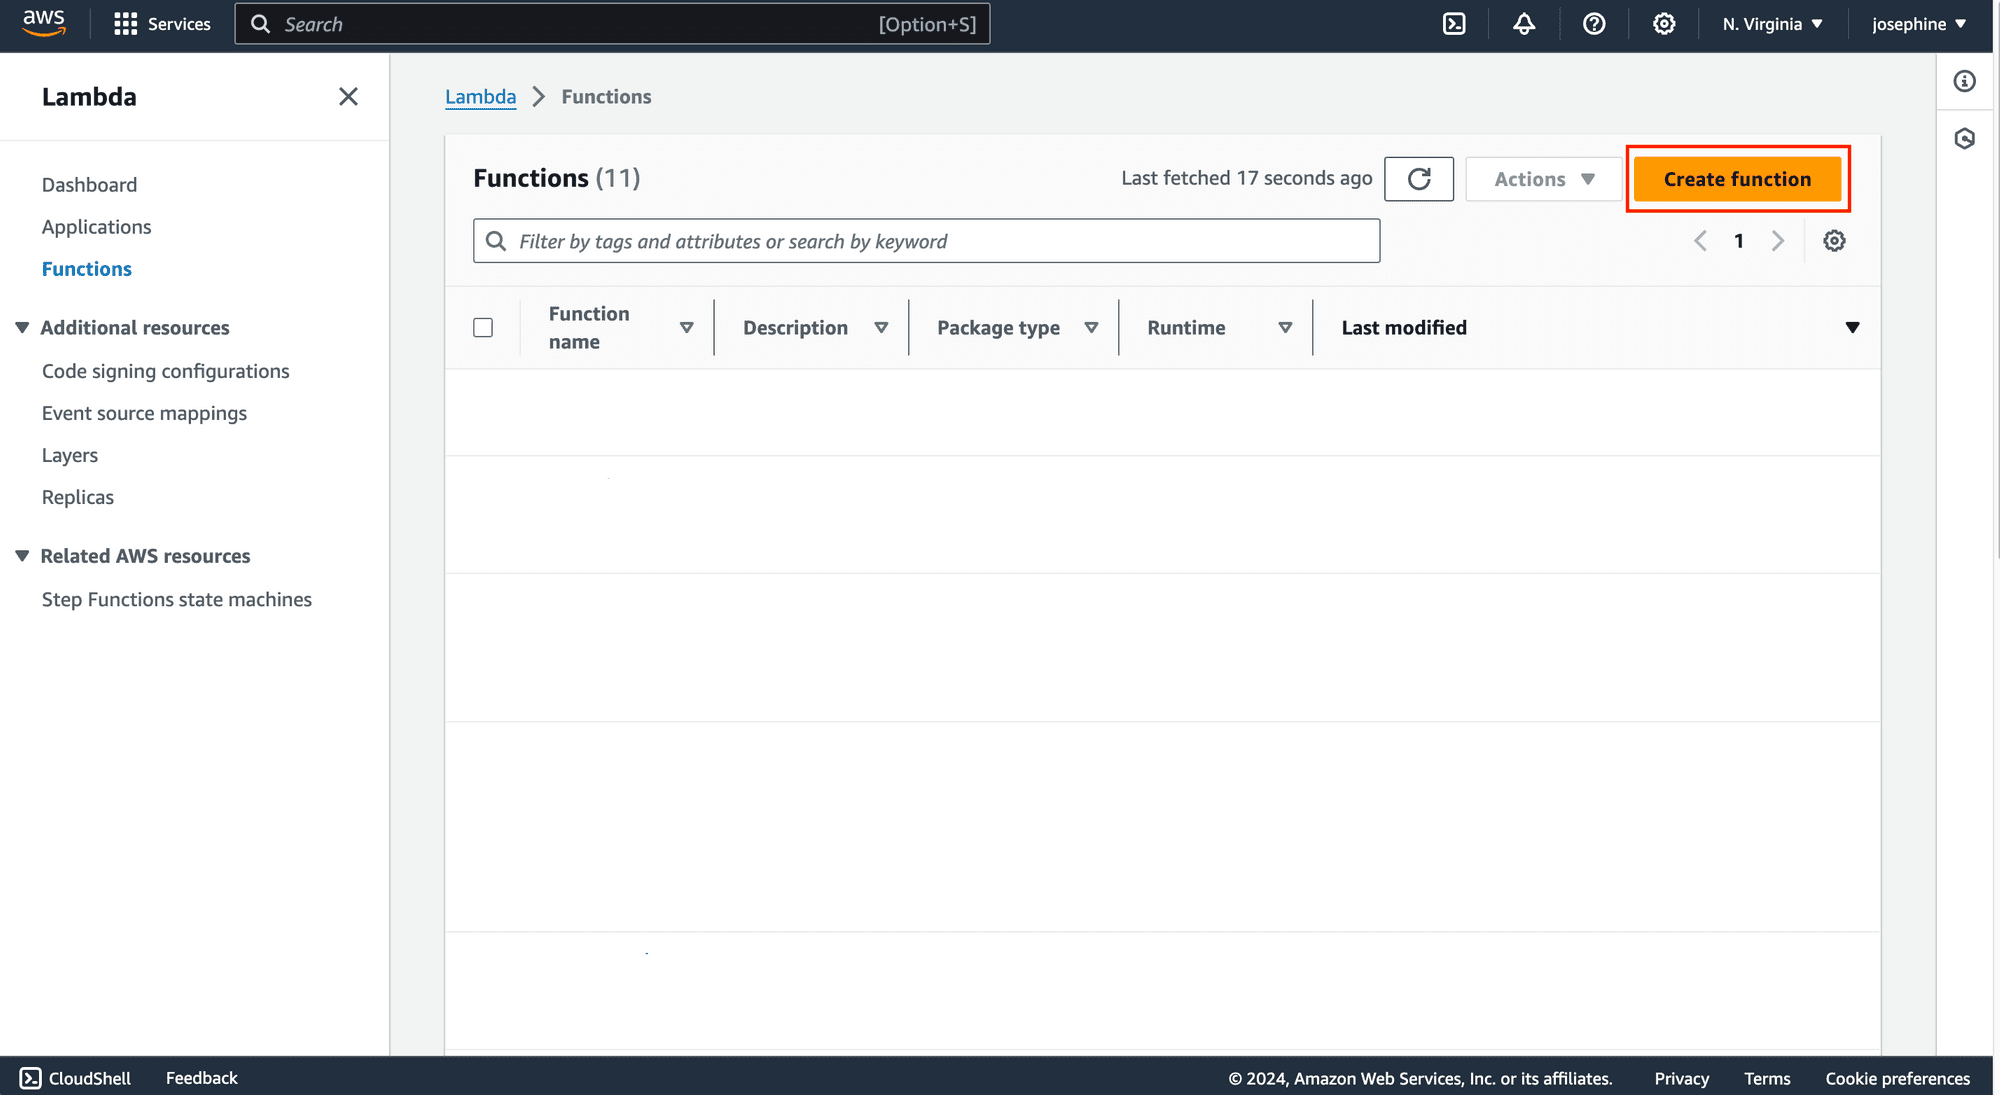
Step 1. Create a New Lambda Function
Log in to the AWS Management Console, navigate to the Lambda service, and create a new Lambda function:
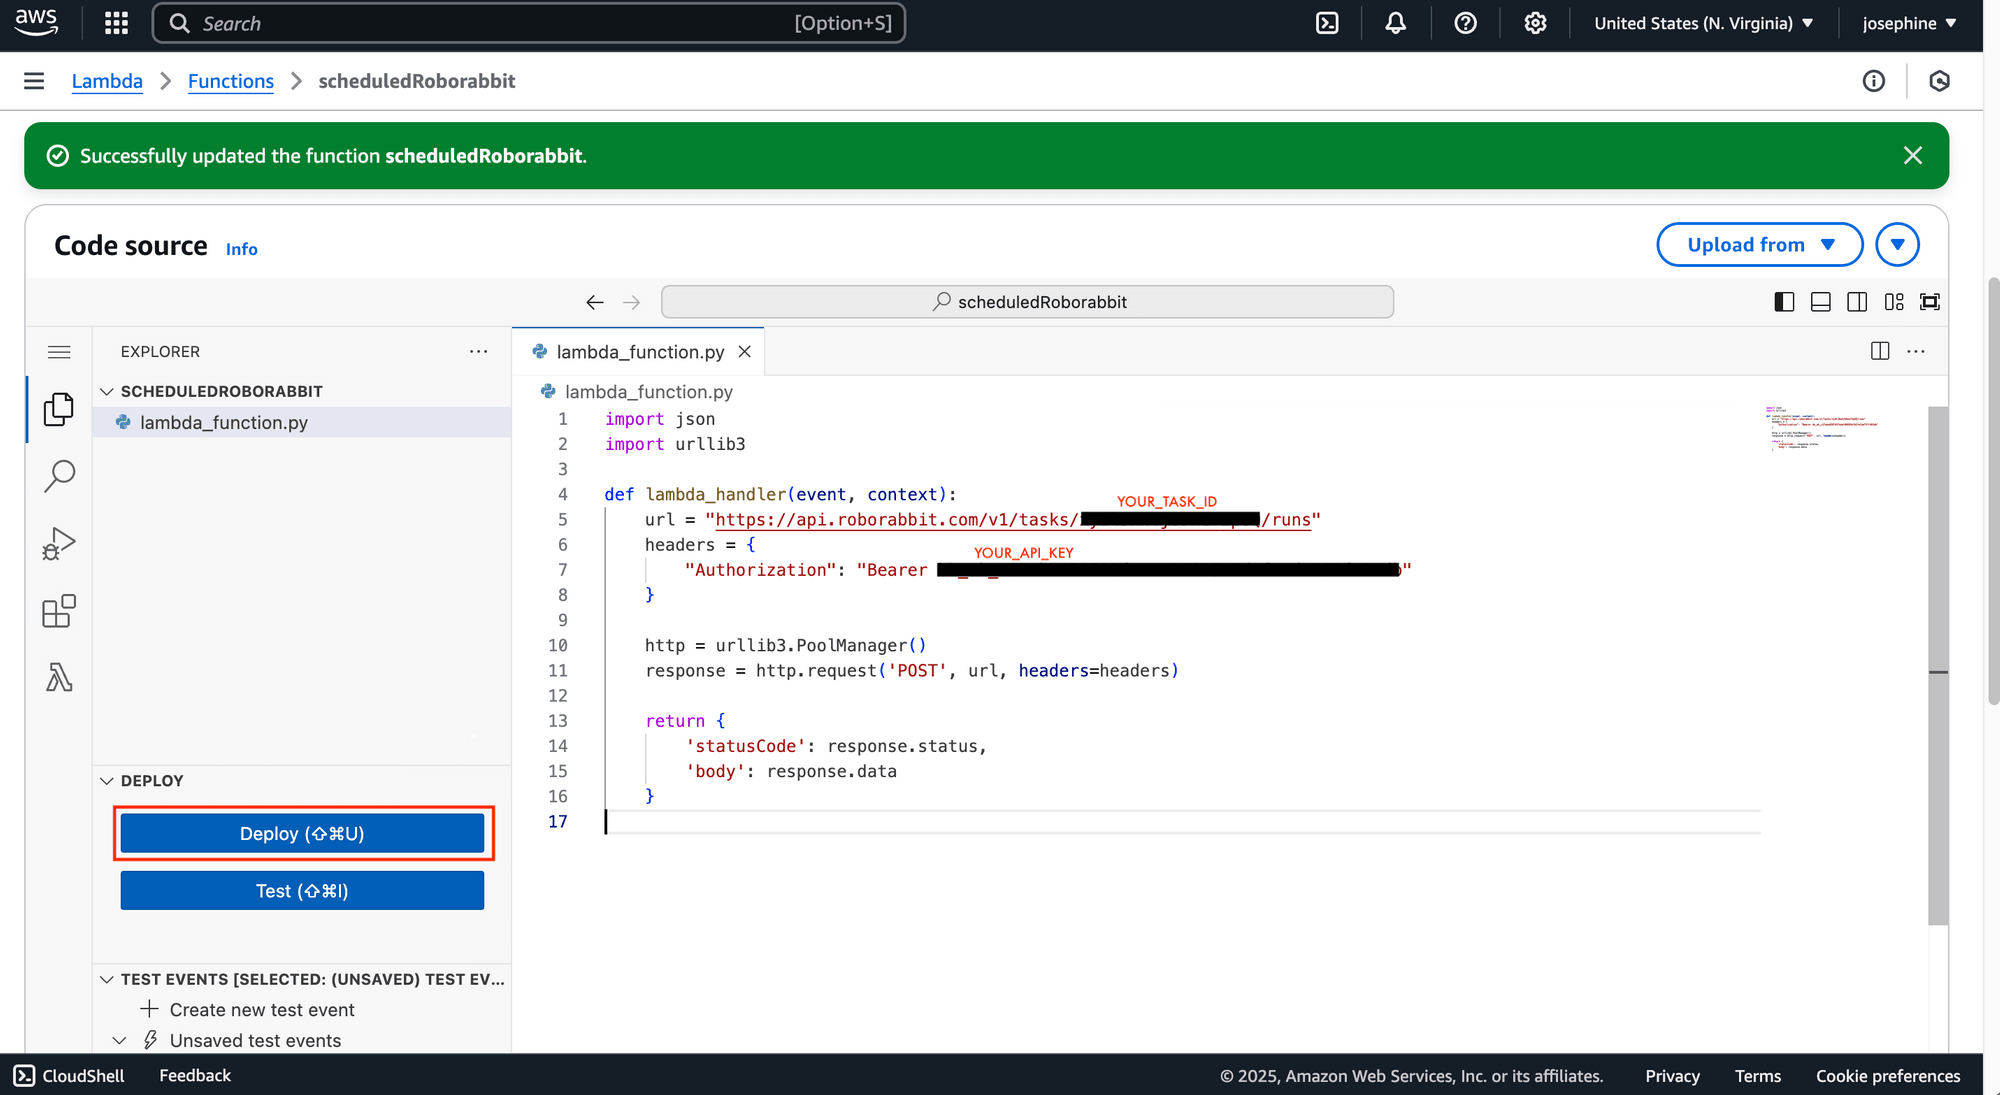
Step 2. Write a Script
Write a script in your preferred programming language to send a request to Roborabbit’s API to trigger the web scraping task. Once done, click "Deploy" to complete the setup:
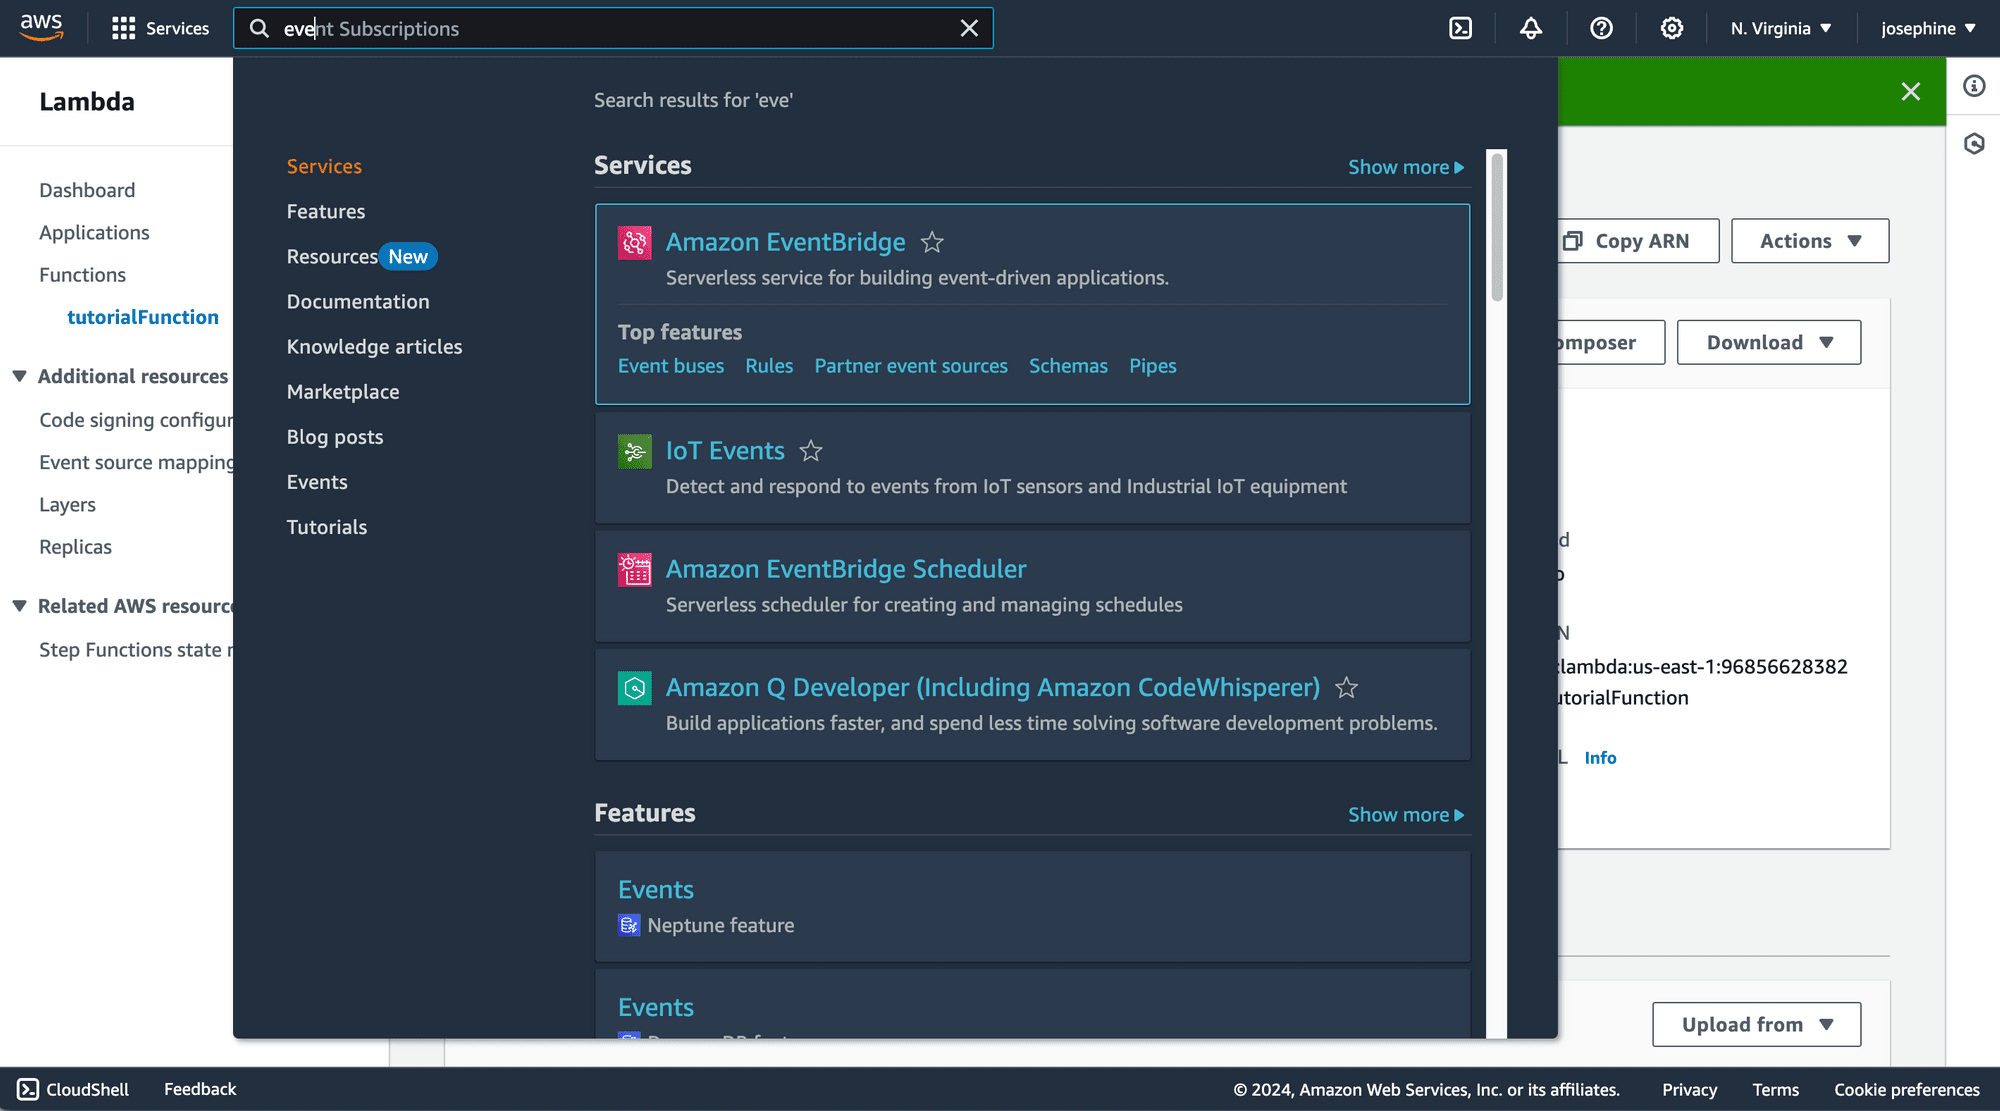
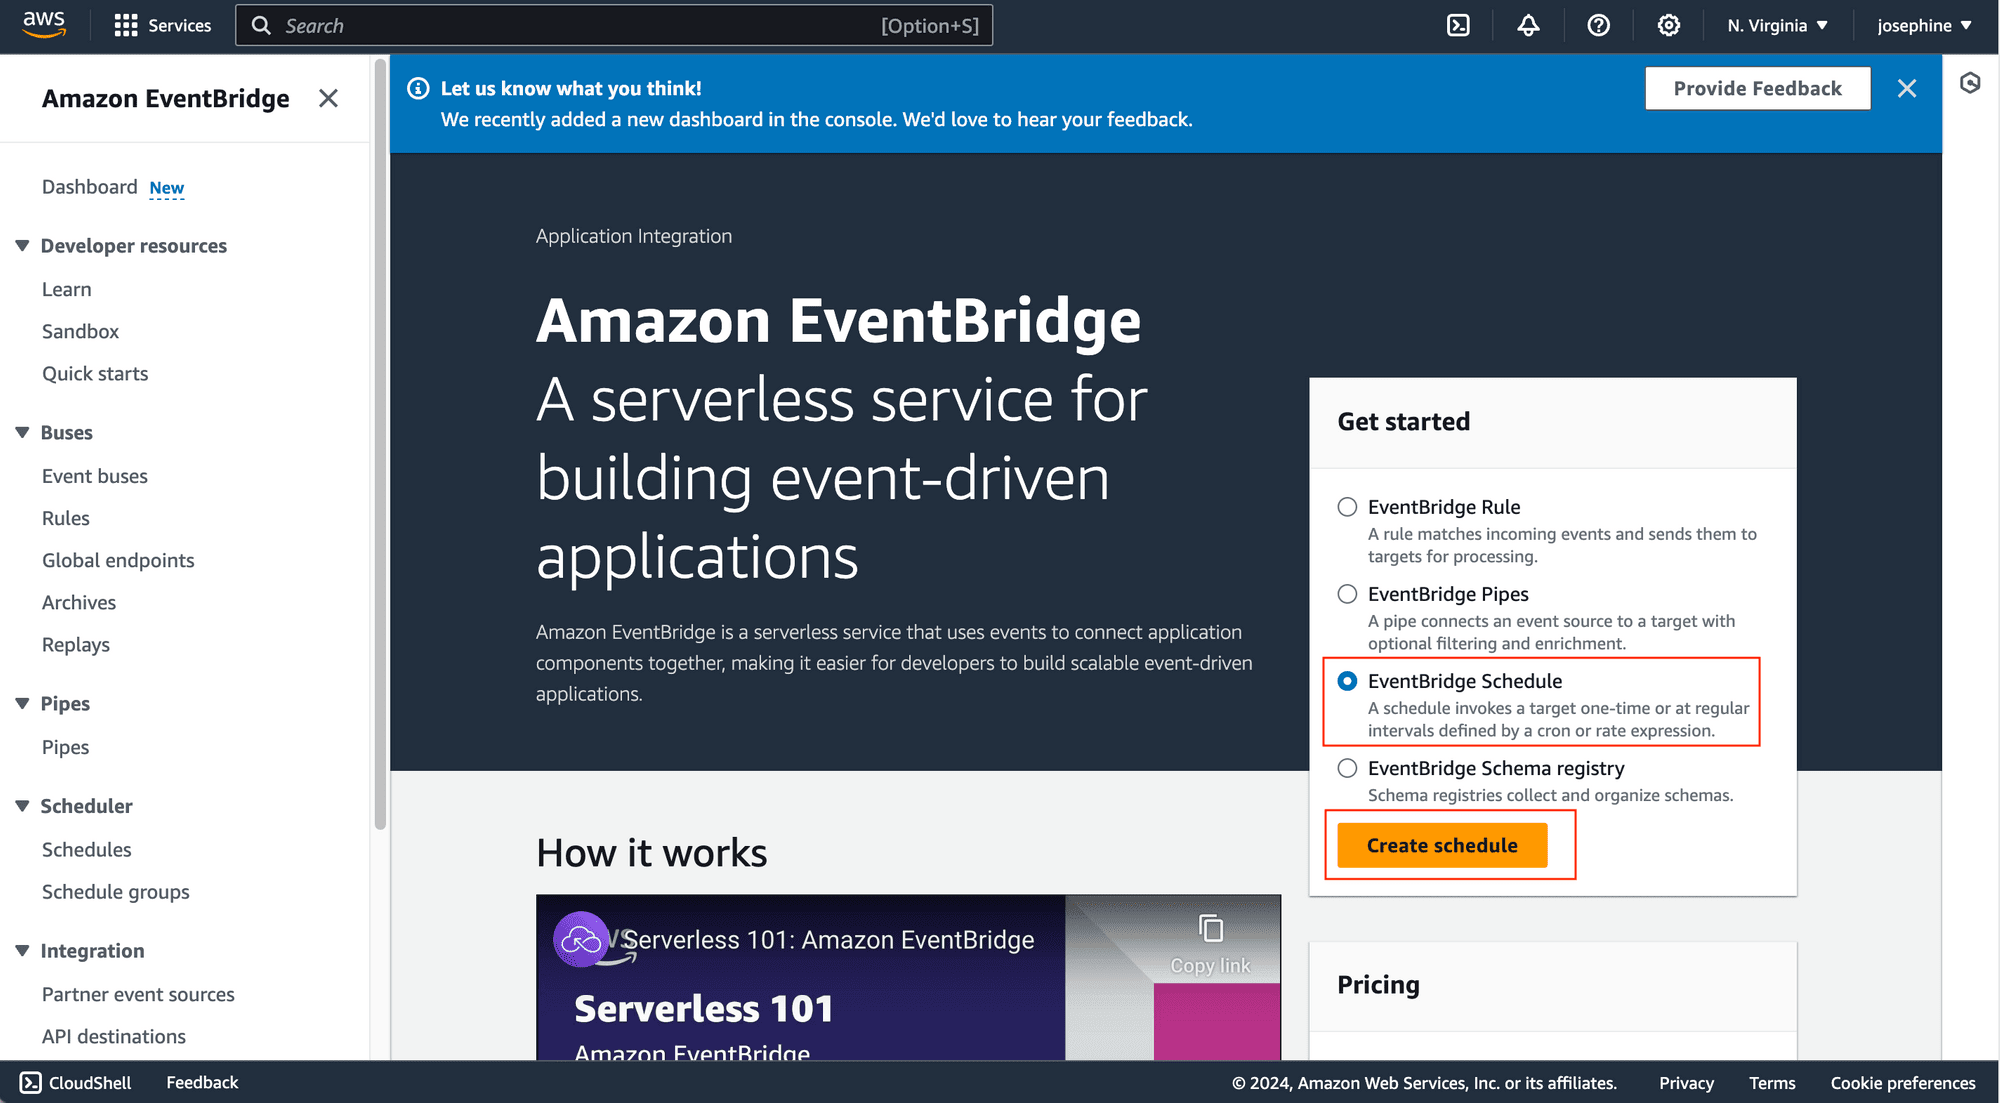
Step 3. Create an EventBridge Schedule
Navigate to Amazon EventBridge and create a new EventBridge Schedule:
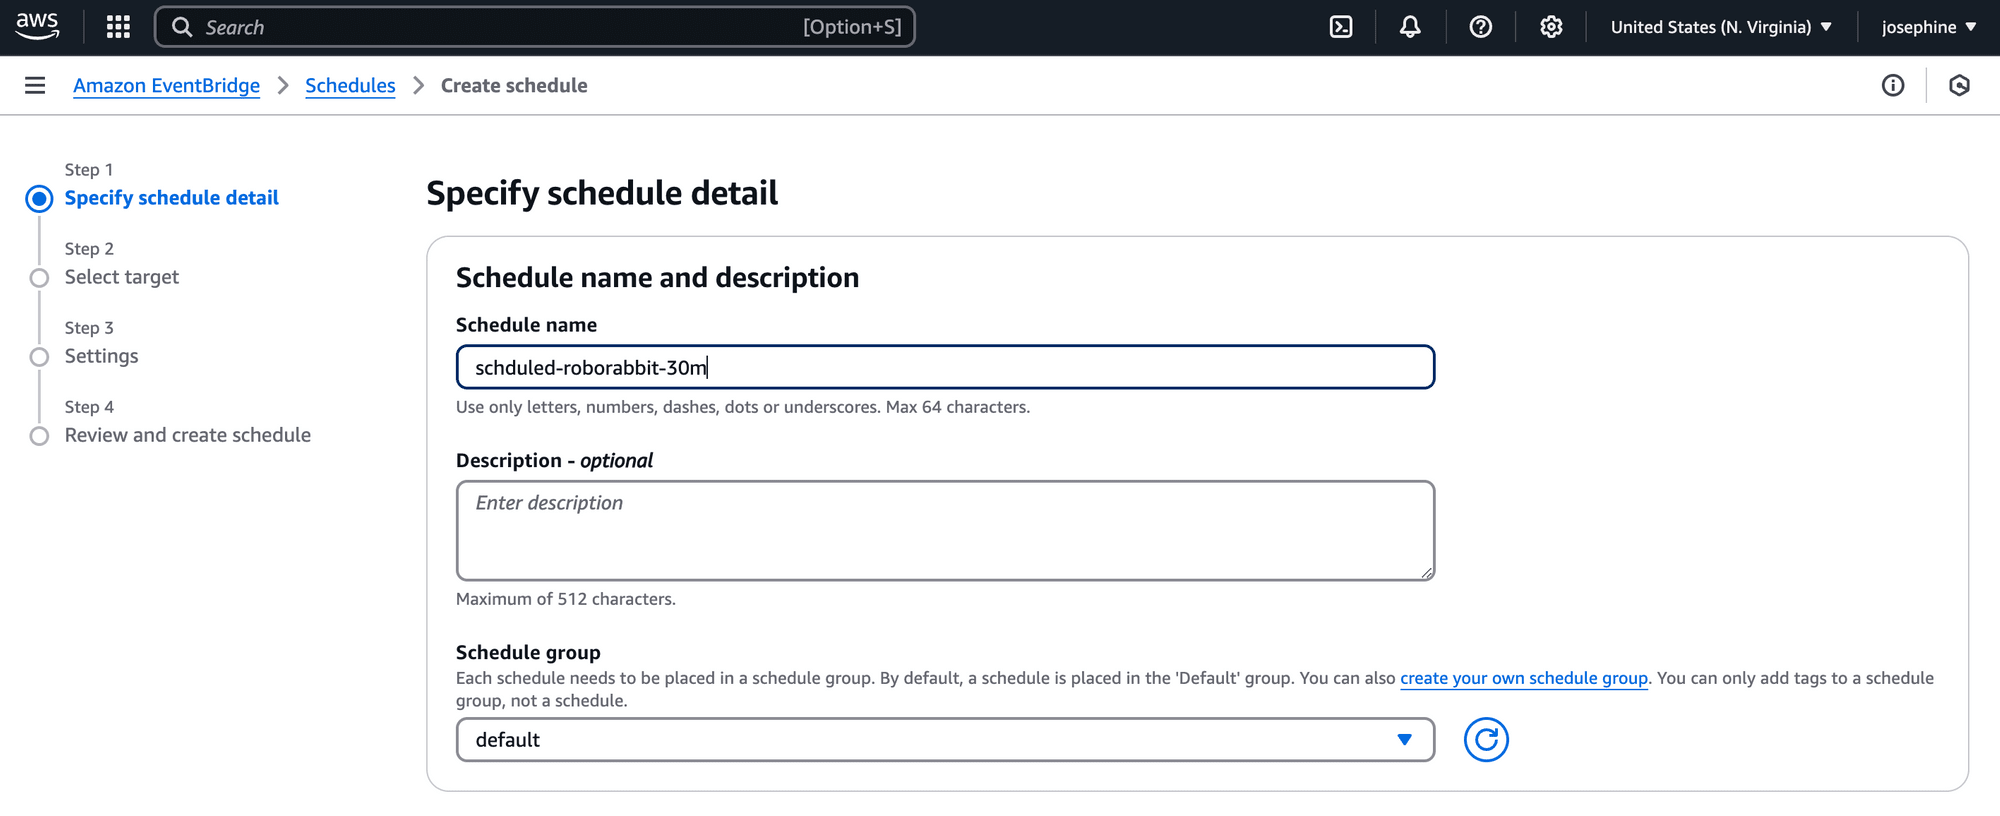
Step 4. Specify the Schedule Detail
Set up the details of your schedule, including the name and the frequency (e.g., every 30 minutes):
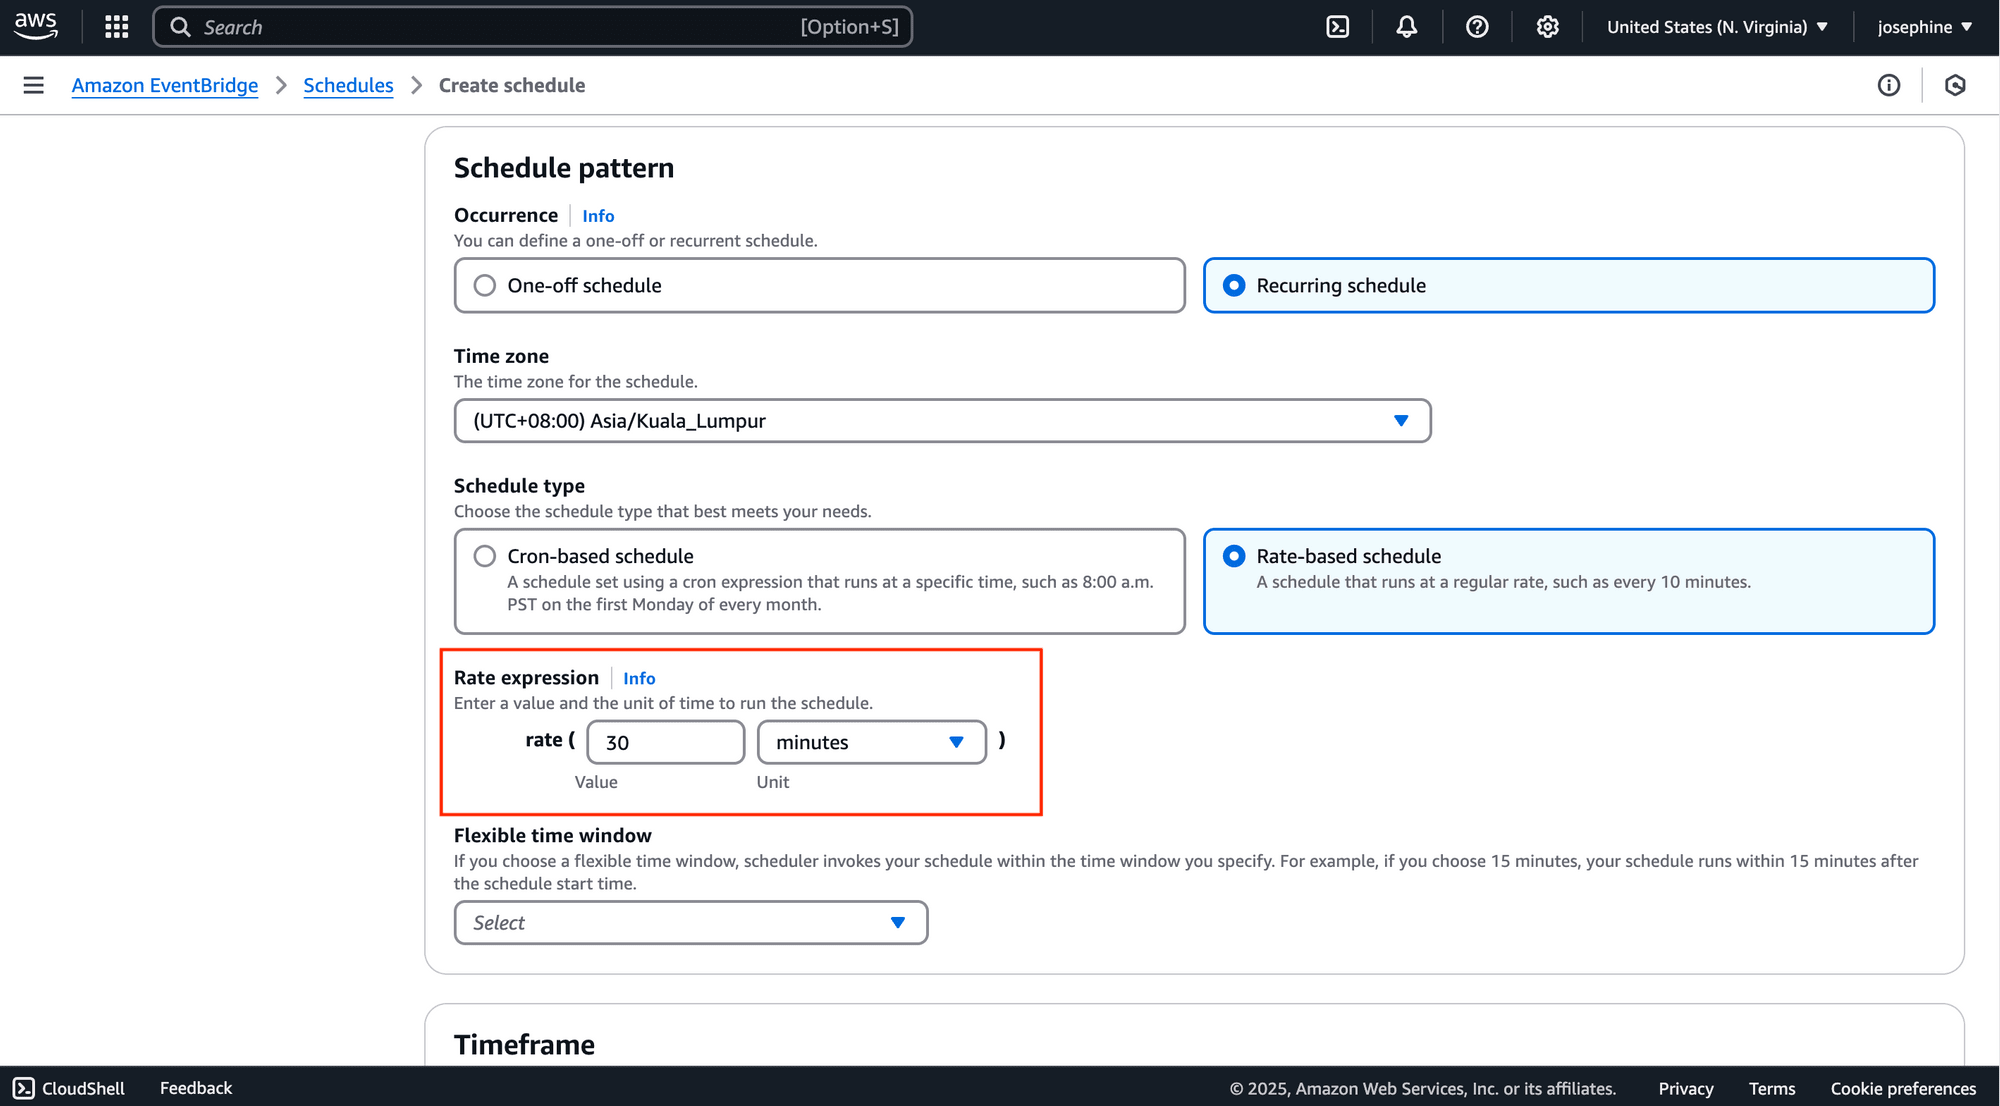
Amazon EventBridge allows you to use the cron-based and rate-based expressions to schedule the function. The example above uses the fixed-based expression rate(30 minutes) to run the schedule every 30 minutes.
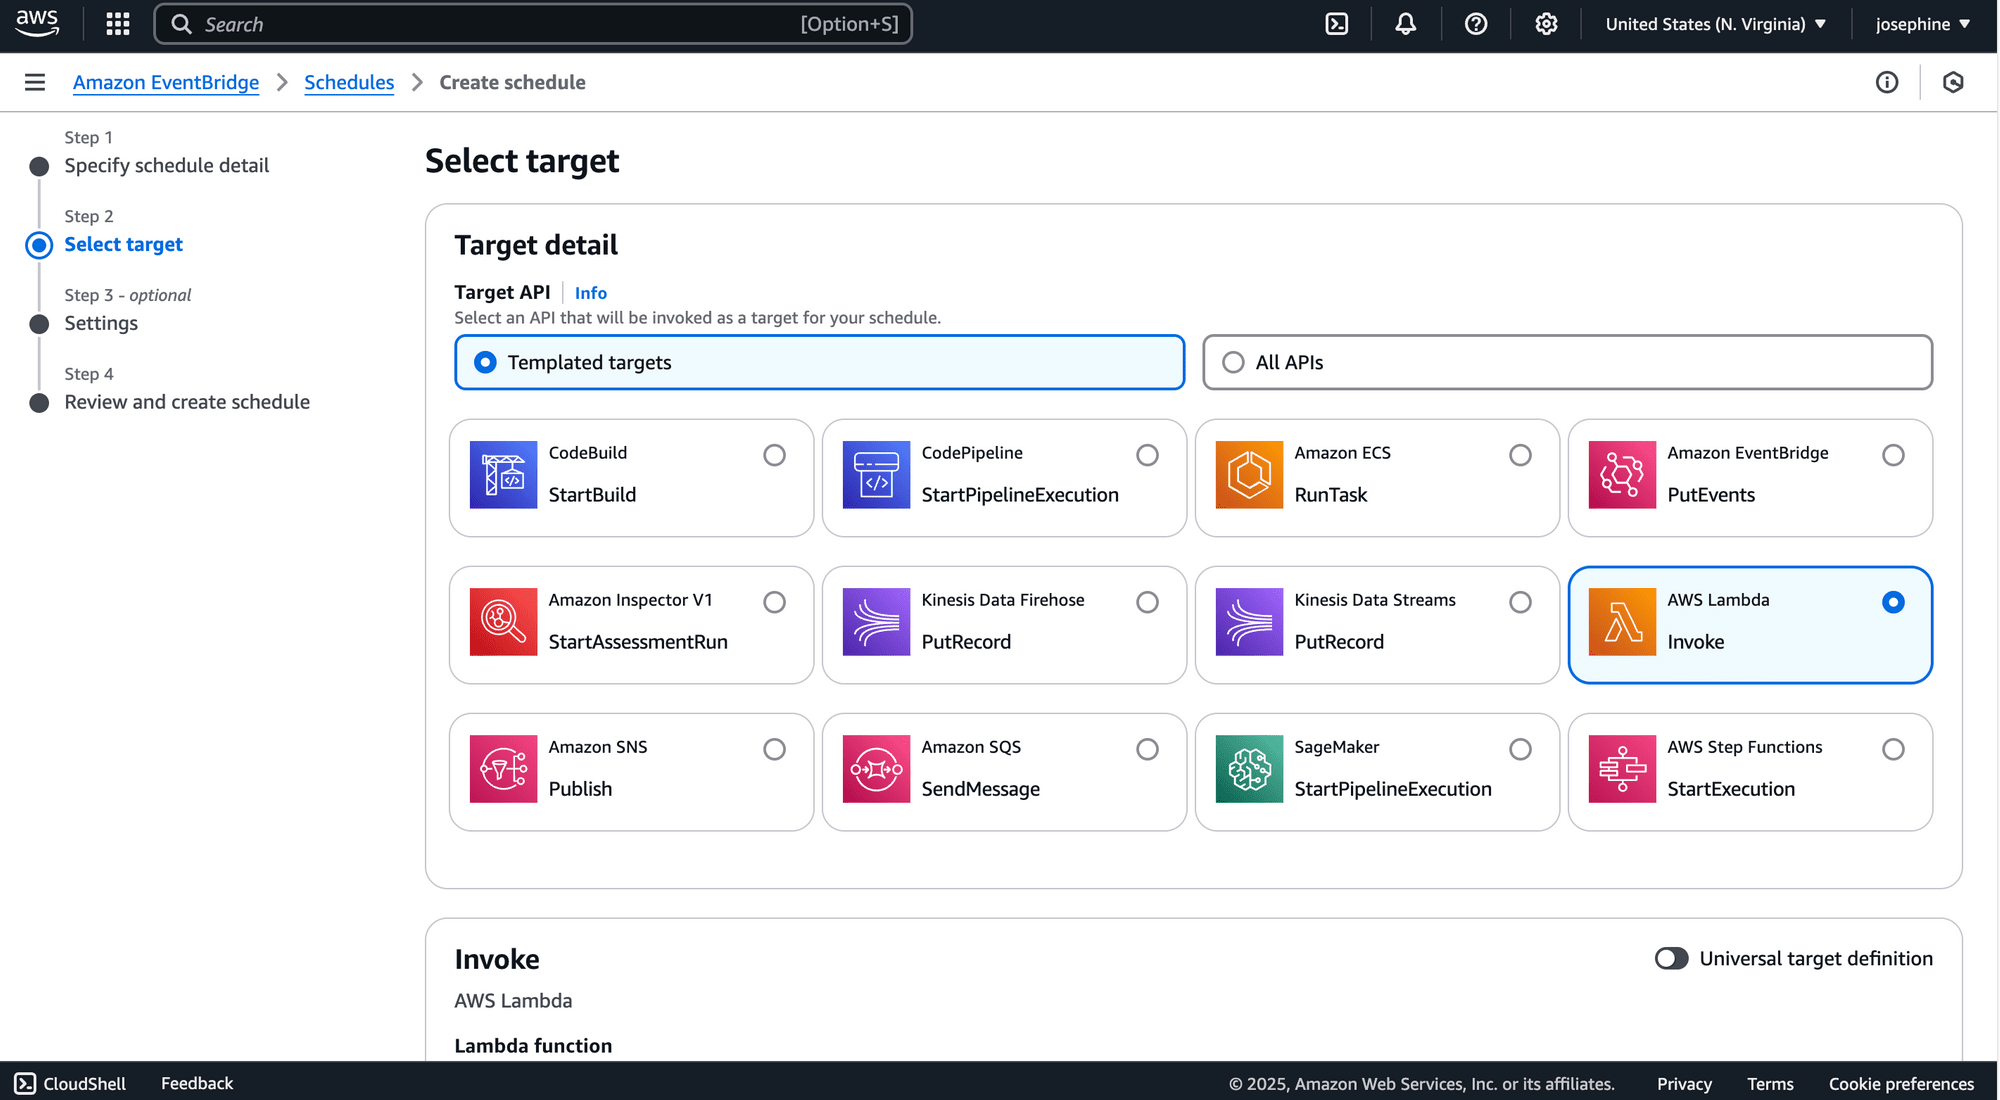
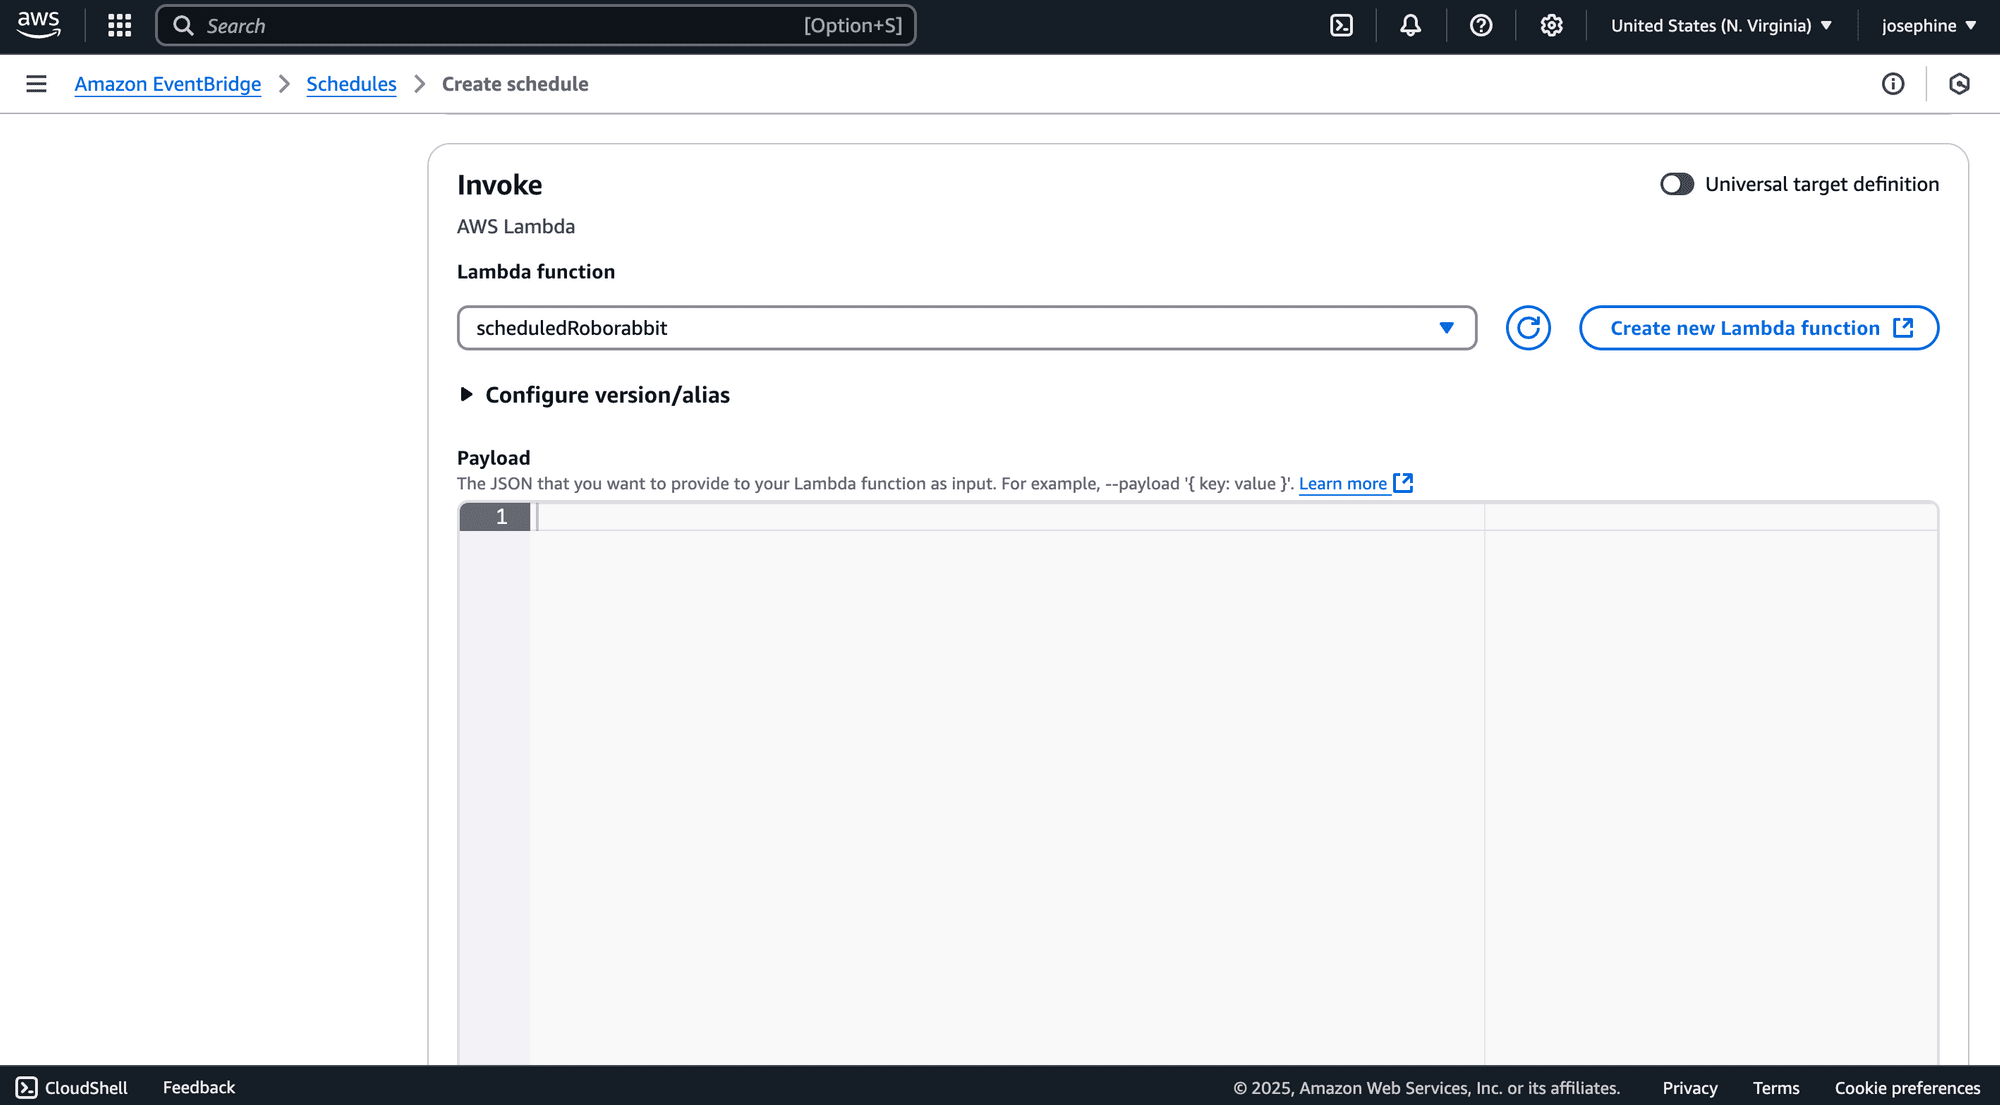
Step 5. Select Your AWS Lambda Function
Finally, select AWS Lambda as the invoke target and choose your Lambda function:
Click “Create Schedule” to complete the setup:

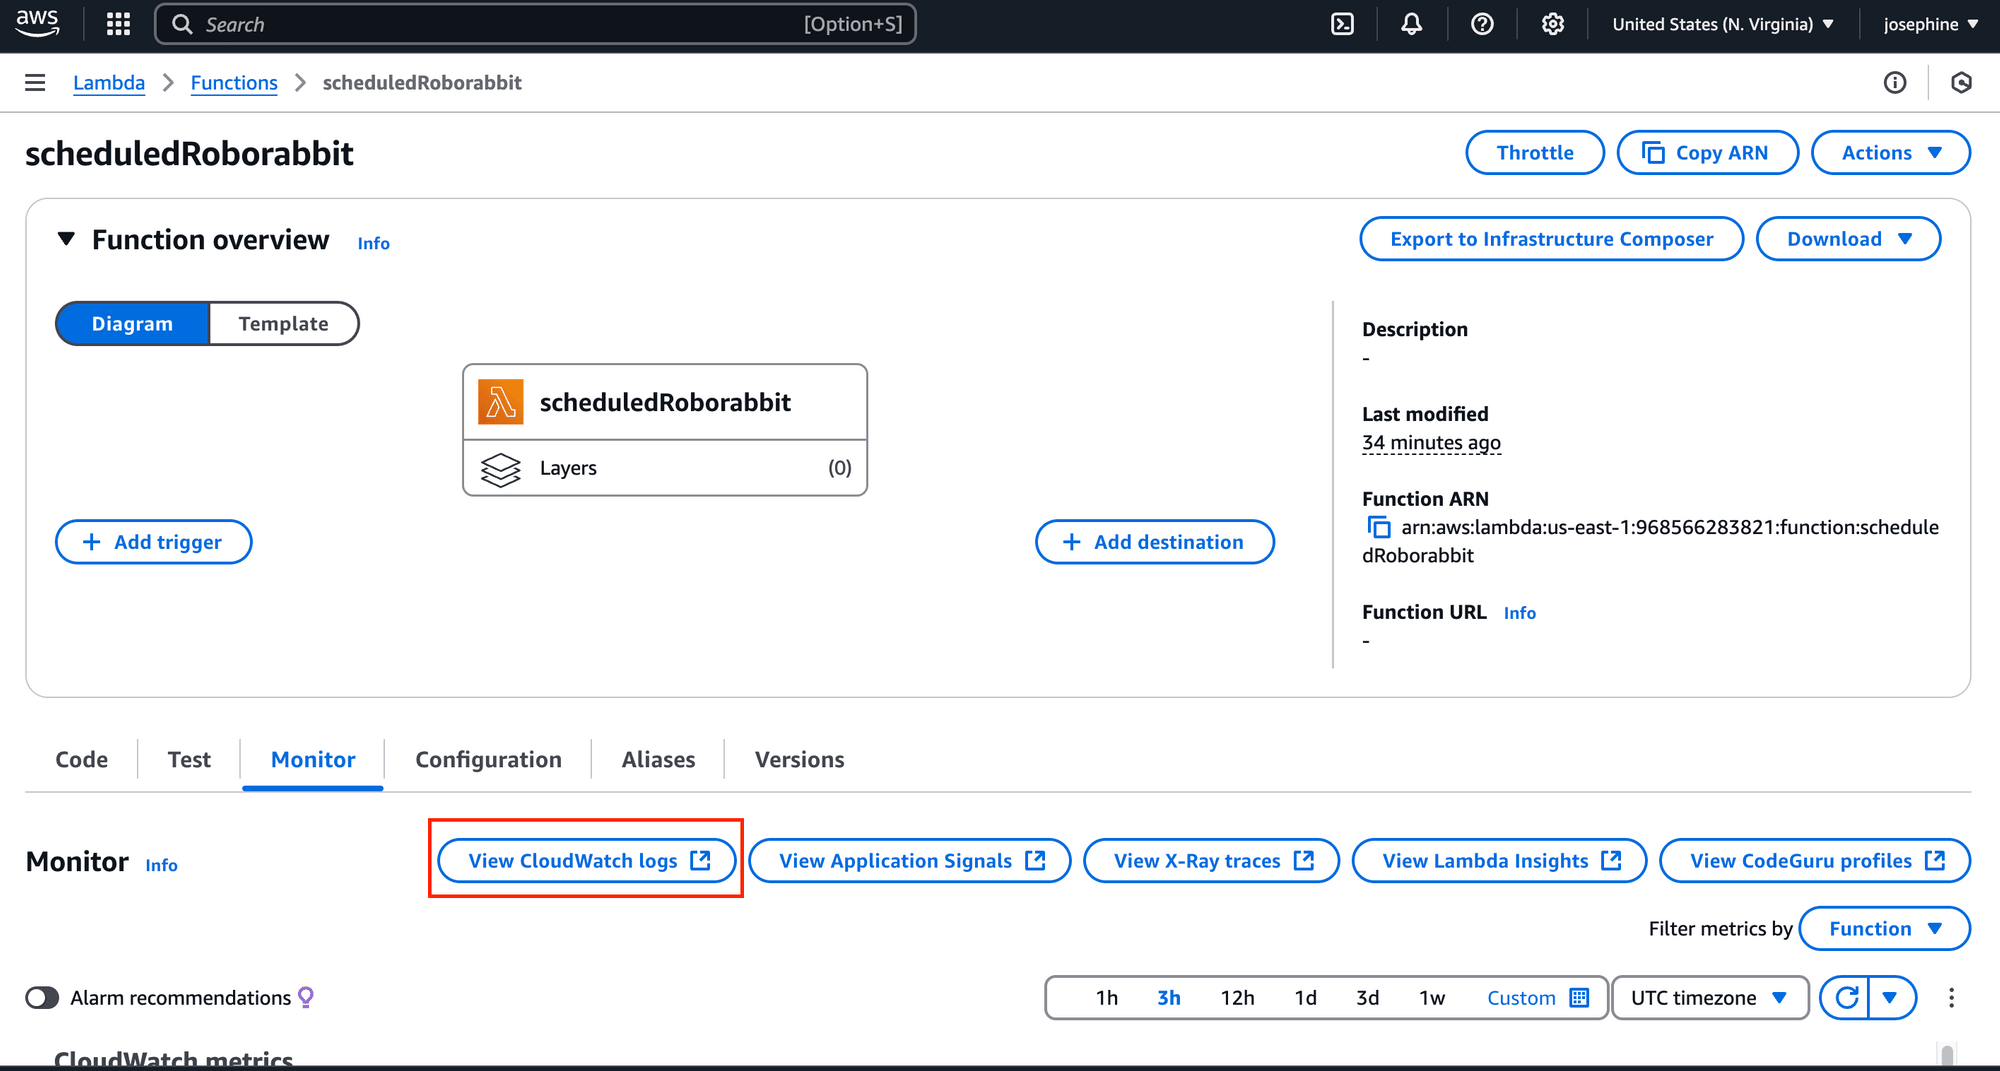
The Lambda function should be triggered as scheduled and you can monitor the logs to check the execution:
🐰 Hare Hint: If you’re not a coder and prefer a simpler solution, Zapier’s scheduling feature can trigger Roborabbit’s API on a schedule too!
Tips for Efficient Scheduled Web Scraping
Now that you know how to schedule web scraping with Roborabbit, it’s important to keep your tasks running smoothly and reliably. If not managed well, scraping can put unnecessary load on servers, lead to IP bans, or result in incomplete data.
To avoid these problems, here are some tips to follow:
- Respect robots.txt and website policies - Before scraping a website, always check its
robots.txtfile and terms of service to see if scraping is allowed. - Set an appropriate scraping frequency - Scraping too often can overload a website and get your IP banned. Set a reasonable interval for scraping, like every few hours or once a day to avoid this problem.
- Use proxies and user agents - To avoid getting blocked from making repetitive requests, rotate user agents and use proxies if needed. Roborabbit handles this well with its built-in proxy, but you can also use a custom proxy from other proxy providers.
- Monitor and handle failures - Make sure to implement error handling in your automation scripts to retry failed requests and use notifications to alert you when something goes wrong.
By following these tips, you can ensure your scheduled web scraping runs smoothly and avoid any potential issues.
Conclusion
In this guide, we’ve covered how to schedule web scraping with Roborabbit and how to enhance the scheduling using tools like cron, AWS Lambda, and EventBridge. With scheduled web scraping, you can automatically collect data at any time interval, whether it’s every hour, daily, or weekly.
Scheduled scraping is especially helpful for tasks like price monitoring, lead generation, and market research, among others. By automating these processes, you not only save time but also keep your data collection consistent and up-to-date. If you haven’t yet, sign up for Roborabbit today and start scheduling your web scraping tasks!