How to Make a Discord Bot to Send Price Change Alerts Automatically
Contents
As of April 2024, Discord has over 200 million monthly active users worldwide. It has become popular among gamers, communities, and various interest groups due to its user-friendly interface and community-building features. Besides that, Discord offers extensive customization options. Users can personalize their servers with bots, roles, and permissions to create a tailored experience that suits the unique needs of different communities.
Among the popular public Discord bots are Carl-bot, MEE6, Dyno, and Pancake. If you seek complete control over the features and behavior, you can also build your own bot tailored to your server's specific requirements!
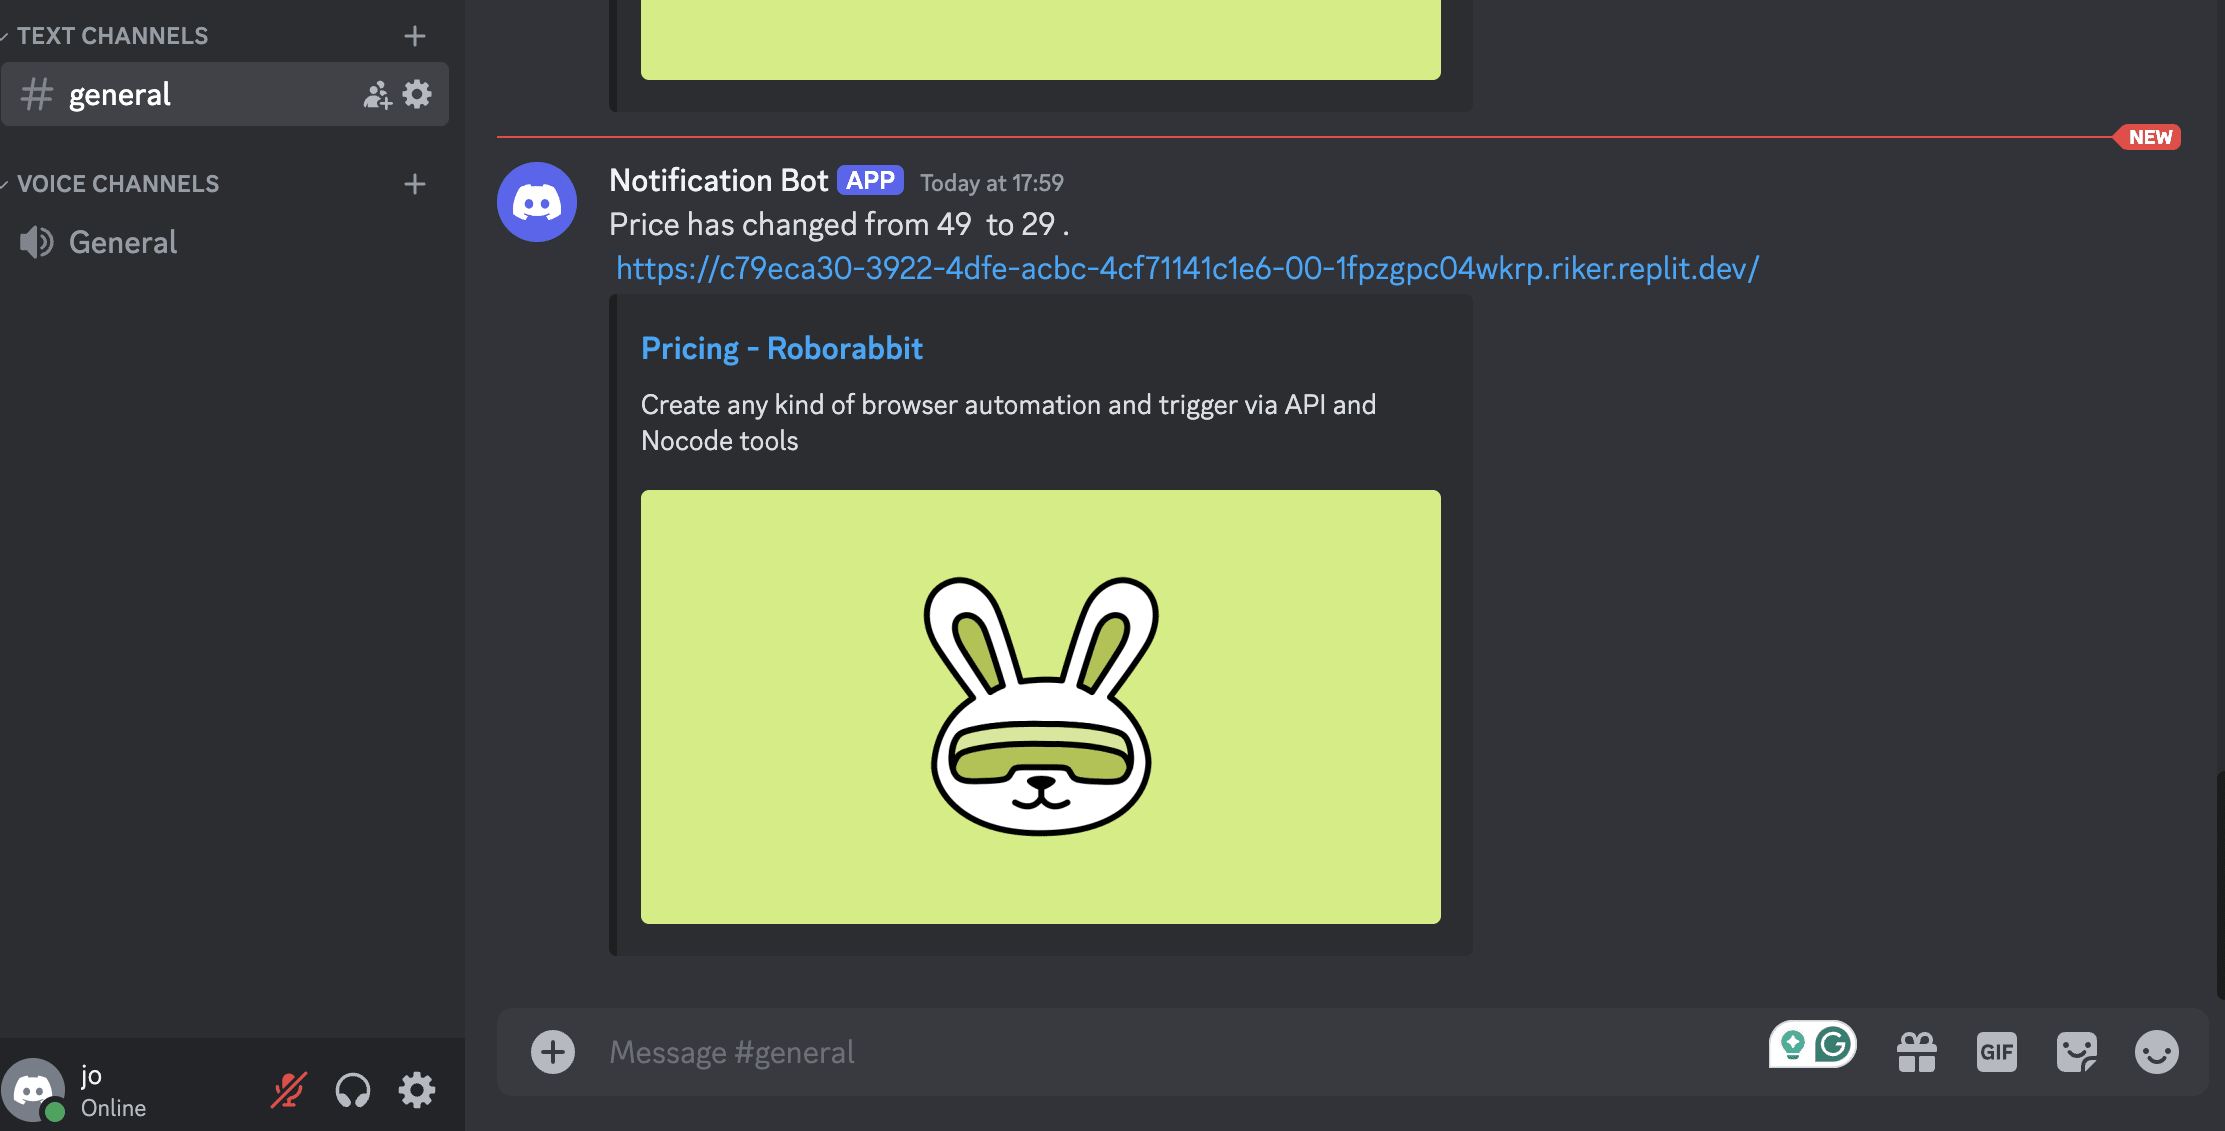
In this guide, we'll walk you through the steps of creating a Discord bot that sends alerts on website price updates. This can be especially useful for keeping yourself or your community informed about price changes on products, tracking deals, monitoring market trends, or any other scenario where real-time price alerts are critical. By the end of this guide, you’ll have a fully functional bot capable of notifying your server members whenever a price change occurs on your specified websites:
Prerequisites
Before we start, make sure you have the following:
- Discord account : You'll need a Discord server where your bot will operate.
- Roborabbit account: This will be used to check website prices. Follow this tutorial to create a Roborabbit task for monitoring price changes.
- Node.js and npm installed : We will use Node.js for coding our bot and npm for managing the packages.
How to Make a Discord Bot
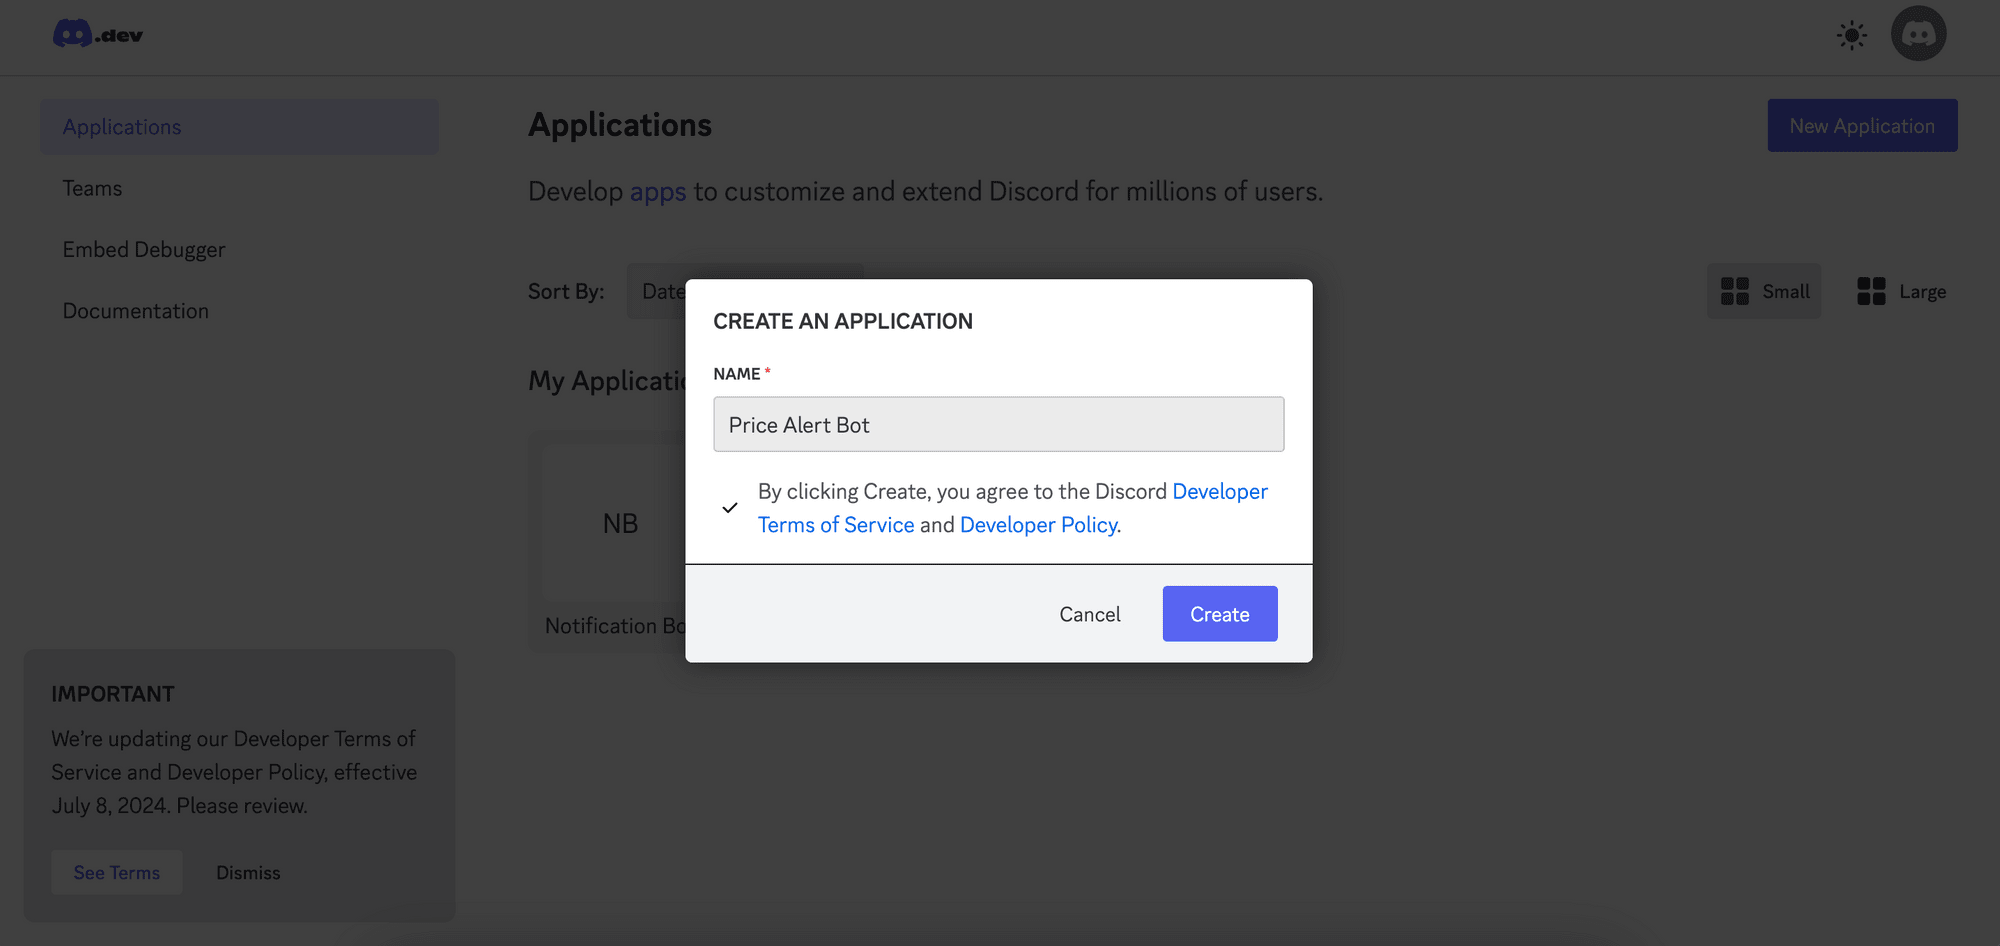
Step 1. Create a Discord Application
Navigate to Discord Developer Portal and create a new application:
Step 2. Create a Bot User
In your application settings, go to the “Bot” tab on the left-hand side and generate a token by clicking “Reset Token” :
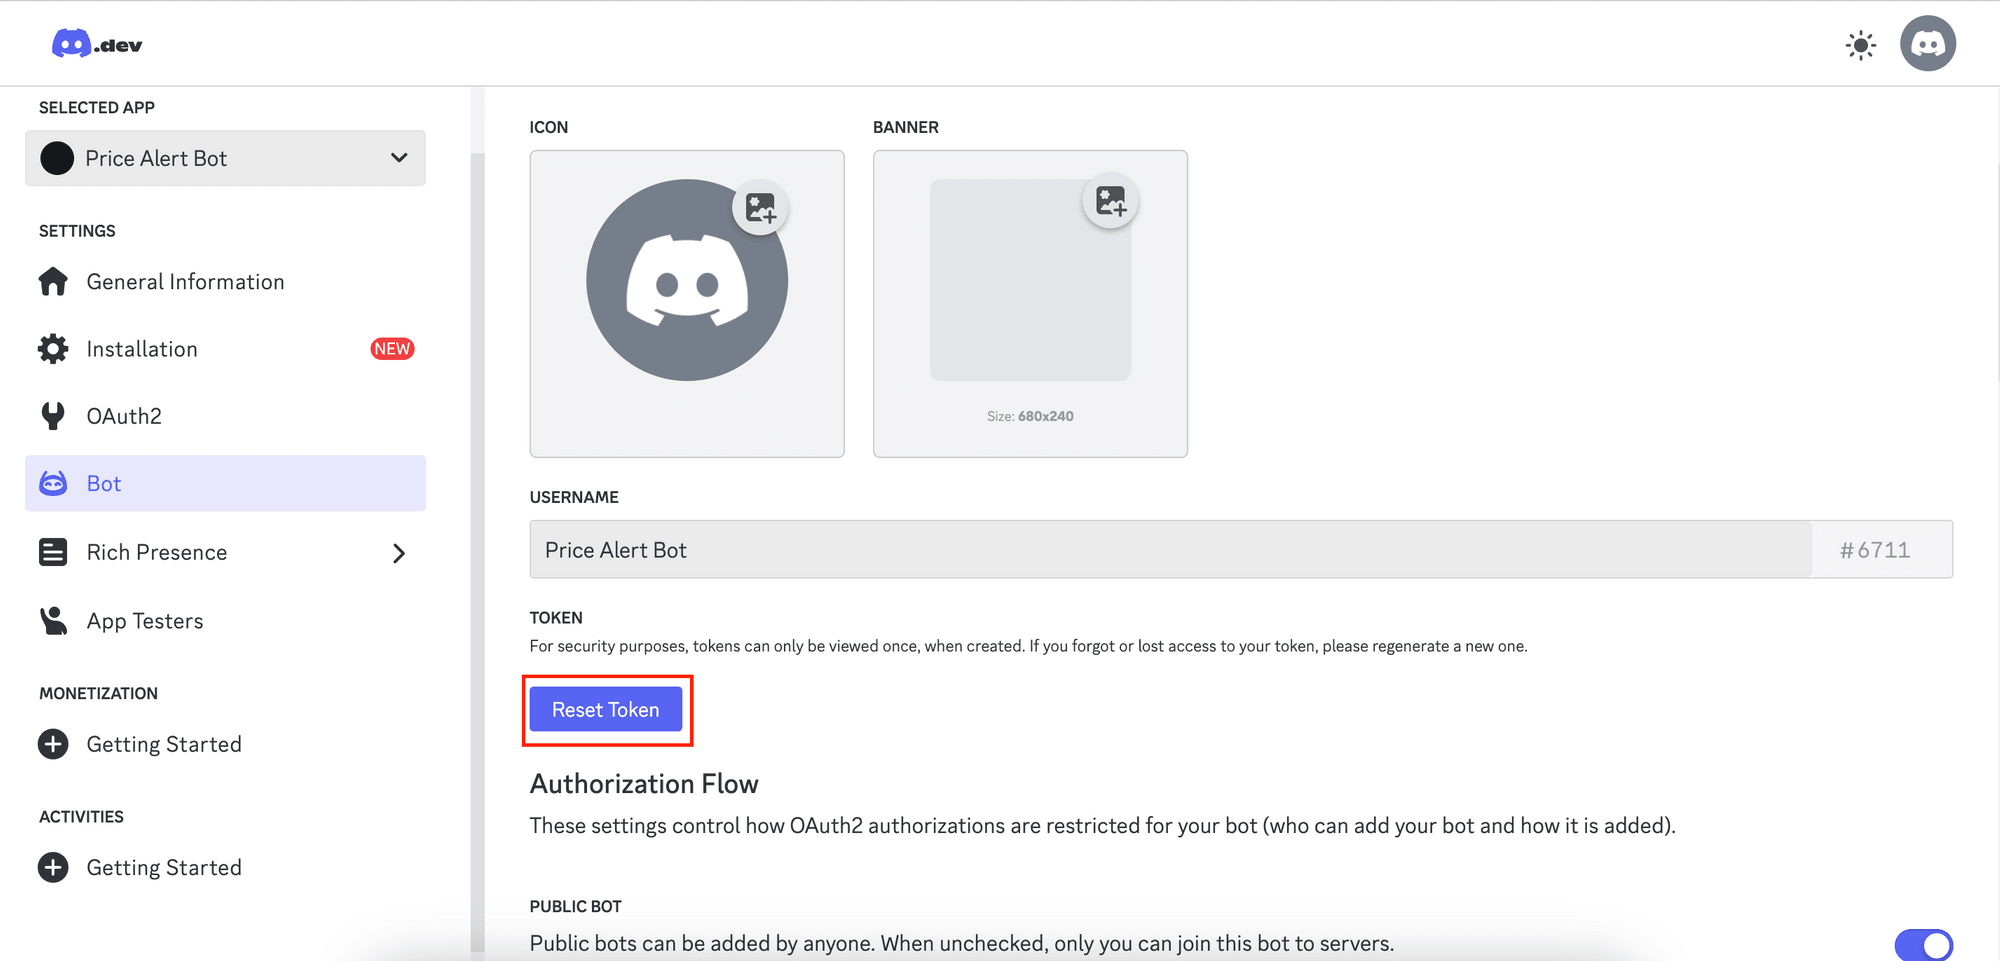
Follow the instructions on the screen until a new token is generated. Copy and save it somewhere safe:

Next, scroll down the page, enable Message Content Intent, and save the changes:
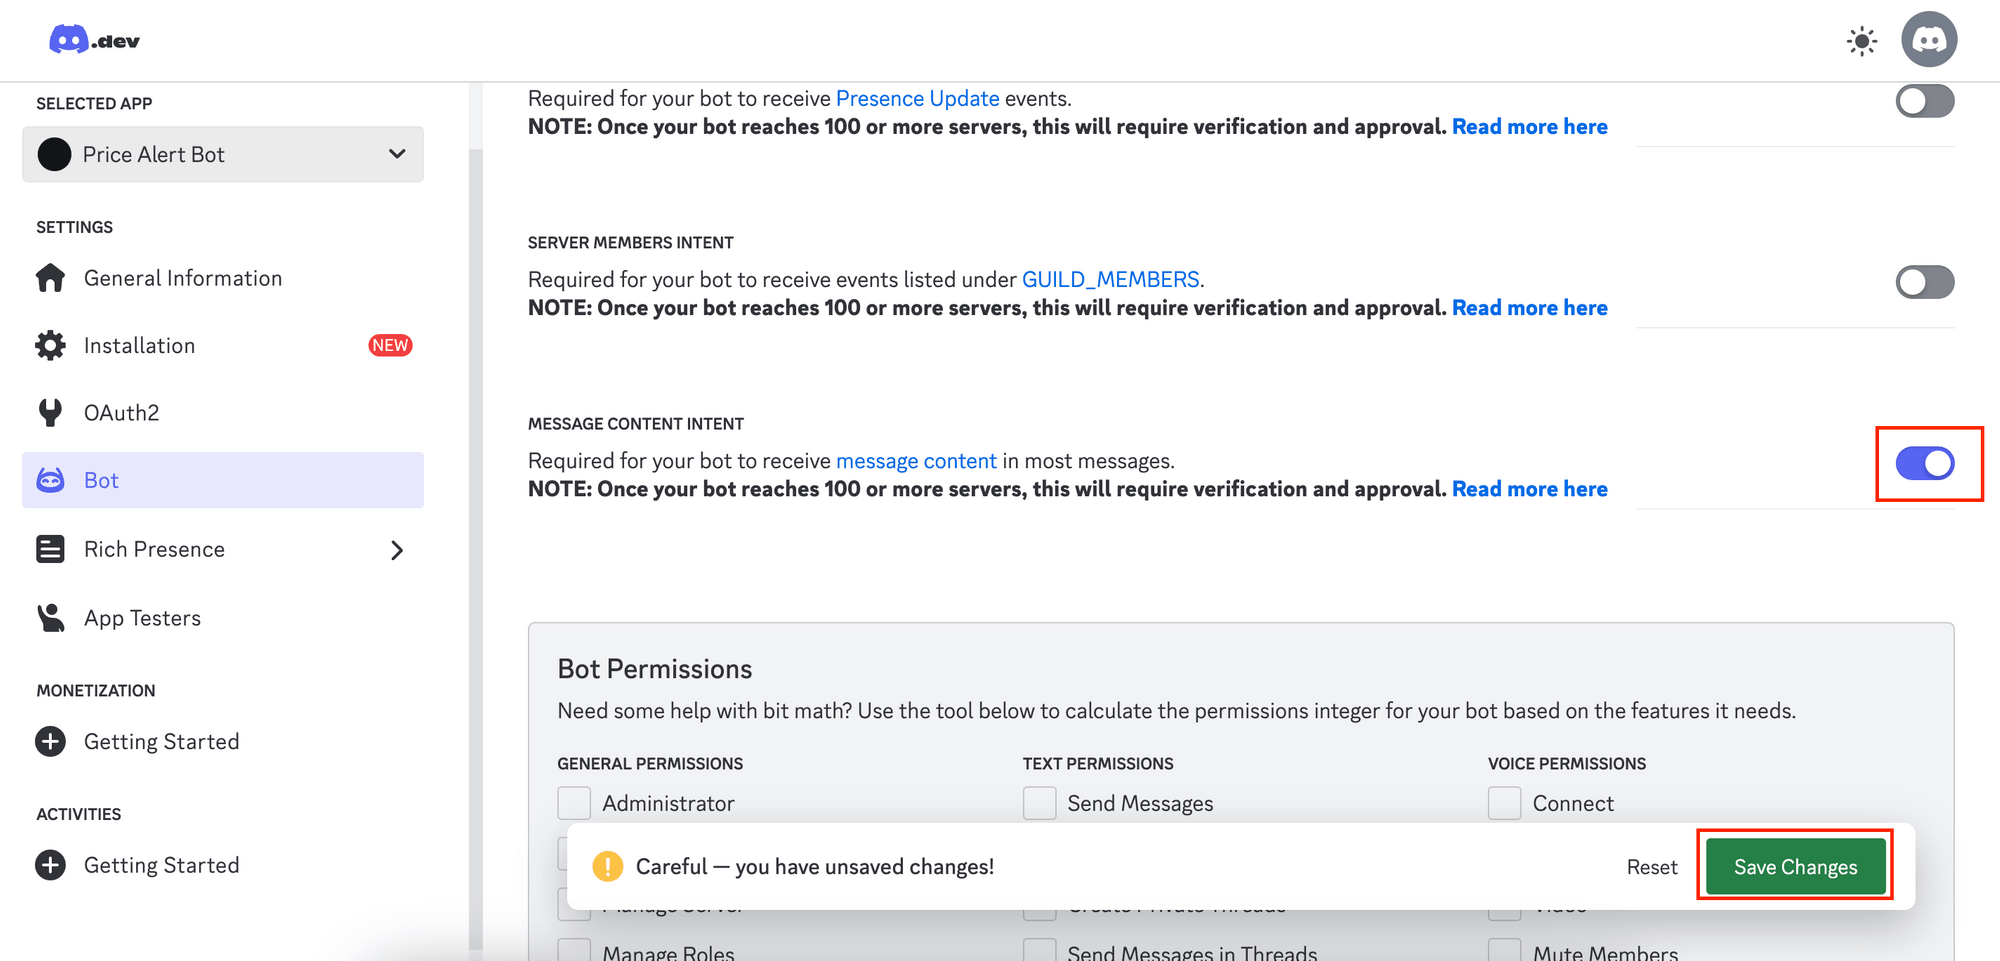
This enables the bot to receive message content that a user sends to the Discord server.
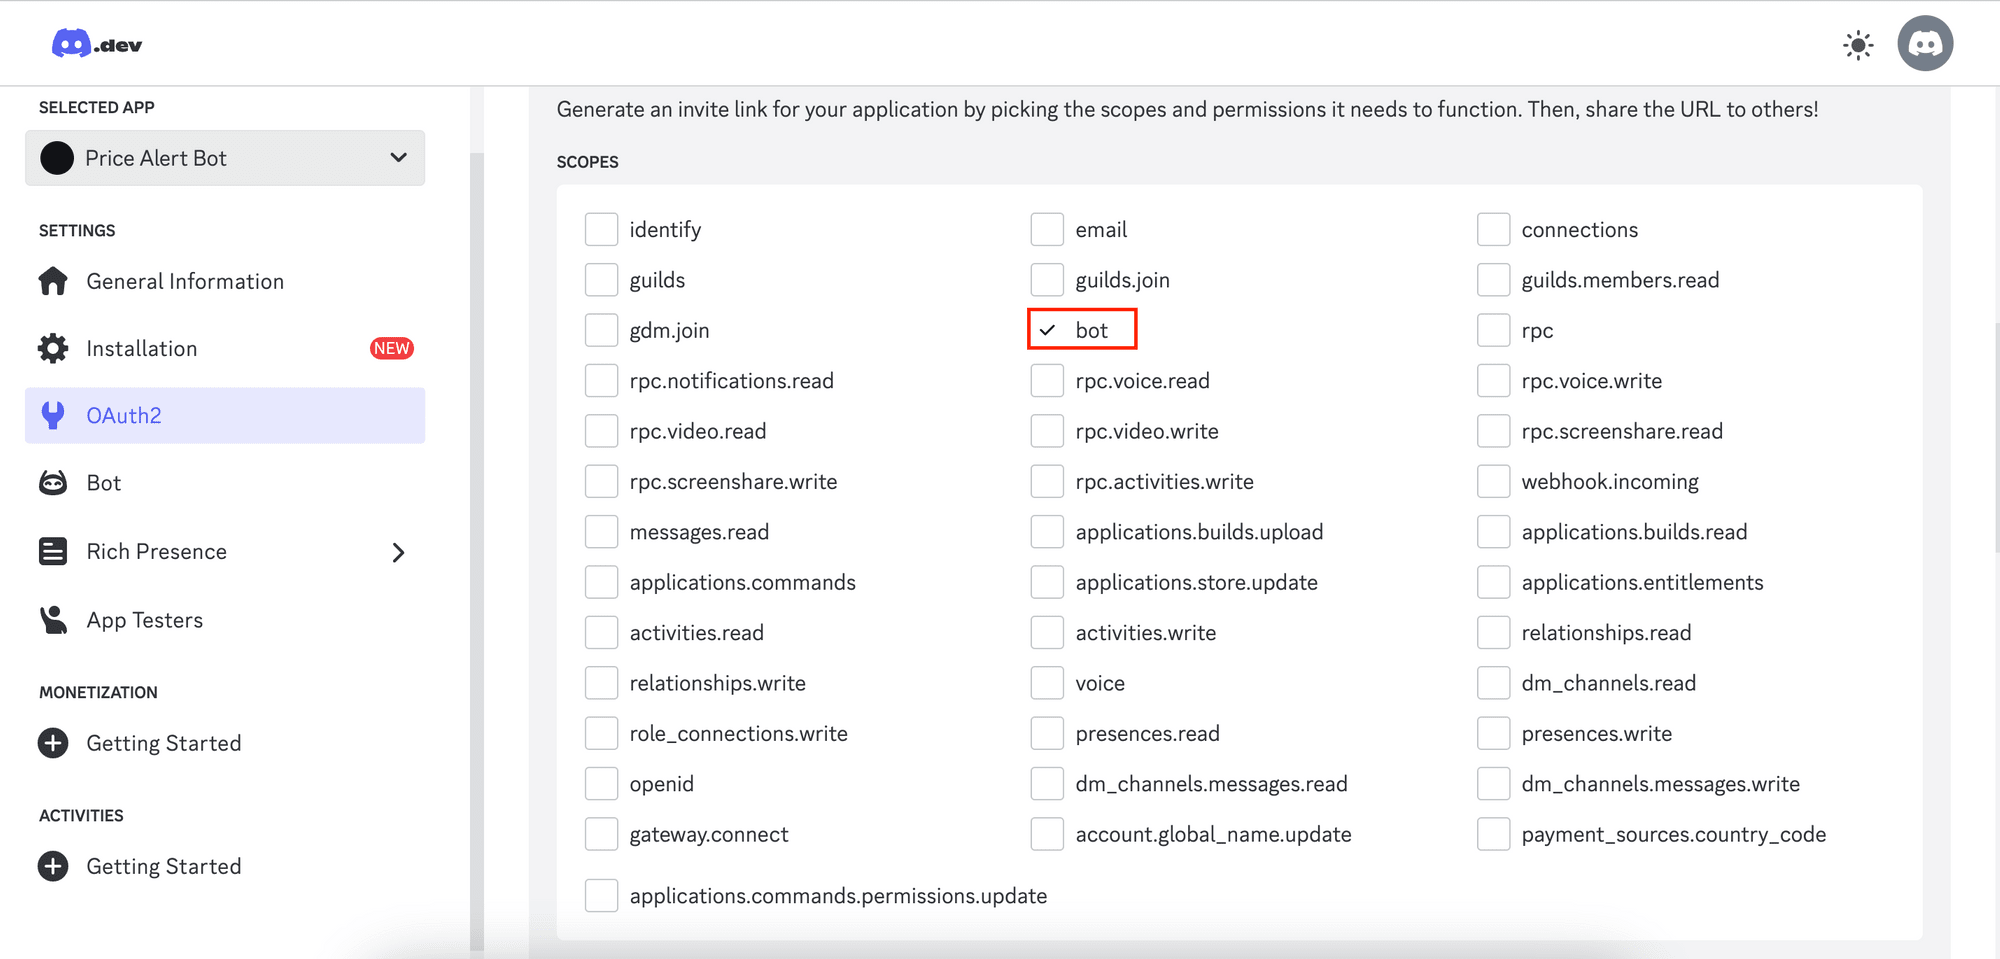
Step 3. Invite Your Bot to a Server
Navigate to the “OAuth2” tab and scroll down to the “ OAuth2 URL Generator” section. Under “Scopes” , select bot:
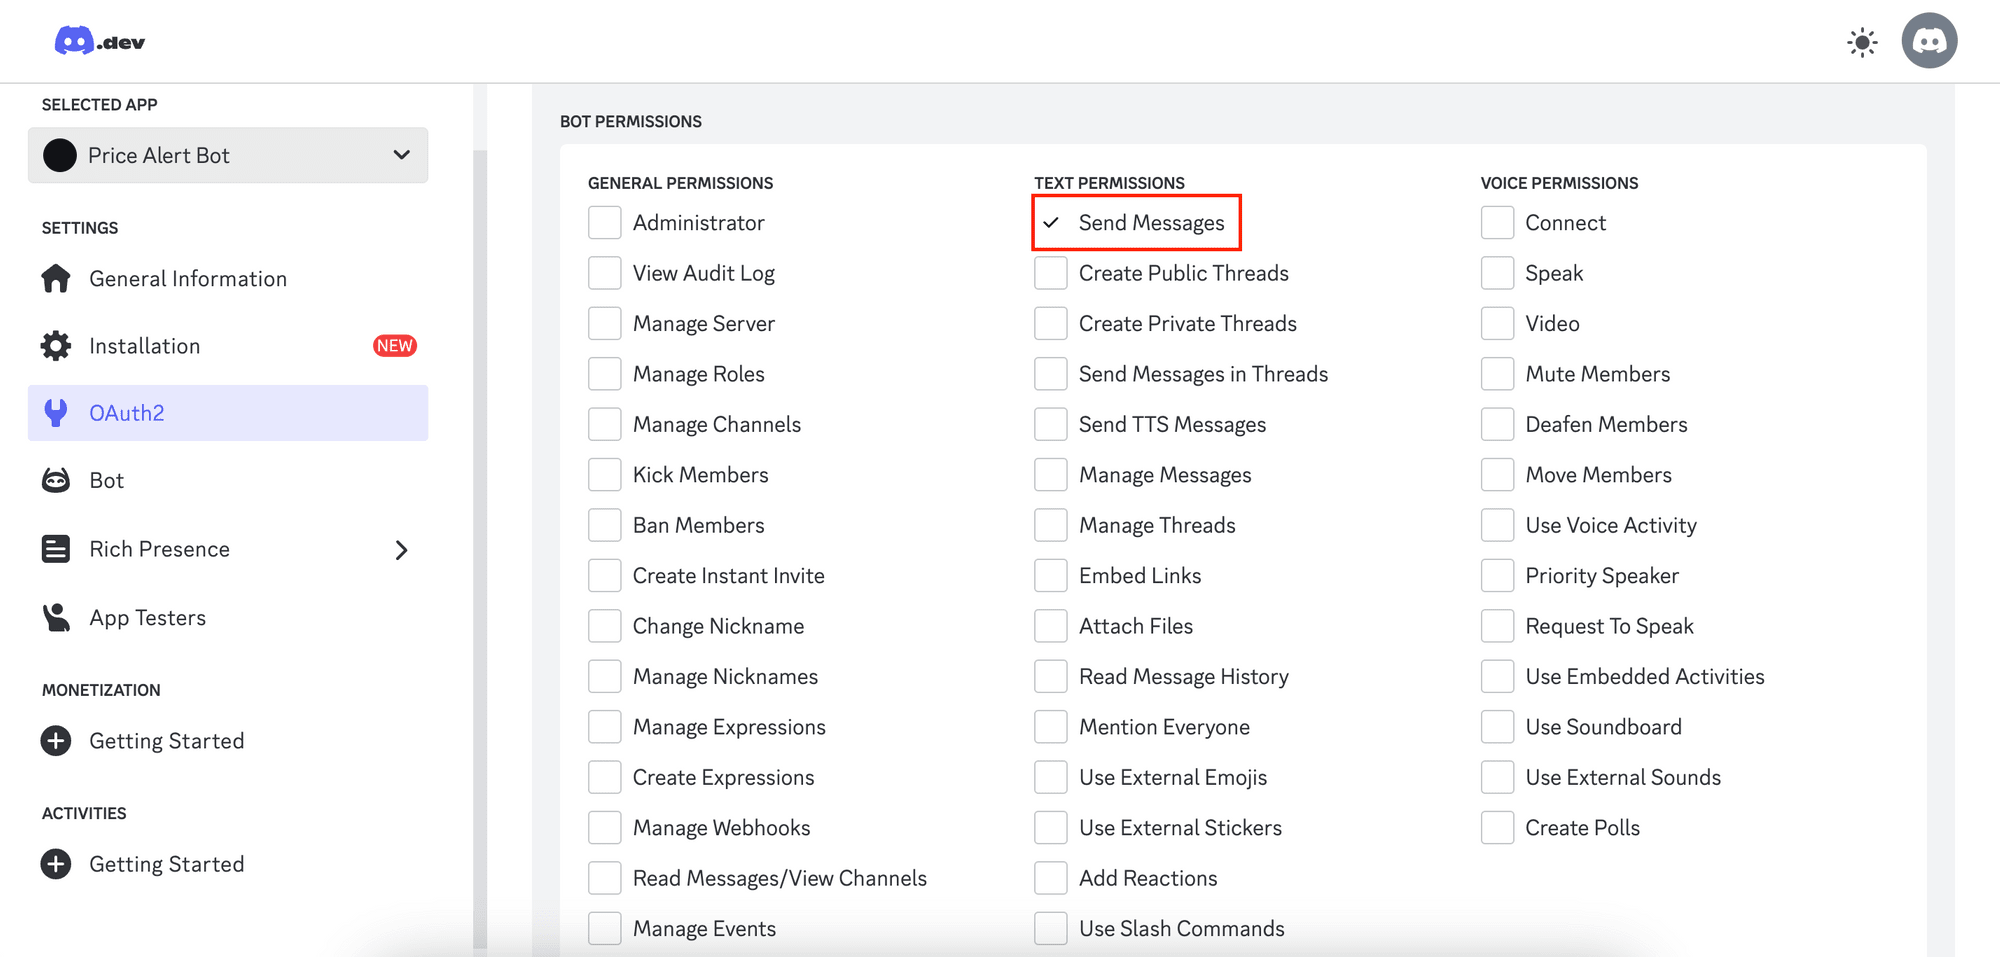
Under “Bot Permissions” , select Send Messages to allow the bot to send messages in the Discord server:
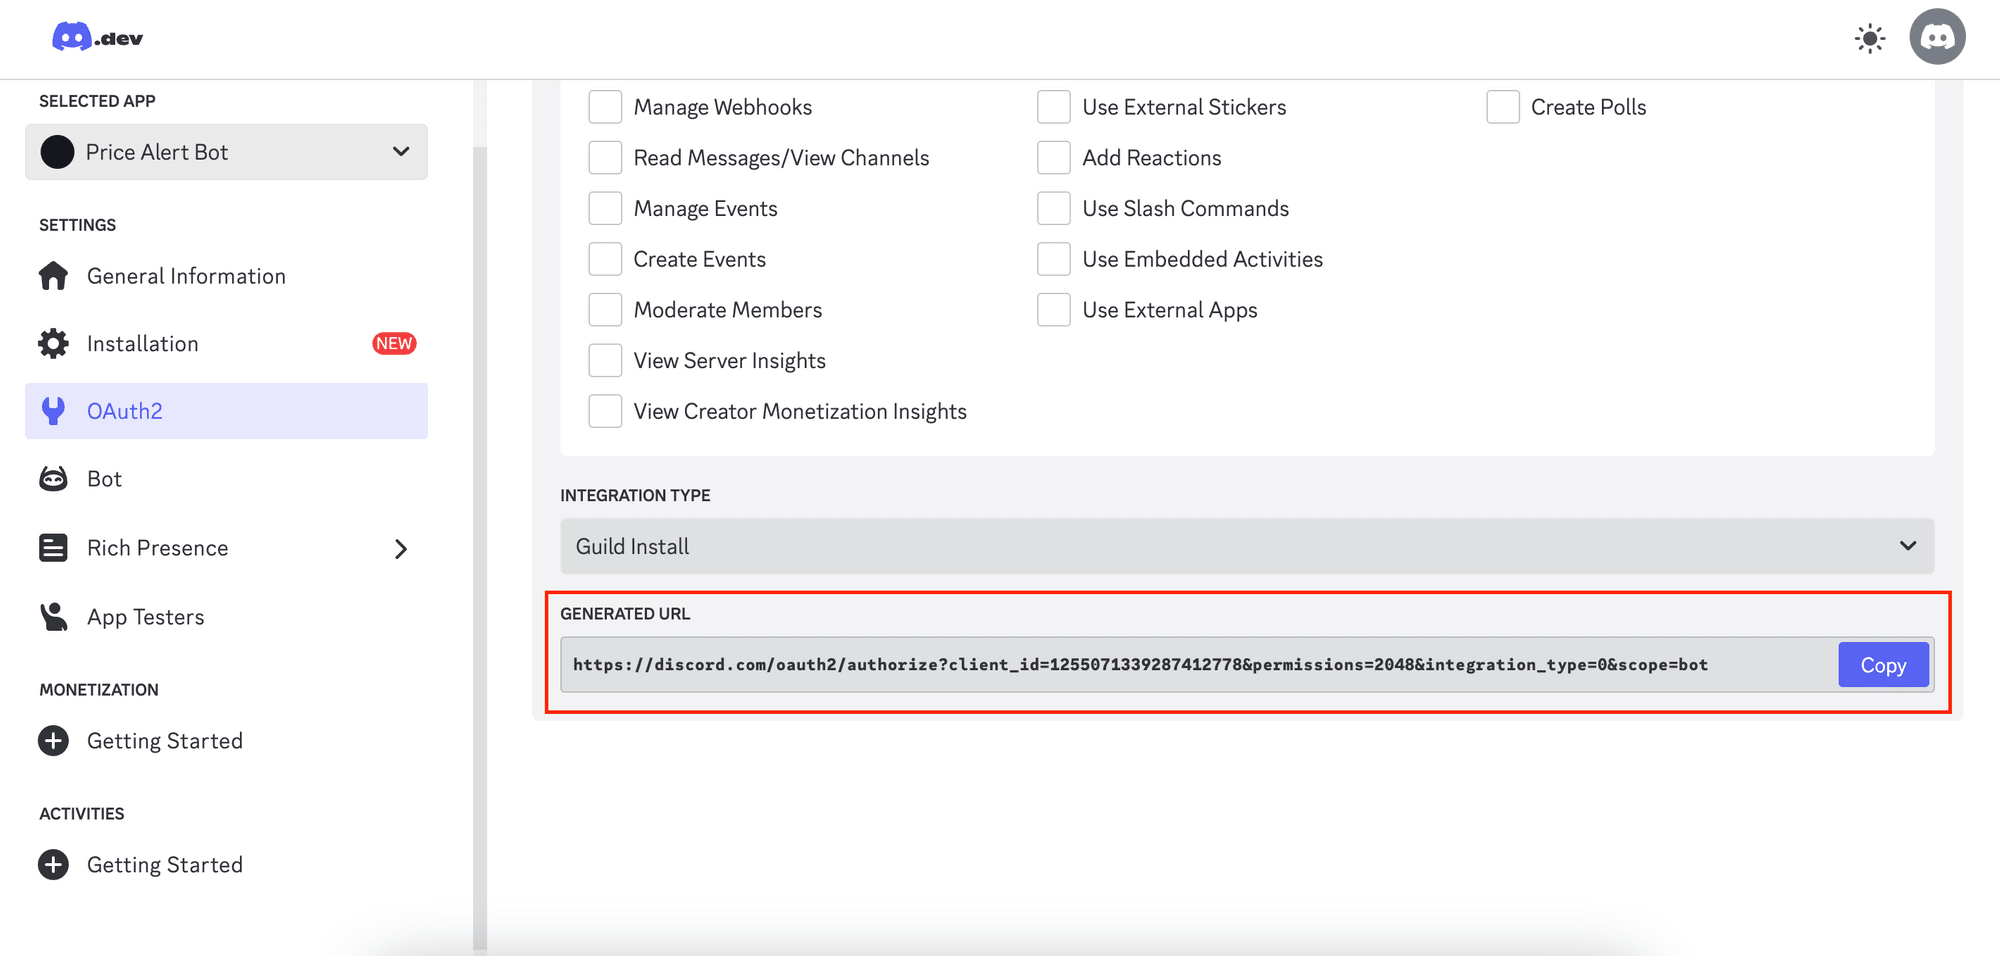
Then, scroll down the page and open the generated URL in a new tab to invite the bot to your server:
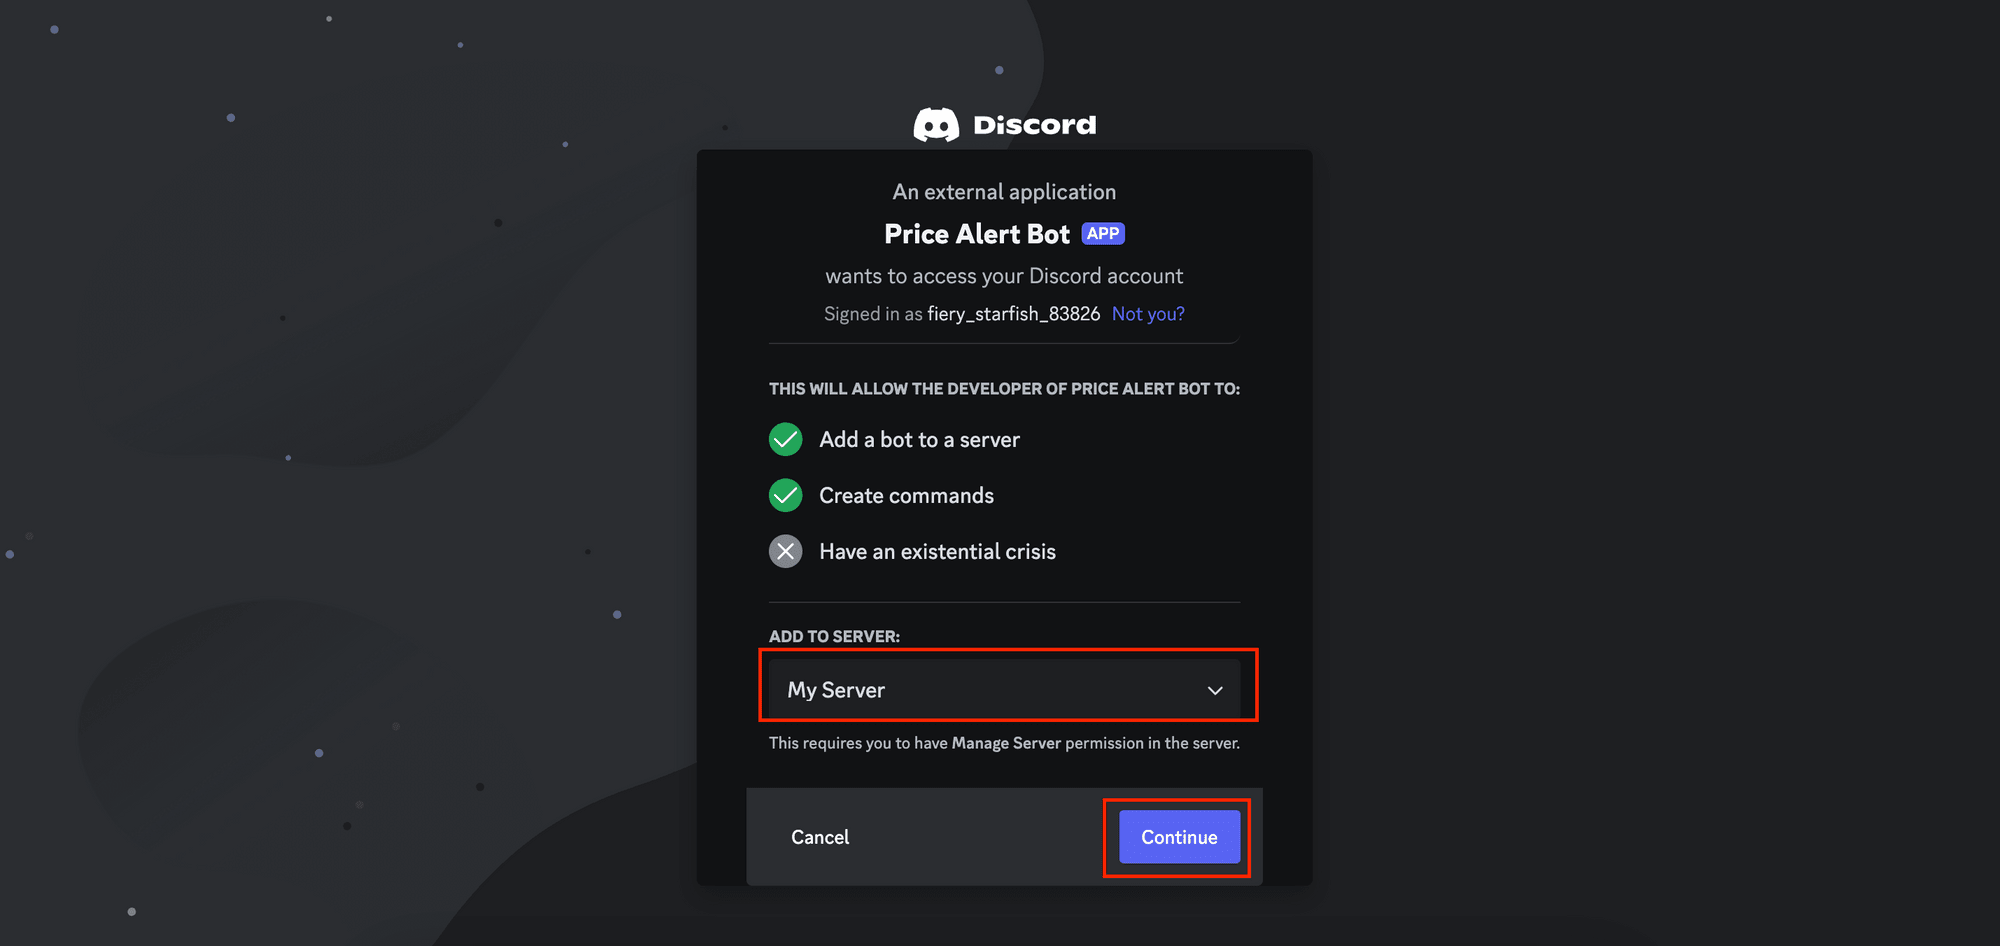
You will see a page where you can select the server to add the bot to. Simply choose a server and click on “Continue” :
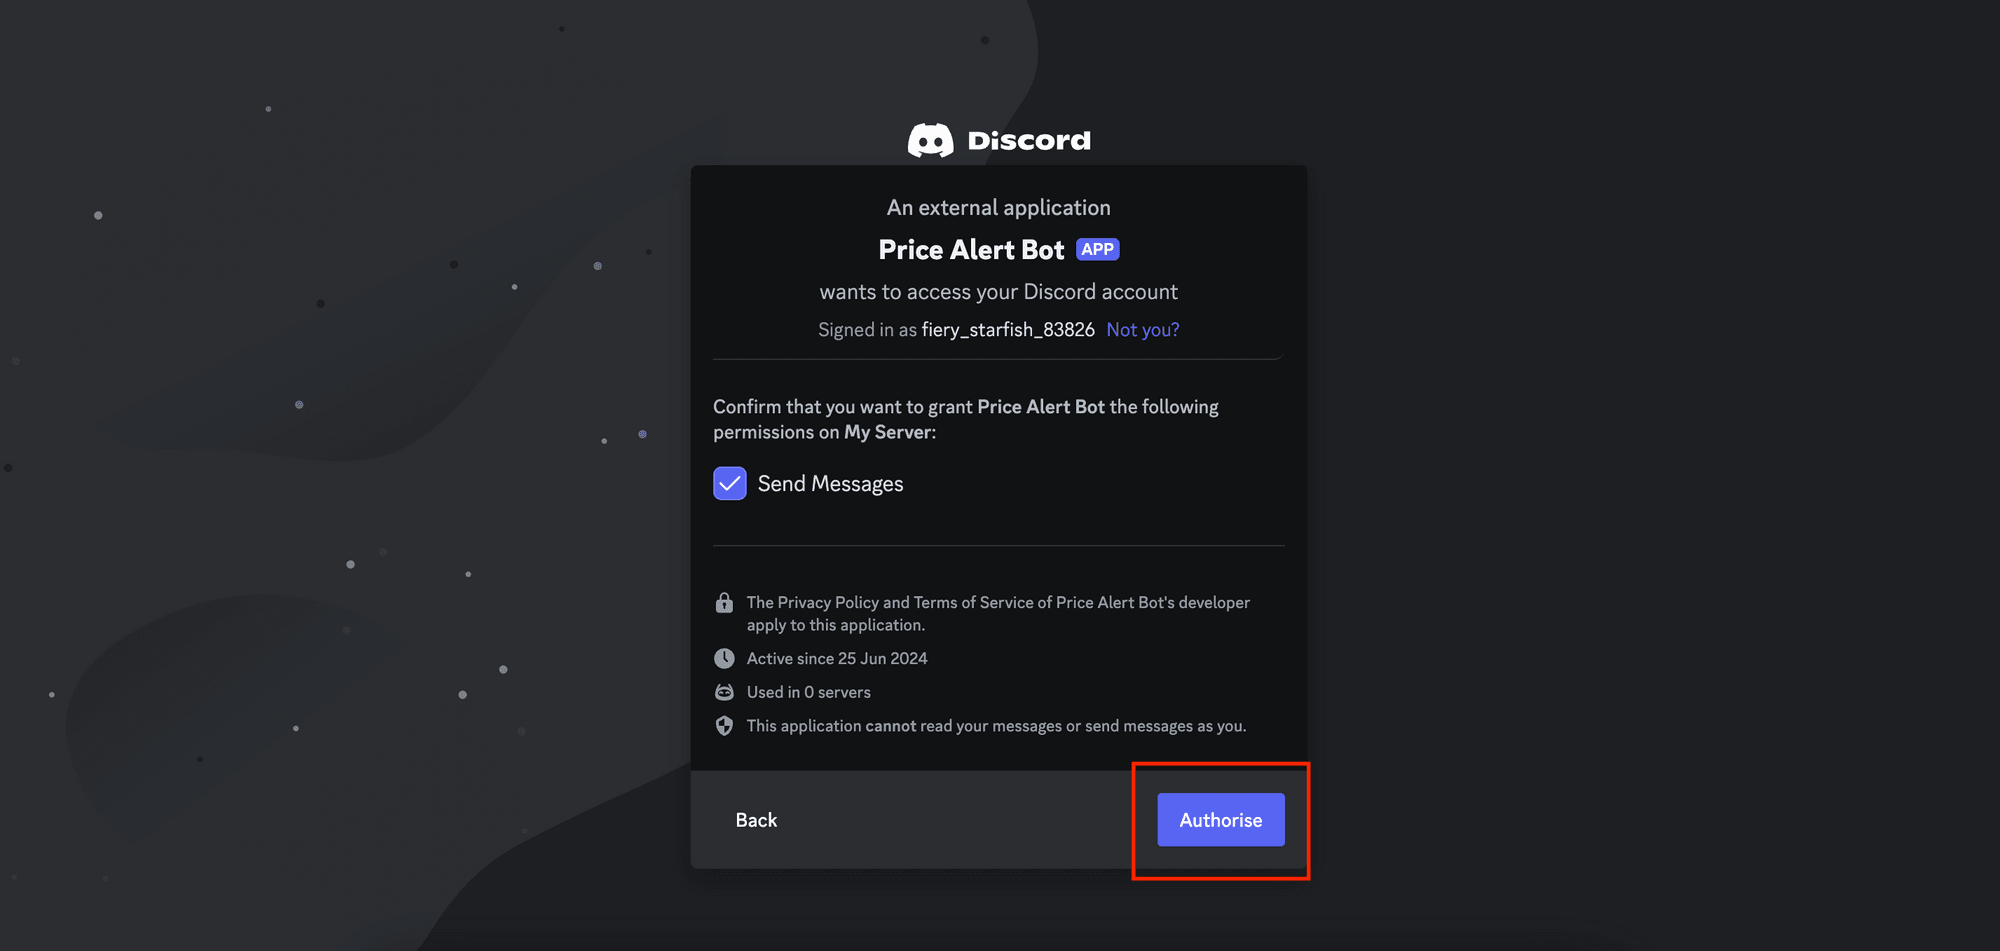
Click “Authorize” to confirm the permissions granted to the Discord bot:
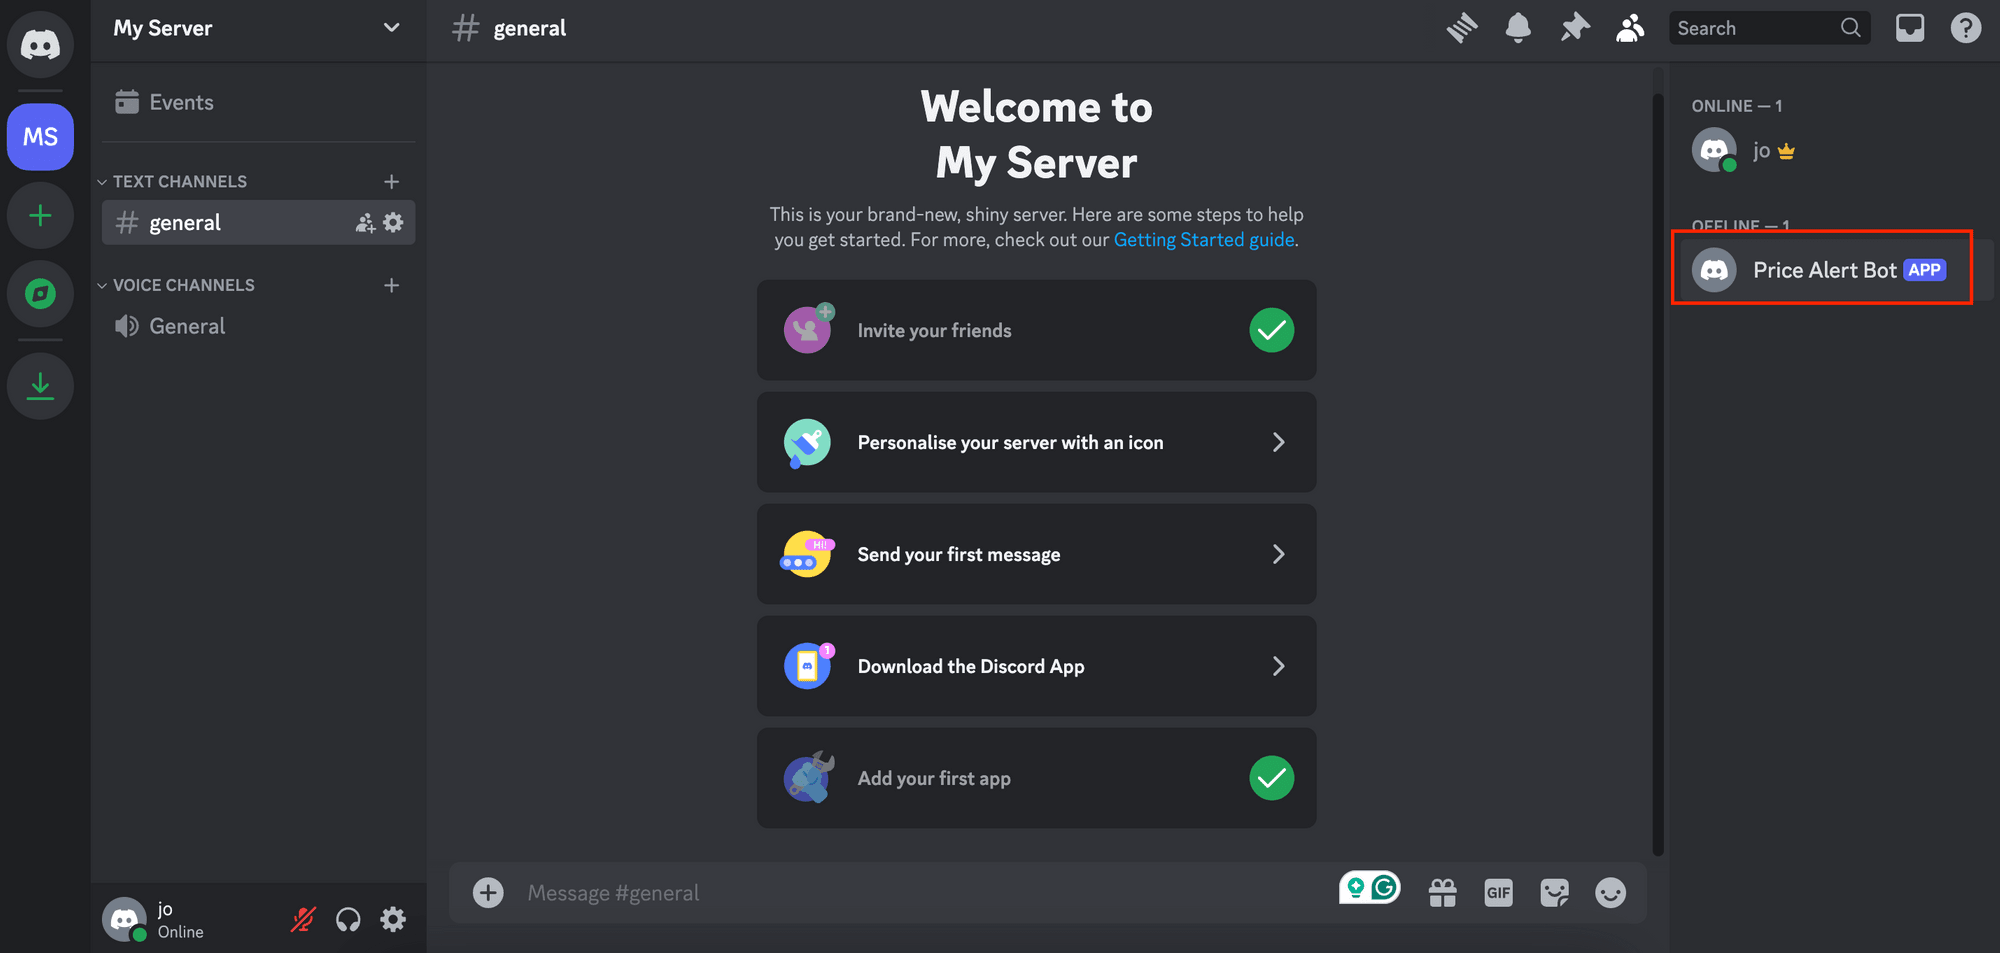
The bot will be added to the server:
Writing a Simple Discord Bot
Step 1. Create a New Node.js Project
Open your terminal/command prompt and create a new directory for your bot:
mkdir discord-bot
cd discord-bot
Then, run the command below in the terminal/command prompt to initialize a new Node.js project:
npm init
Step 2. Install discord.js
We will use discord.js to interact with the Discord API. Run the command below in the terminal/command prompt to install it in your project:
npm install discord.js
Step 3. Writing the Bot Code
Create a file named discordbot.js. Import Client and GatewayIntentBits from discord.js at the beginning of the file:
const { Client, GatewayIntentBits } = require('discord.js');
Then, declare your Discord bot token and your Discord channel ID as constants:
const TOKEN = 'your_discord_bot_token';
const CHANEL_ID = 'your_discord_channel_id';
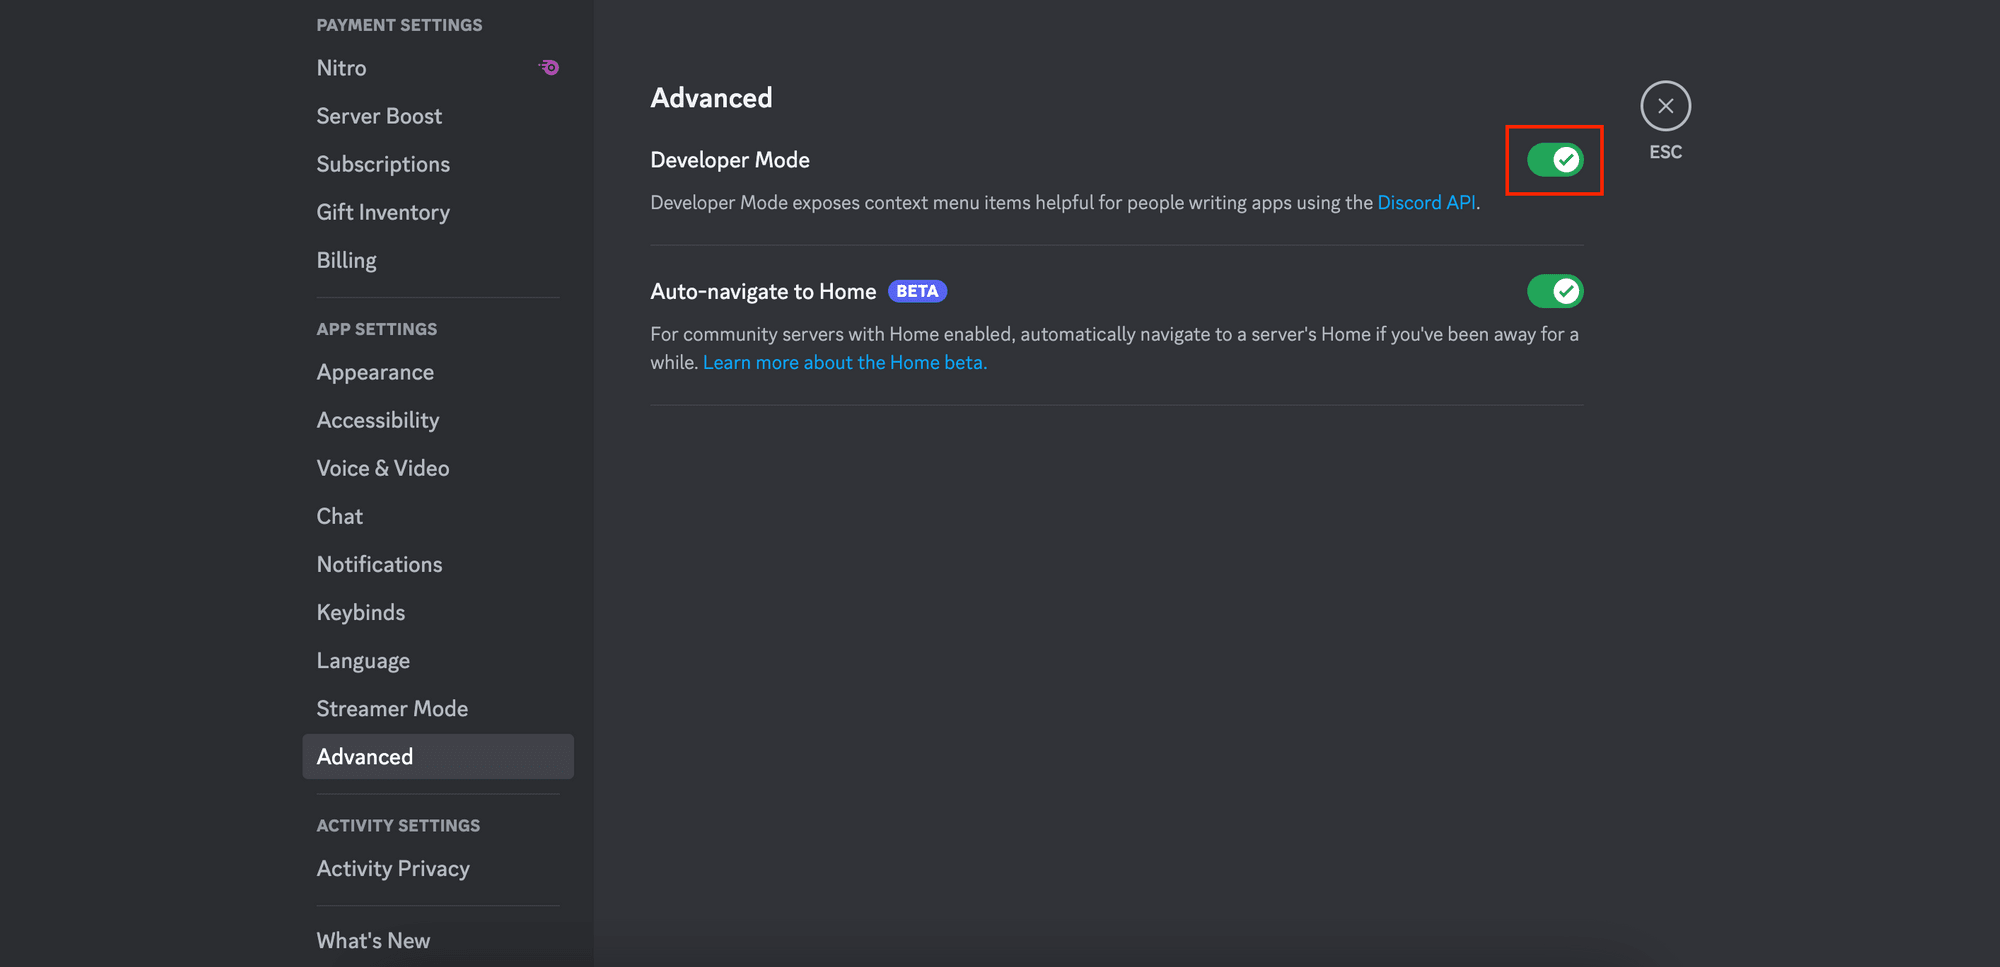
To get your Discord channel ID, enable D eveloper Mode in the account settings:
Then, right-click on the channel and copy the channel ID:

Next, create a new Discord bot client and log in using your token. Once the bot is logged in and ready, it will send a message in the channel:
const discordBot = new Client({ intents: [GatewayIntentBits.Guilds, GatewayIntentBits.GuildMessages, GatewayIntentBits.MessageContent] });

discordBot.login(TOKEN);

discordBot.once('ready', async () => {
    console.log('Bot is online!');
    const channel = await discordBot.channels.fetch(CHANEL_ID);
    if (channel) {
      await channel.send("Hi, I'm a Discord bot!");
      console.log('Message sent.');
    } else {
      console.error('Channel not found');
    }
});
Step 4. Starting the Discord Bot
Run the command below in the terminal/command prompt to start the Discord bot:
npm discordbot.js
The bot should send a message in the channel:

Now that the bot is up and running, let's set it up to send an alert to the Discord channel whenever the price on a web page changes!
Integrating with the Price Monitoring Tool
We will modify the code in How to Make a Competitor Price Monitoring/Tracking Tool in Node.js with Roborabbit and integrate the Discord bot. The bot will send price change alerts to a Discord channel instead of an e-mail. You can find the code on GitHub in this repository.
Step 1. Modify the Discord Bot Service File
Remove discordBot.once('ready’) in the discordbot.js file and add the following code:
discordBot.sendMessage = async (message) => {
  try {
    const channel = await discordBot.channels.fetch(CHANEL_ID);
    if (channel) {
      await channel.send(message);
      console.log('Message sent:', message);
    } else {
      console.error('Channel not found');
    }
  } catch (error) {
    console.error('Error sending message:', error);
  }
};

module.exports = discordBot;
This allows the sendMessage() function to be called in another file to send a message to the Discord channel.
Step 2. Import the Discord Bot Service File
In the index.js file, remove code that is related to alertService and import the Discord bot service above:
const discordbot = require('./discordbot');
Step 3. Modify the Price Change Alert
In the /job-done endpoint, make the following changes to send the price change alert to a Discord channel instead of an e-mail:
app.post('/job-done', (req, res) => {
  const currentPrice = req.body.outputs['your_step_id_save_text'];
  // add this code
  const url = req.body.outputs['your_step_id_go'].location;
  console.log('Job done, current price is ' + currentPrice);

  if(!oldPrice) {
    oldPrice = currentPrice;
  }
  if (currentPrice != oldPrice) {
    // add this code
    const msg = `Price has changed from ${oldPrice} to ${currentPrice}. \\n ${url}`;
    console.log(msg);
    discordbot.sendMessage(msg);
    oldPrice = currentPrice;
  }
  roborabbit.checkPrice();
});
Step 4. Test and Deploy
To test your integration locally, run npm node.js in your terminal/command prompt and use ngrok to expose it publicly. This enables Roborabbit to send responses to the /job-done endpoint via webhook after completing the price-checking job. Make sure the webhook URL in your roborabbit.js file is correctly configured to receive these updates.
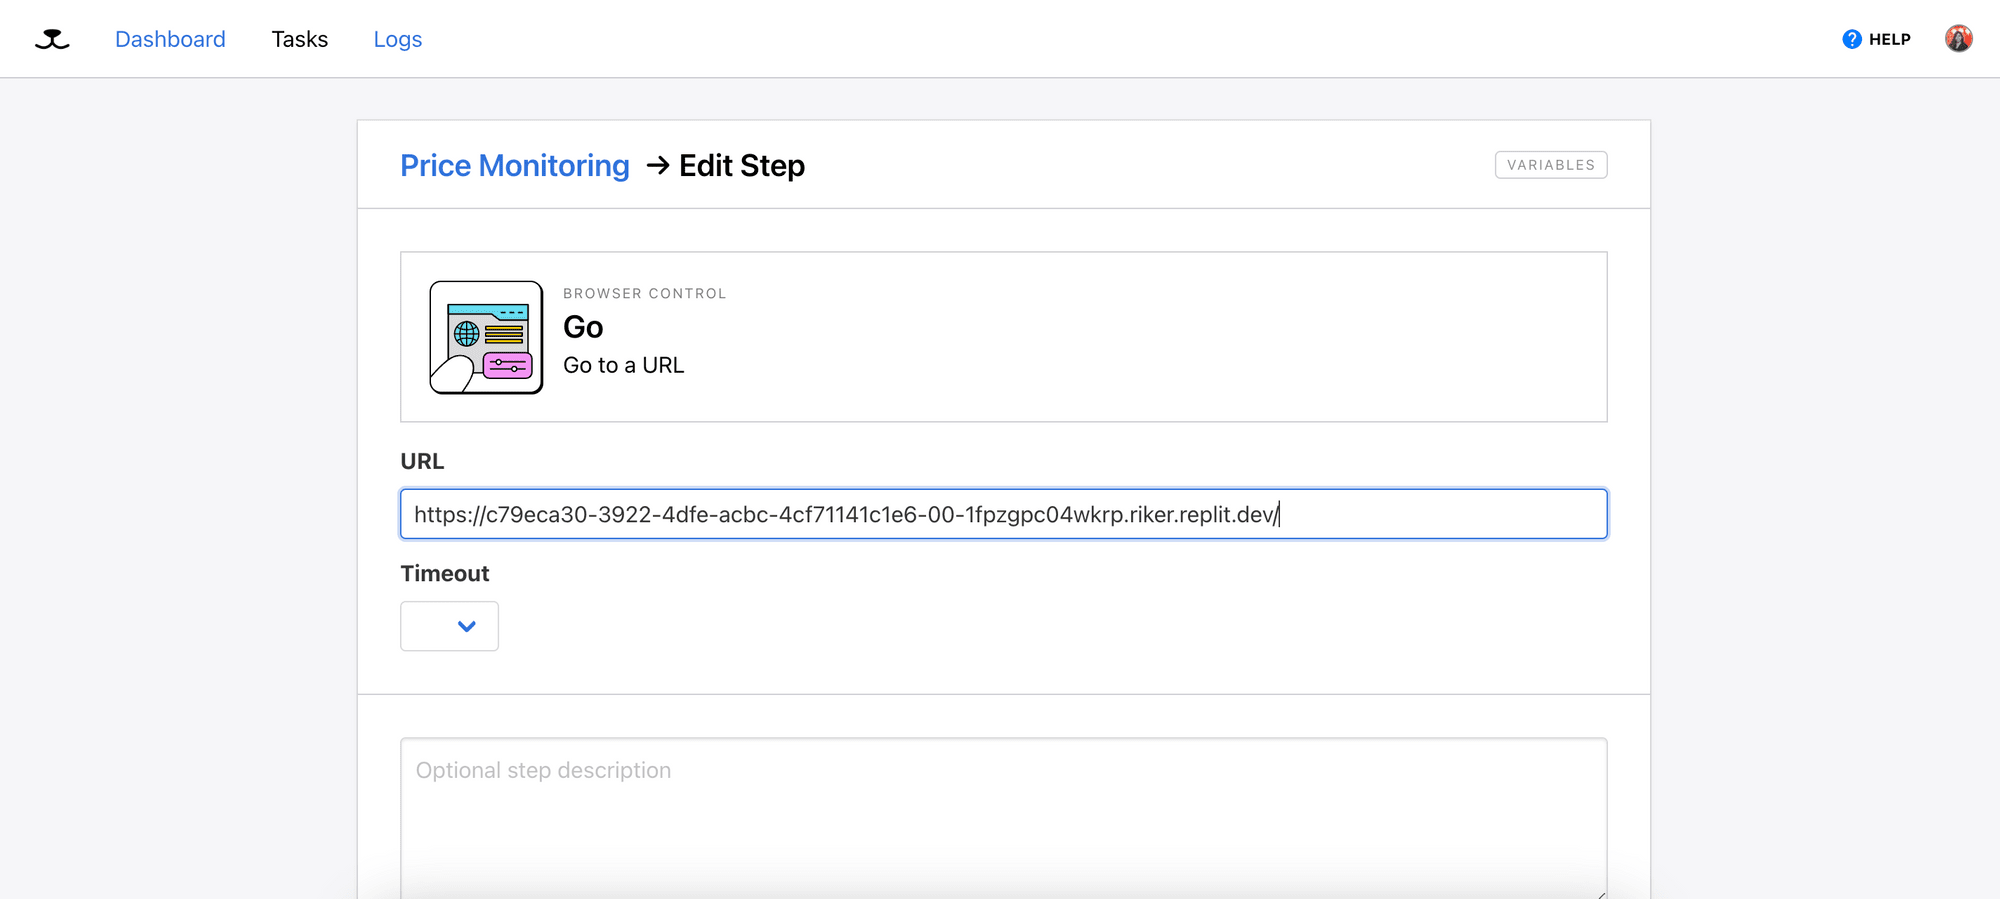
To simulate a price change on the web page, duplicate the web page on Replit. Next, copy the Development URL and paste it into the “Go” step of your Roborabbit task.

Next, modify the price directly in the HTML code. Once the price is updated, you'll receive an alert in your Discord channel:
After successfully testing your Discord bot integration on your local machine, you can deploy it to your chosen hosting service to enable continuous price monitoring!
🐰 Hare Hint: For a complete implementation, refer to this GitHub repo.
Conclusion
Discord's versatile features, including the ability to customize servers with bots enable users to automate tasks and enhance the community experience effortlessly. When combined with a web automation tool like Roborabbit, the bot can become a powerful solution for various applications, such as following industry insights, receiving alerts on automated tests, and more.
If you haven't already, check out Roborabbit to explore how you can automate data-related tasks on the web!