How to Make a Competitor Price Monitoring/Tracking Tool in Node.js with Browserbear
Contents
Competitor price tracking is a practice of continuously monitoring the prices of the products/services offered by a business’s competitors to stay updated on their latest offerings. It is especially beneficial for businesses in highly competitive industries as it helps them to gain insights into the market trend and adjust their pricing strategy accordingly.
Businesses that can benefit from monitoring competitors’ prices include e-commerce, hotels, real estate, digital products, digital services/freelancing, etc. However, it’s inefficient to visit competitors’ websites daily or even several times a day to check the prices manually. Not only that it’s time-consuming and resource-intensive, rapid price changes could also be missed if the checking is not frequent enough, leading to missed opportunities.
This is where a competitor price monitoring tool comes in handy—it can check competitors’ prices 24/7 and sends a price alert automatically when the price changes. Let’s learn how to make one in Node.js!
How to Check Competitors’ Prices Programmatically
To programmatically check competitors' prices, we will need to inspect the HTML structure of the web page and identify the HTML element that holds the price data.
Then, we will need to write code to parse the HTML and extract the relevant price data using libraries like Playwright, Puppeteer, and Cheerio. Typically, we can use CSS selectors or XPath in our code to locate the target HTML element. However, it can be tricky when the element is heavily nested in the HTML code. Constructing complex selectors that traverse multiple levels of the DOM can become challenging and hard to read, increasing the chances of errors.
An easier way to check competitors’ prices programmatically is by extracting the price data using a more visual tool like Browserbear and doing the rest of the work in the Node.js code, which is what we will be doing in this tutorial.
What is Browserbear
Browserbear is a scalable, cloud-based browser automation tool that helps you automate any browser task. You can use it to automate website testing, scrape data, take scheduled screenshots for archiving, and more without writing a single line of code.
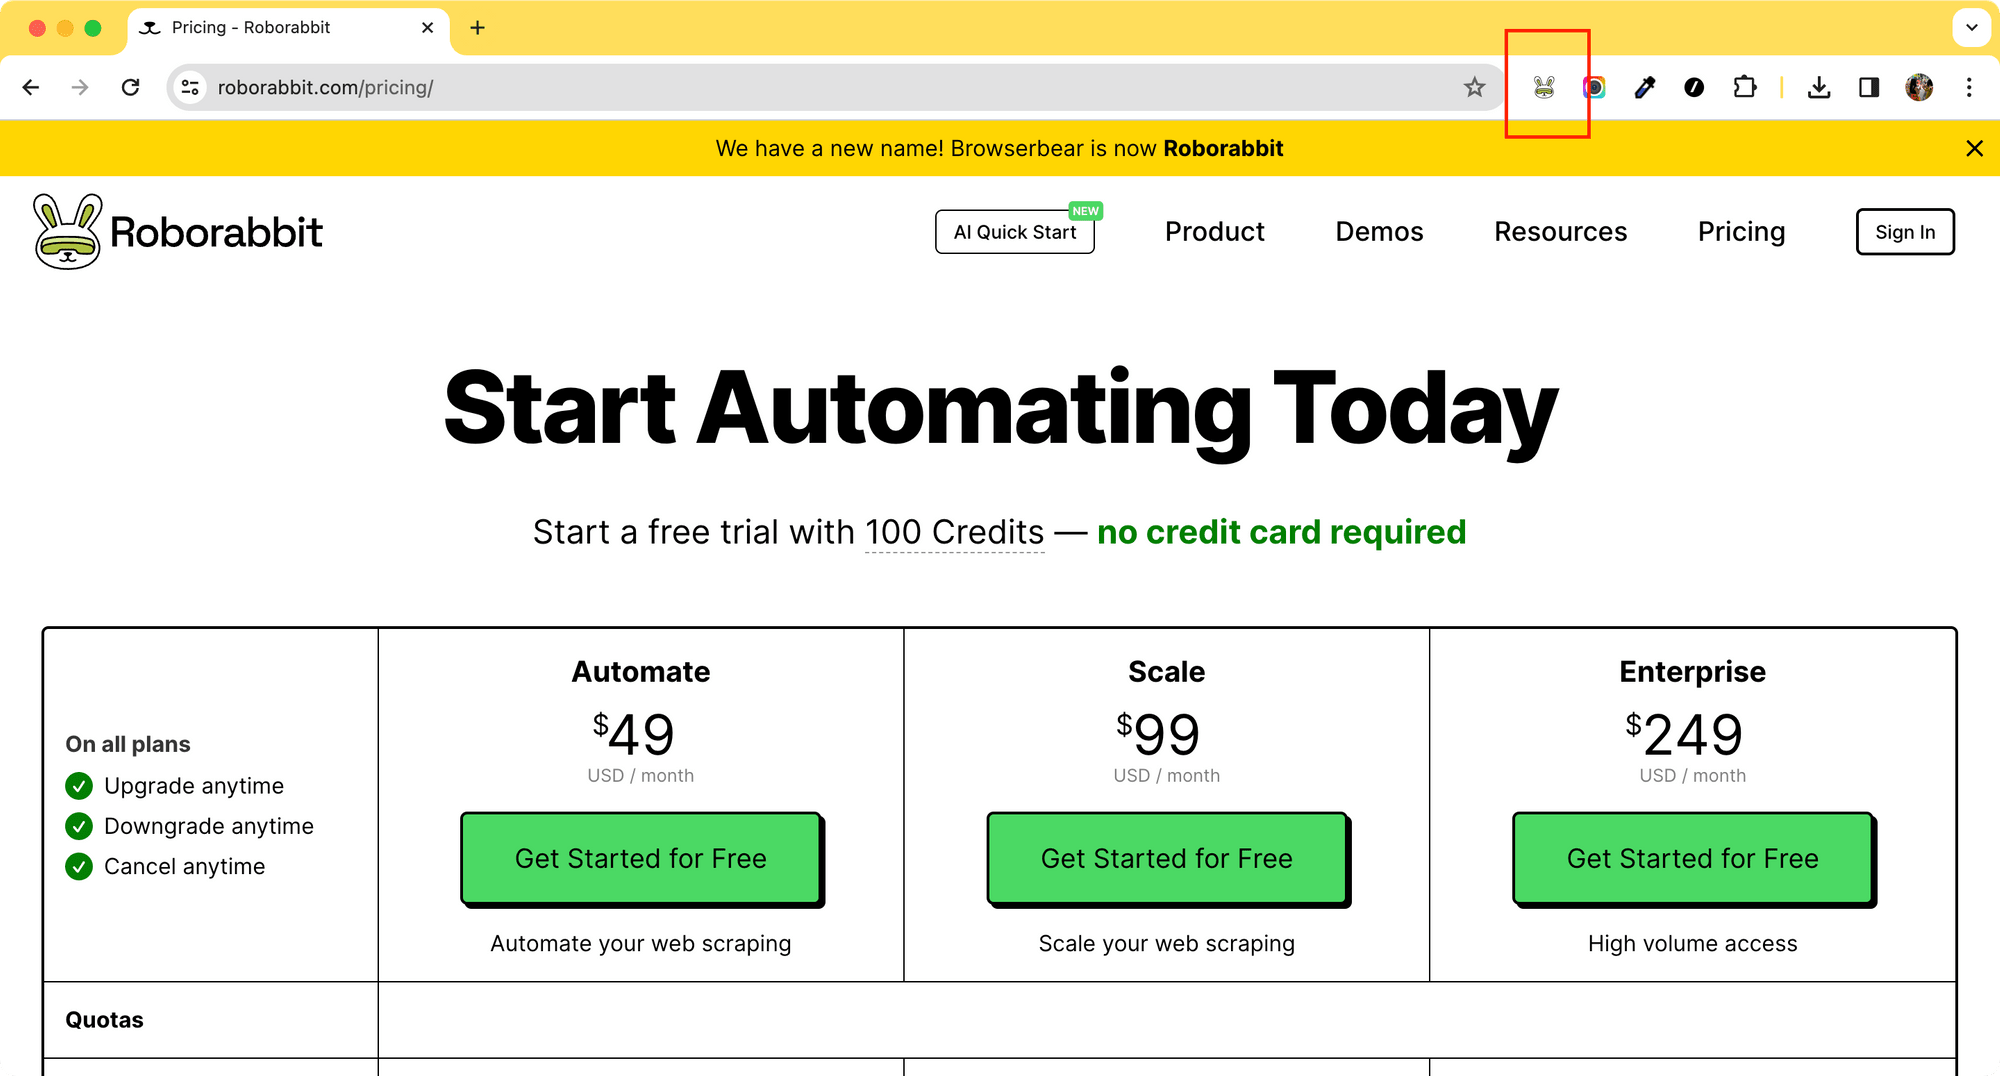
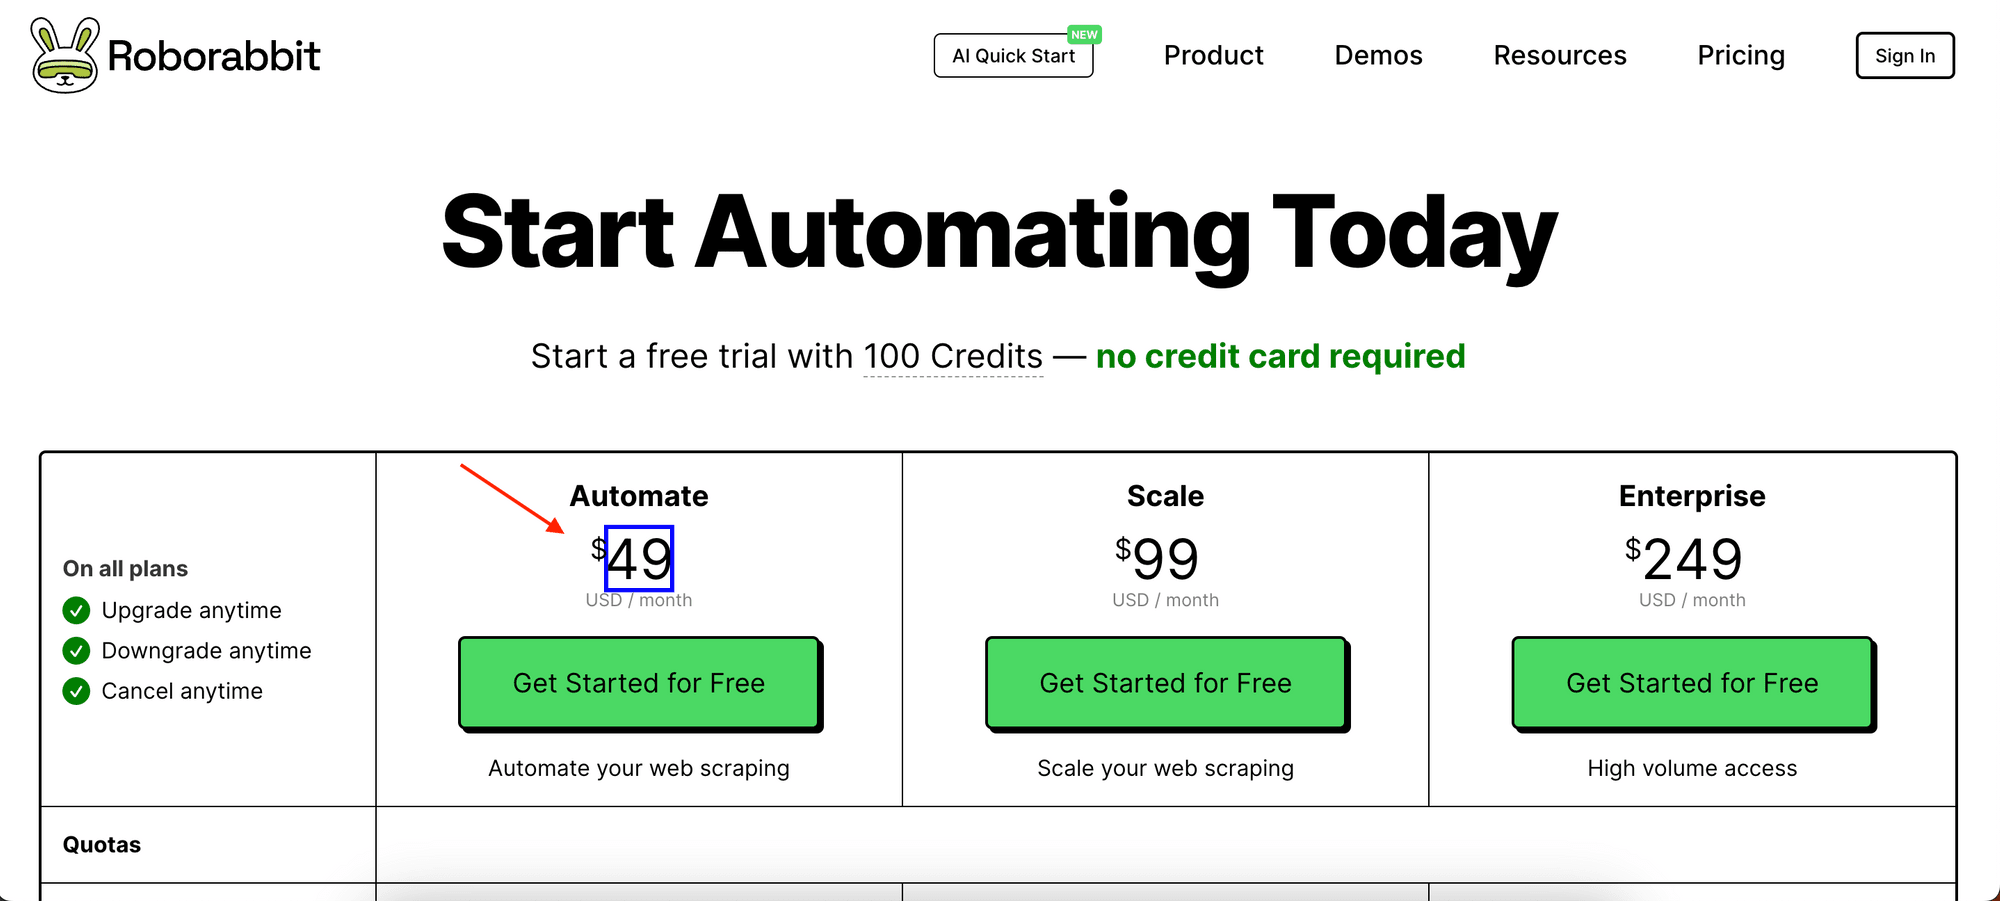
One of the standout features of Browserbear is its user-friendly interface and ease of use. Unlike other web automation tools, Roborabbit is incredibly simple to set up and navigate. You can easily locate your target HTML element (the blue box in the screenshot below) by hovering your mouse over it with the Roborabbit Helper extension…
… and add necessary steps to your automation task from the Browserbear dashboard.
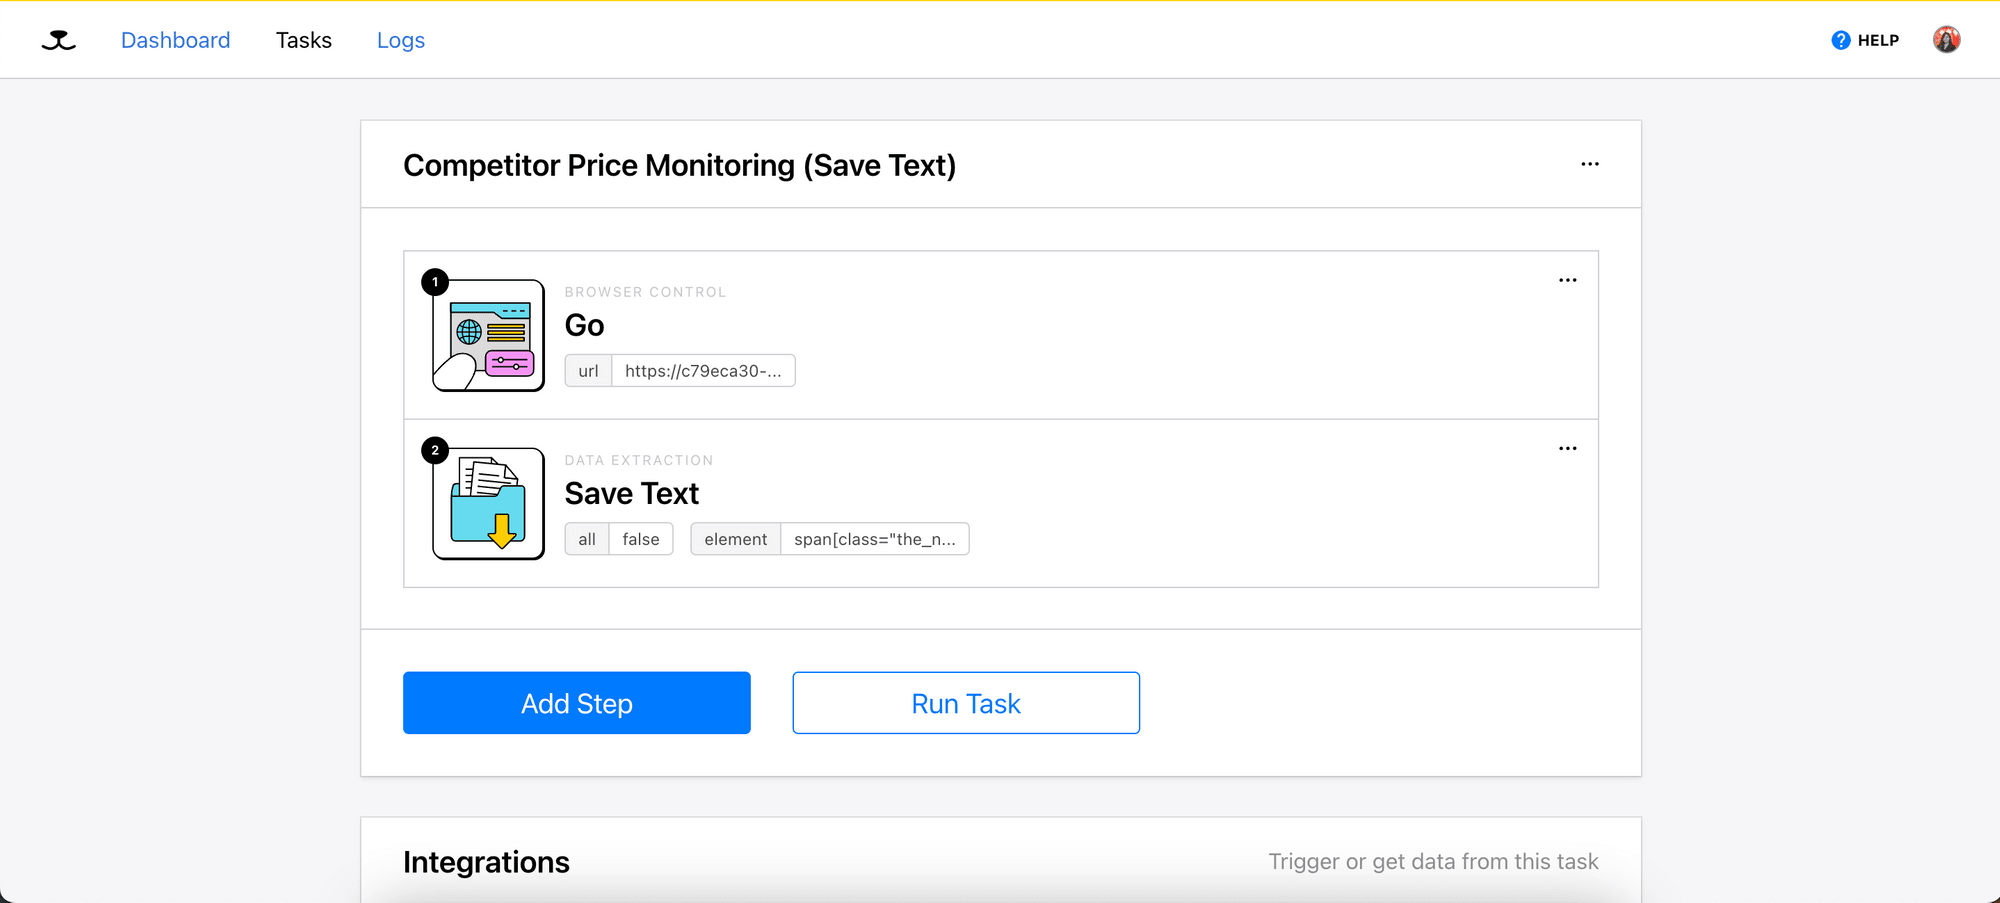
The best part is we can integrate the automation task into our Node.js project using its API! All we need are the project API key and other relevant IDs that can be found on the dashboard.
Pre-requisites
To follow this tutorial, you will need:
- npm
- Node.js
- A Roborabbit account - get started for free!
- Roborabbit Helper - a Chrome extension that helps Roborabbit in locating HTML elements on a web page
Creating a Browserbear Task
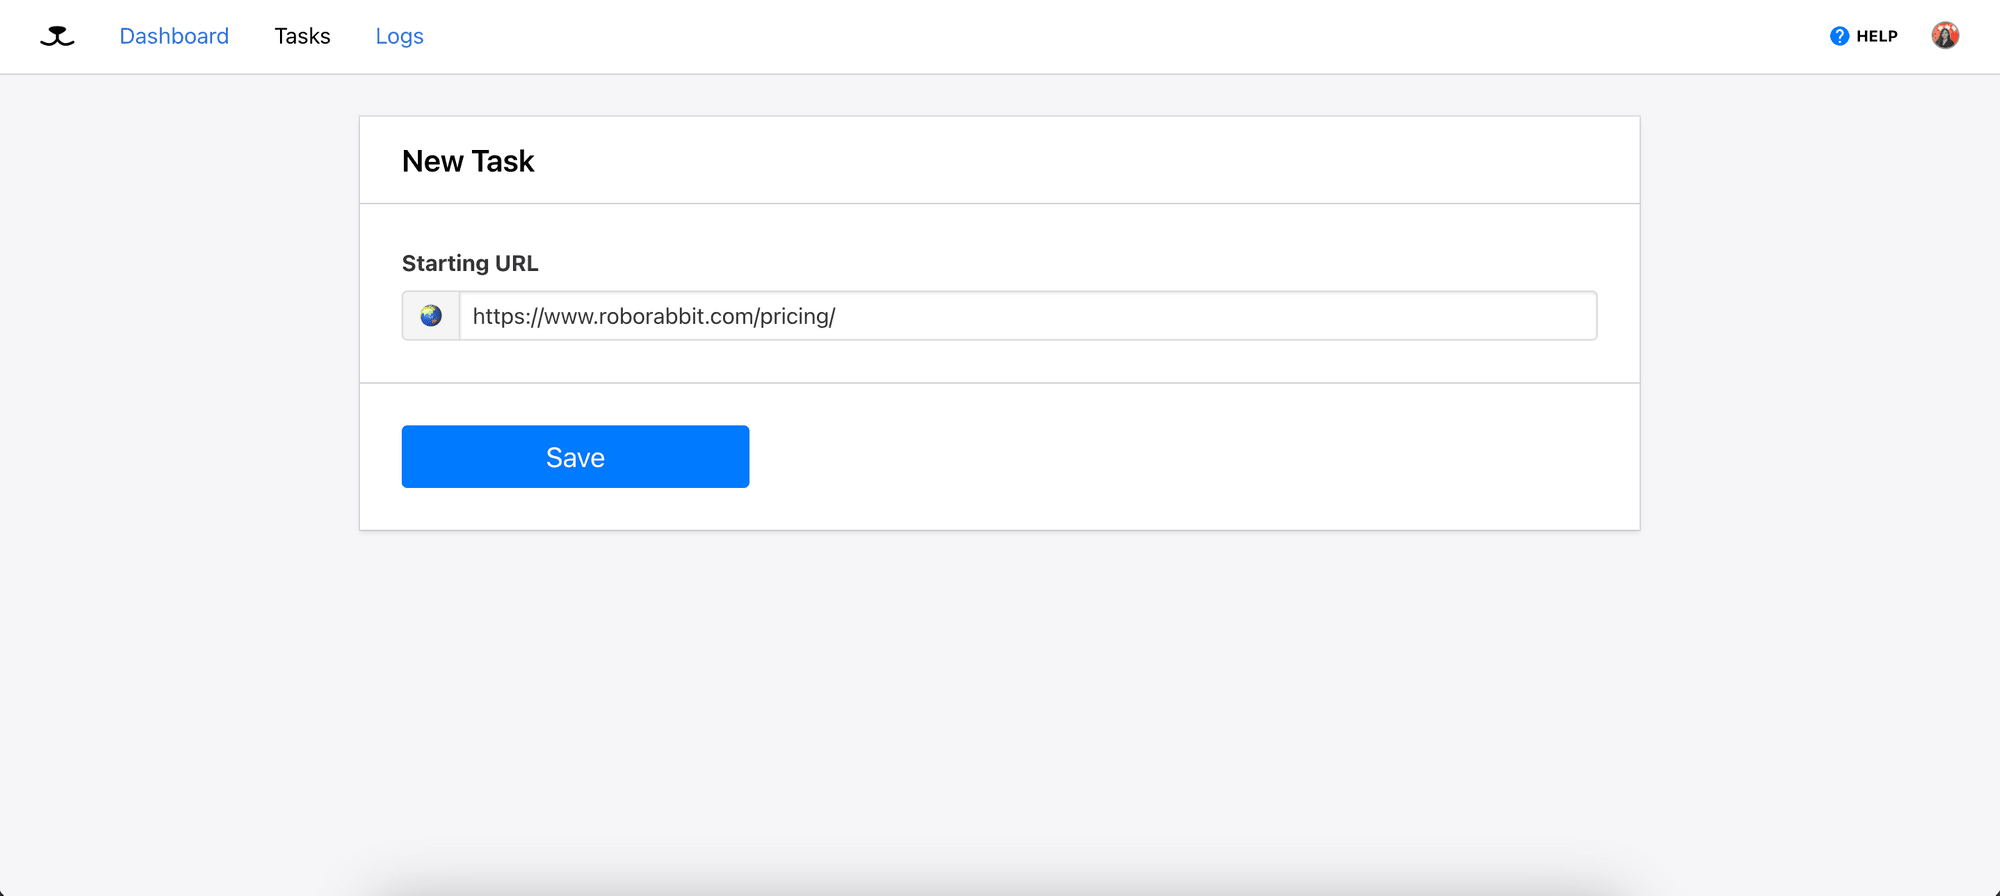
We will use Roborabbit's Pricing page as a demonstration for this tutorial. Start by logging in to your Roborabbit account and create a new task. You’ll be prompted to enter the URL of the target website. Paste the website’s URL into the “Starting URL” field and click the “Save” button.
Step 1. Go
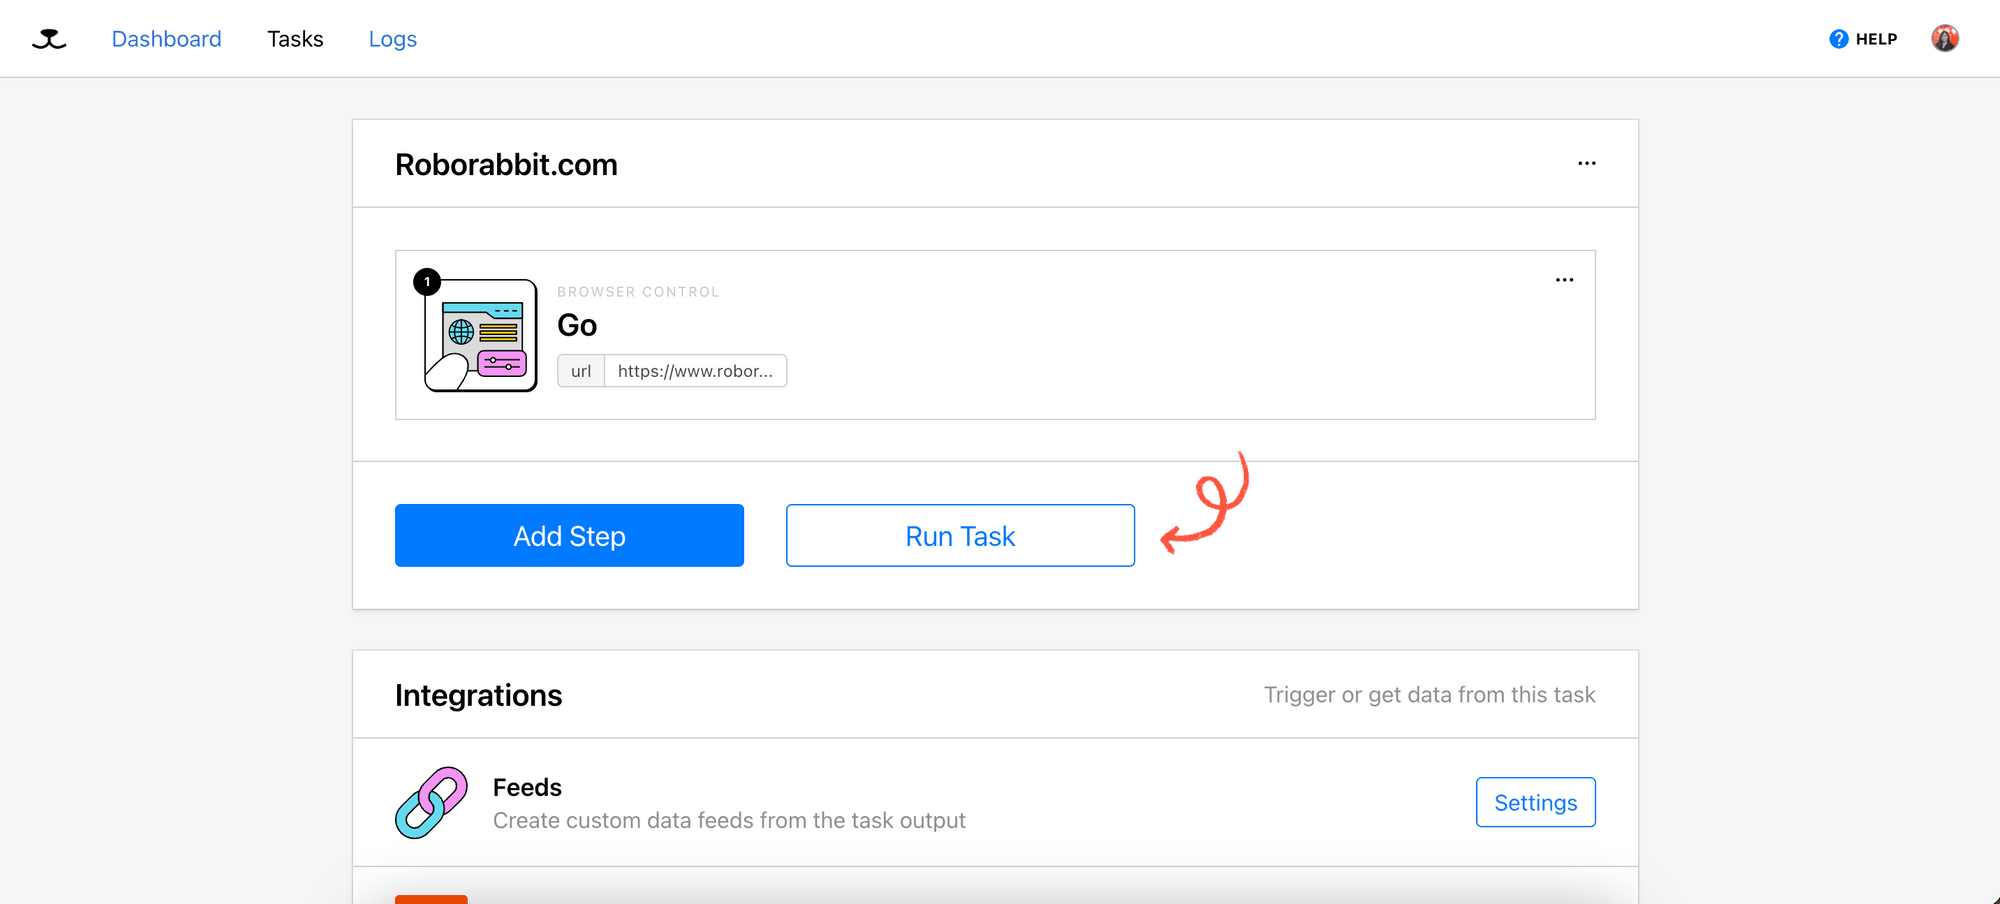
The first step, “Go” with the starting URL will be added to your task automatically.
Step 2. Save Text
This step will save the text of the target HTML element and we will use the Browserbear Helper extension to locate it.
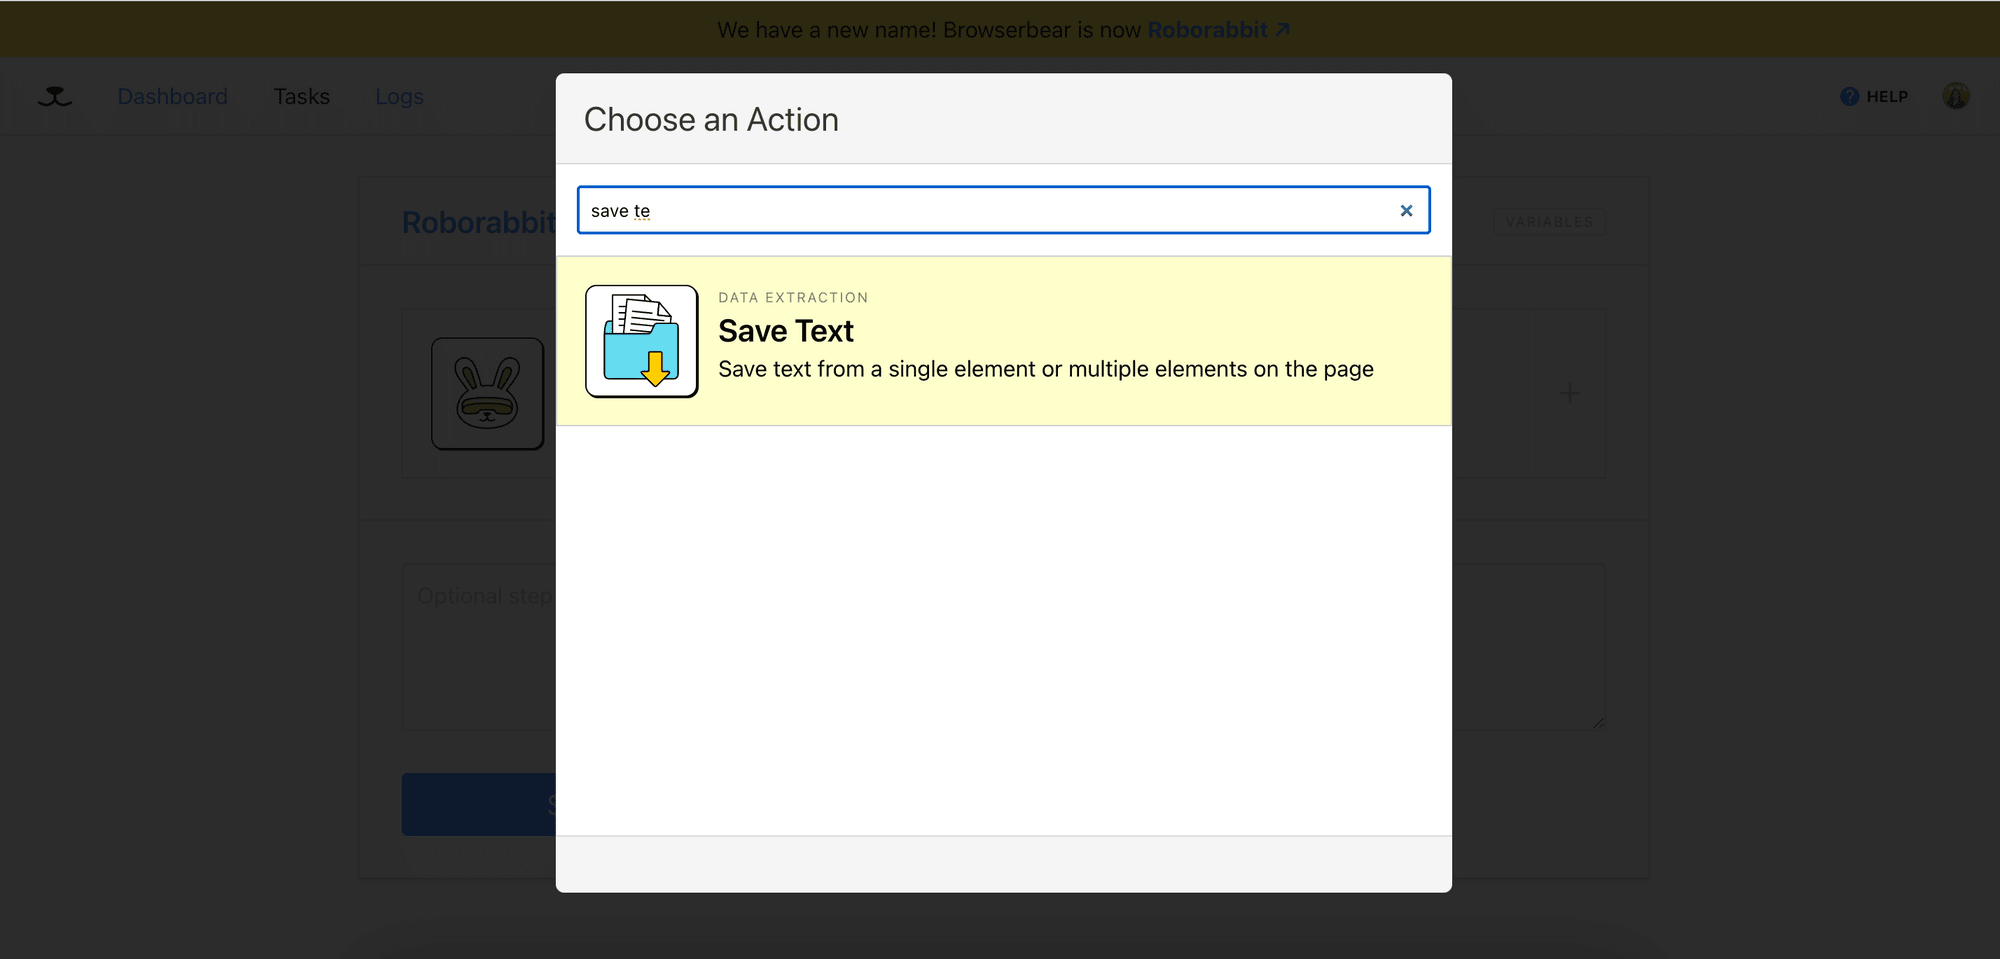
Add a new step to the task and select the “Save Text” action:
On the Pricing page, click the Browserbear icon to activate the extension. Then, hover your mouse over the target HTML element, which is the price. You should see a blue box surrounding the price.
Click on the element and copy the JSON object (config) that appears on the pop-up window.
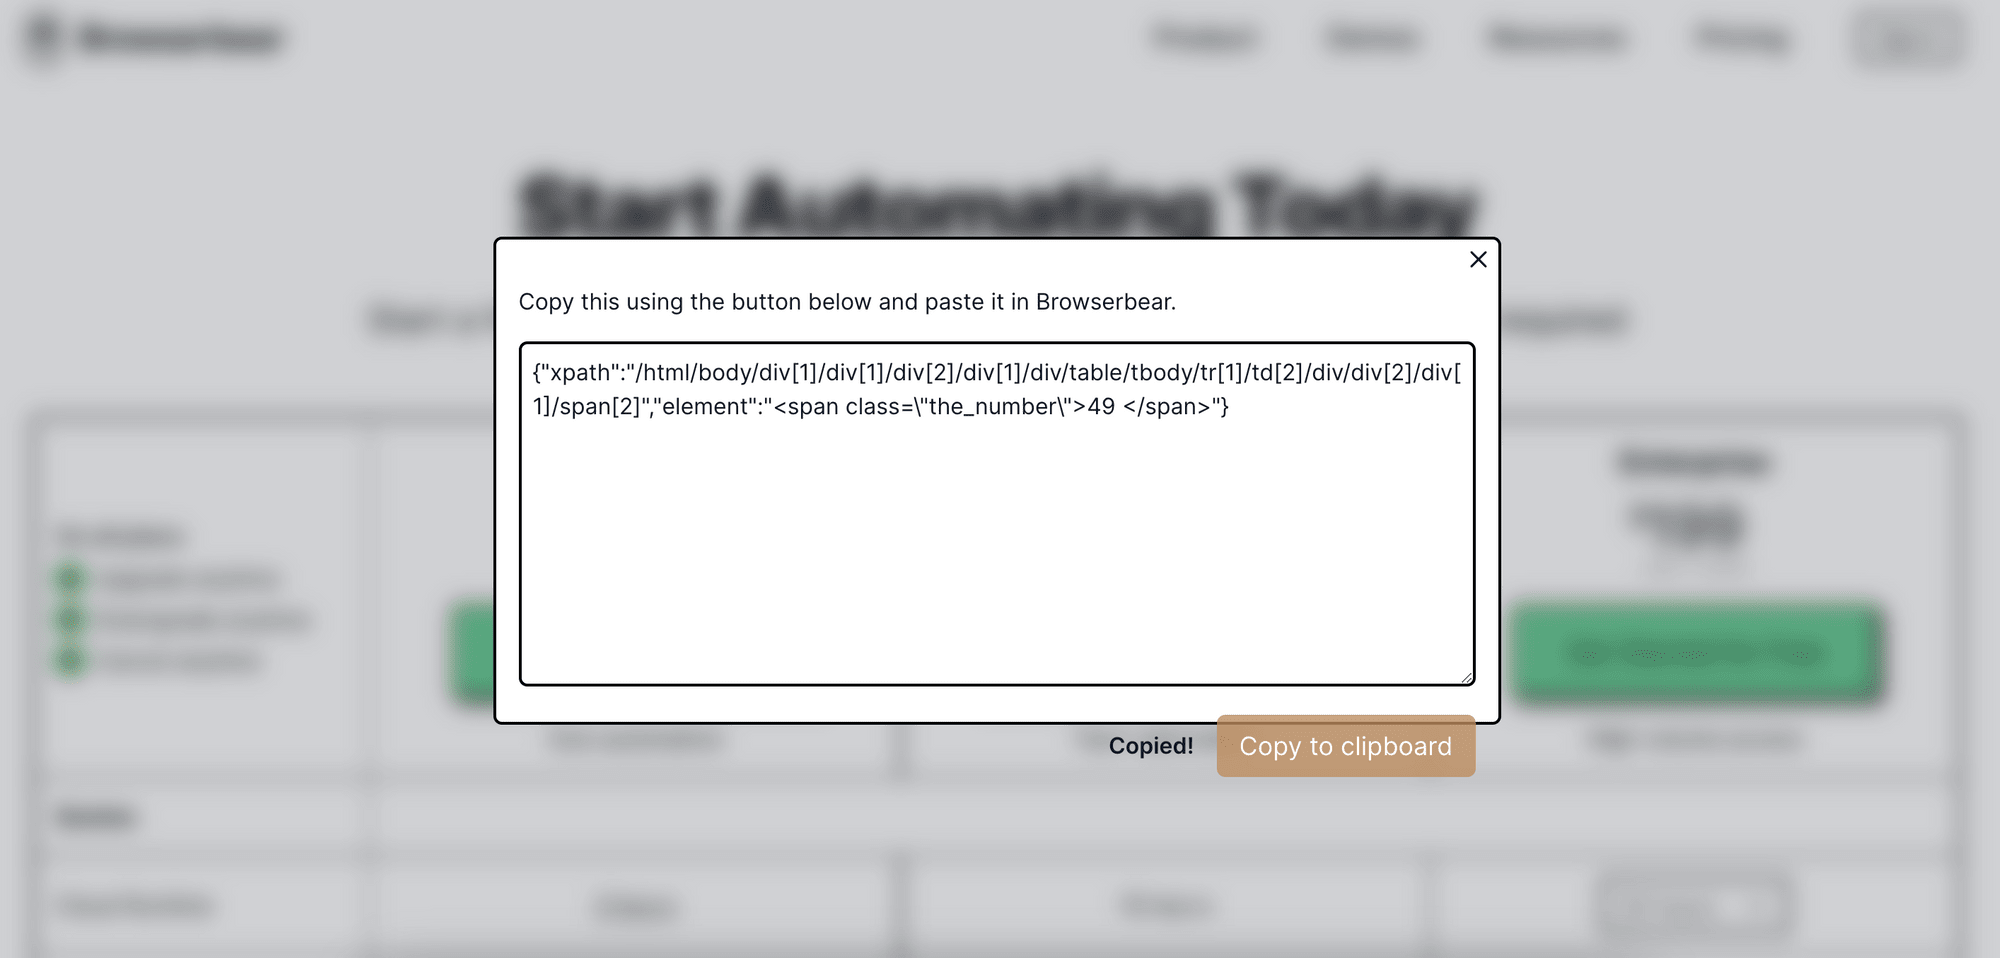
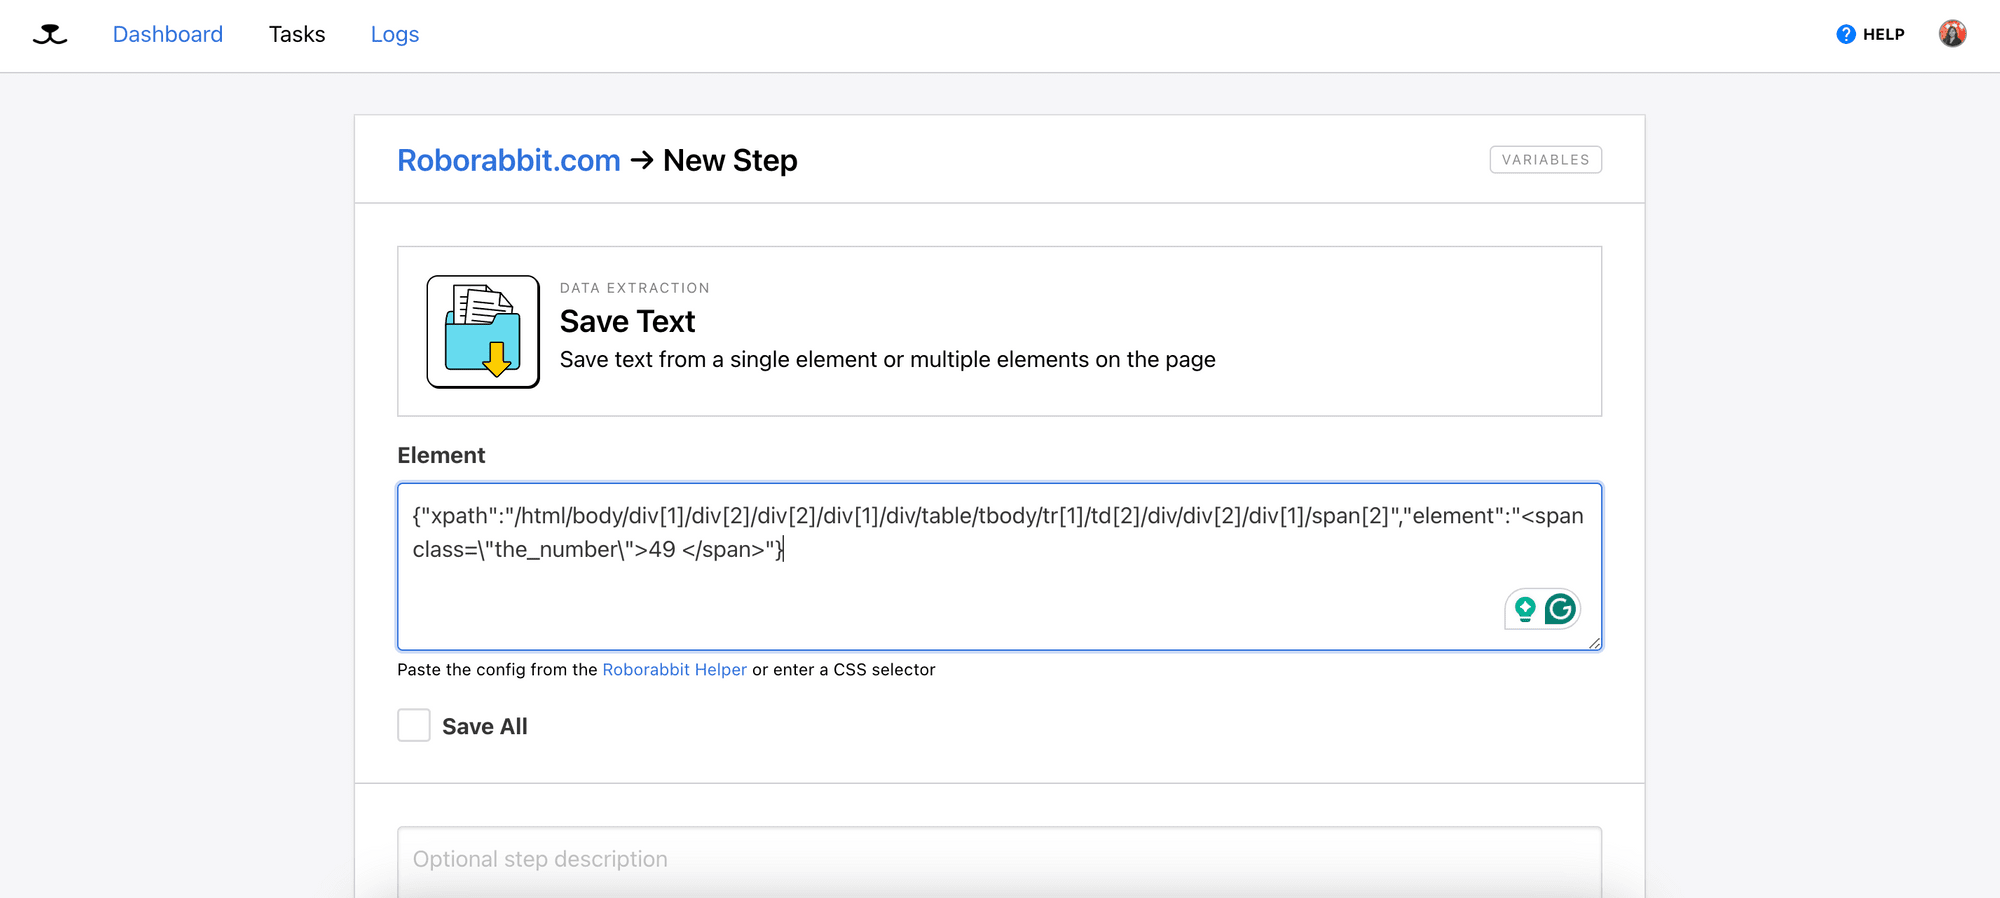
The JSON object (config) contains the XPath and the HTML snippet of the selected HTML element, which will be used by Browserbear to locate the target HTML element. Paste it into the Element field, choose the ideal tag for the element, and click the “Save” button.
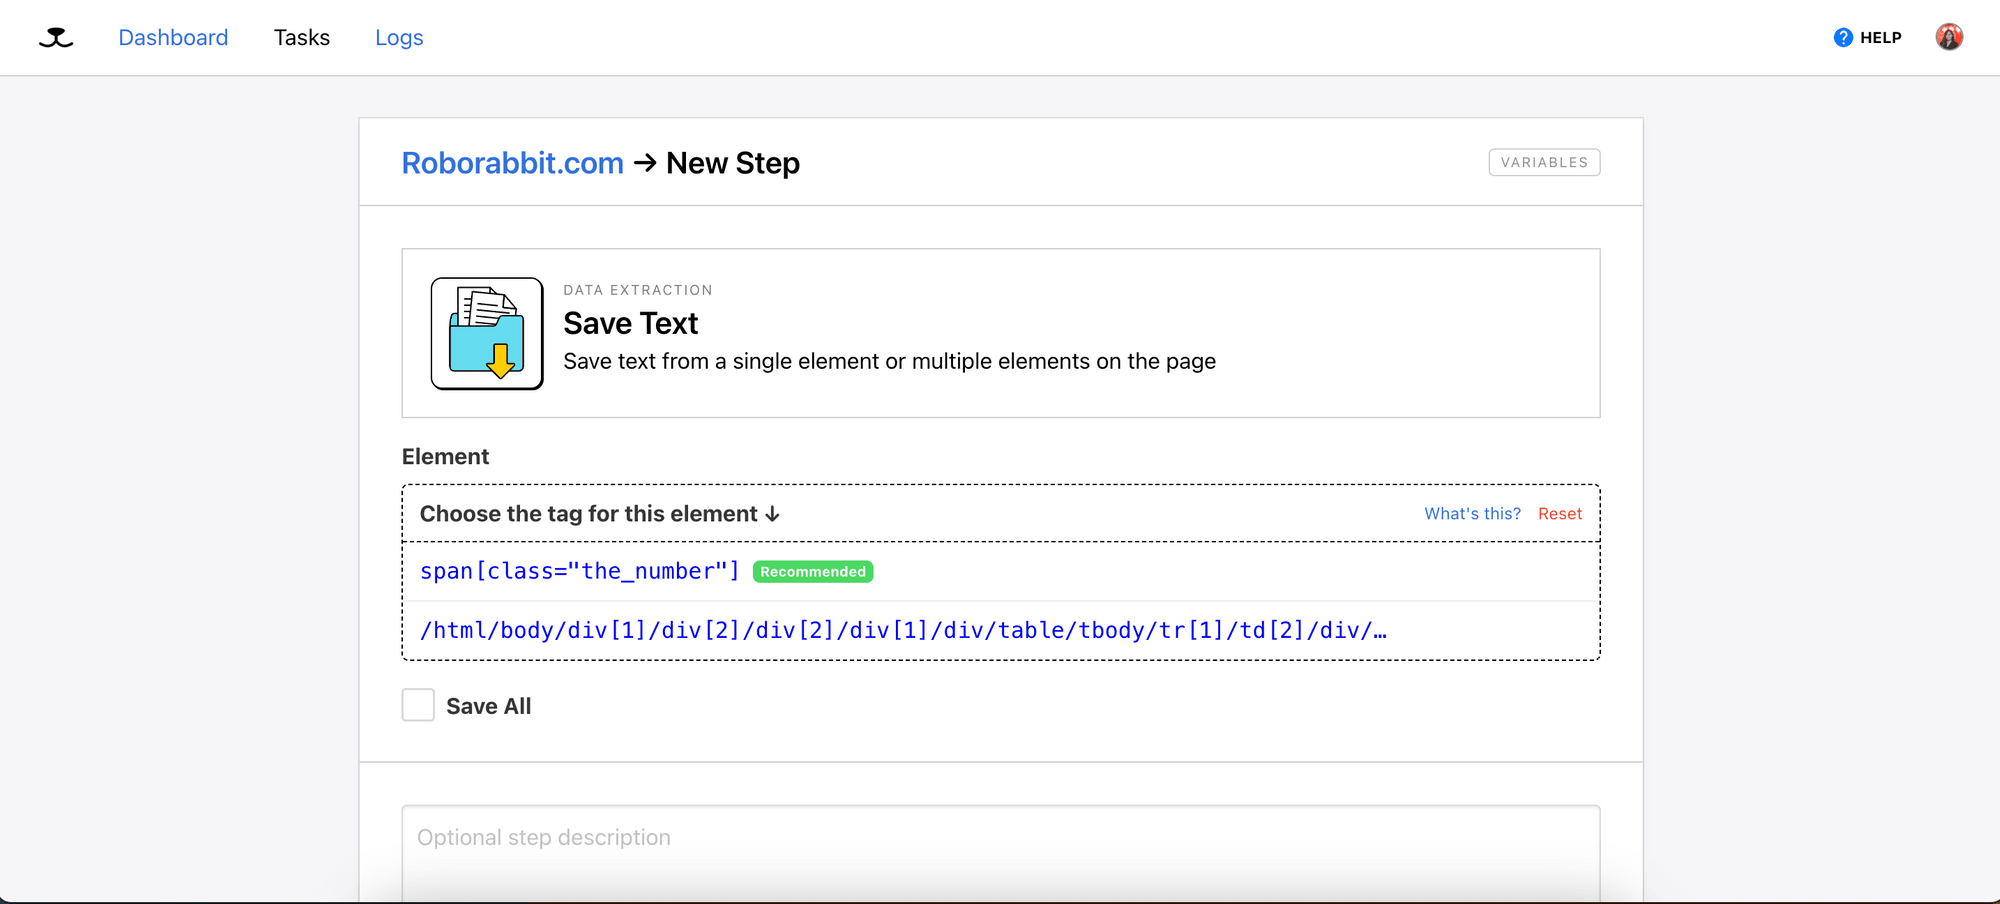
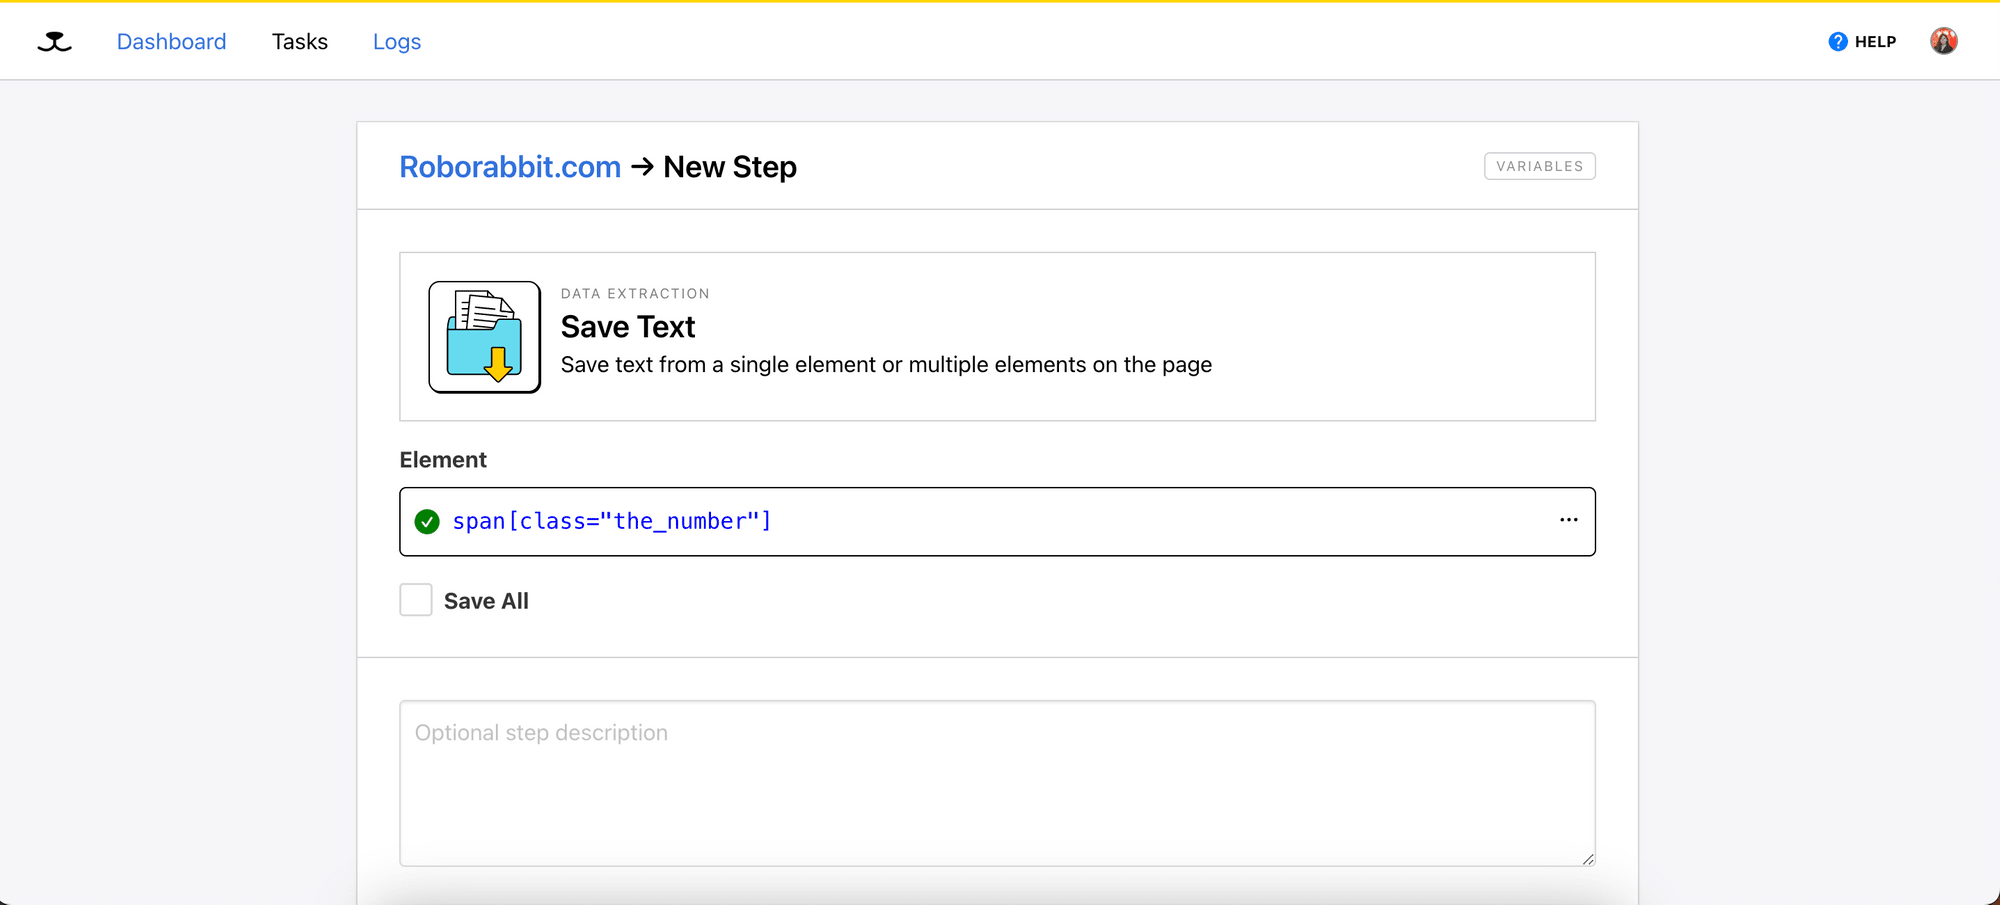
Testing the Task
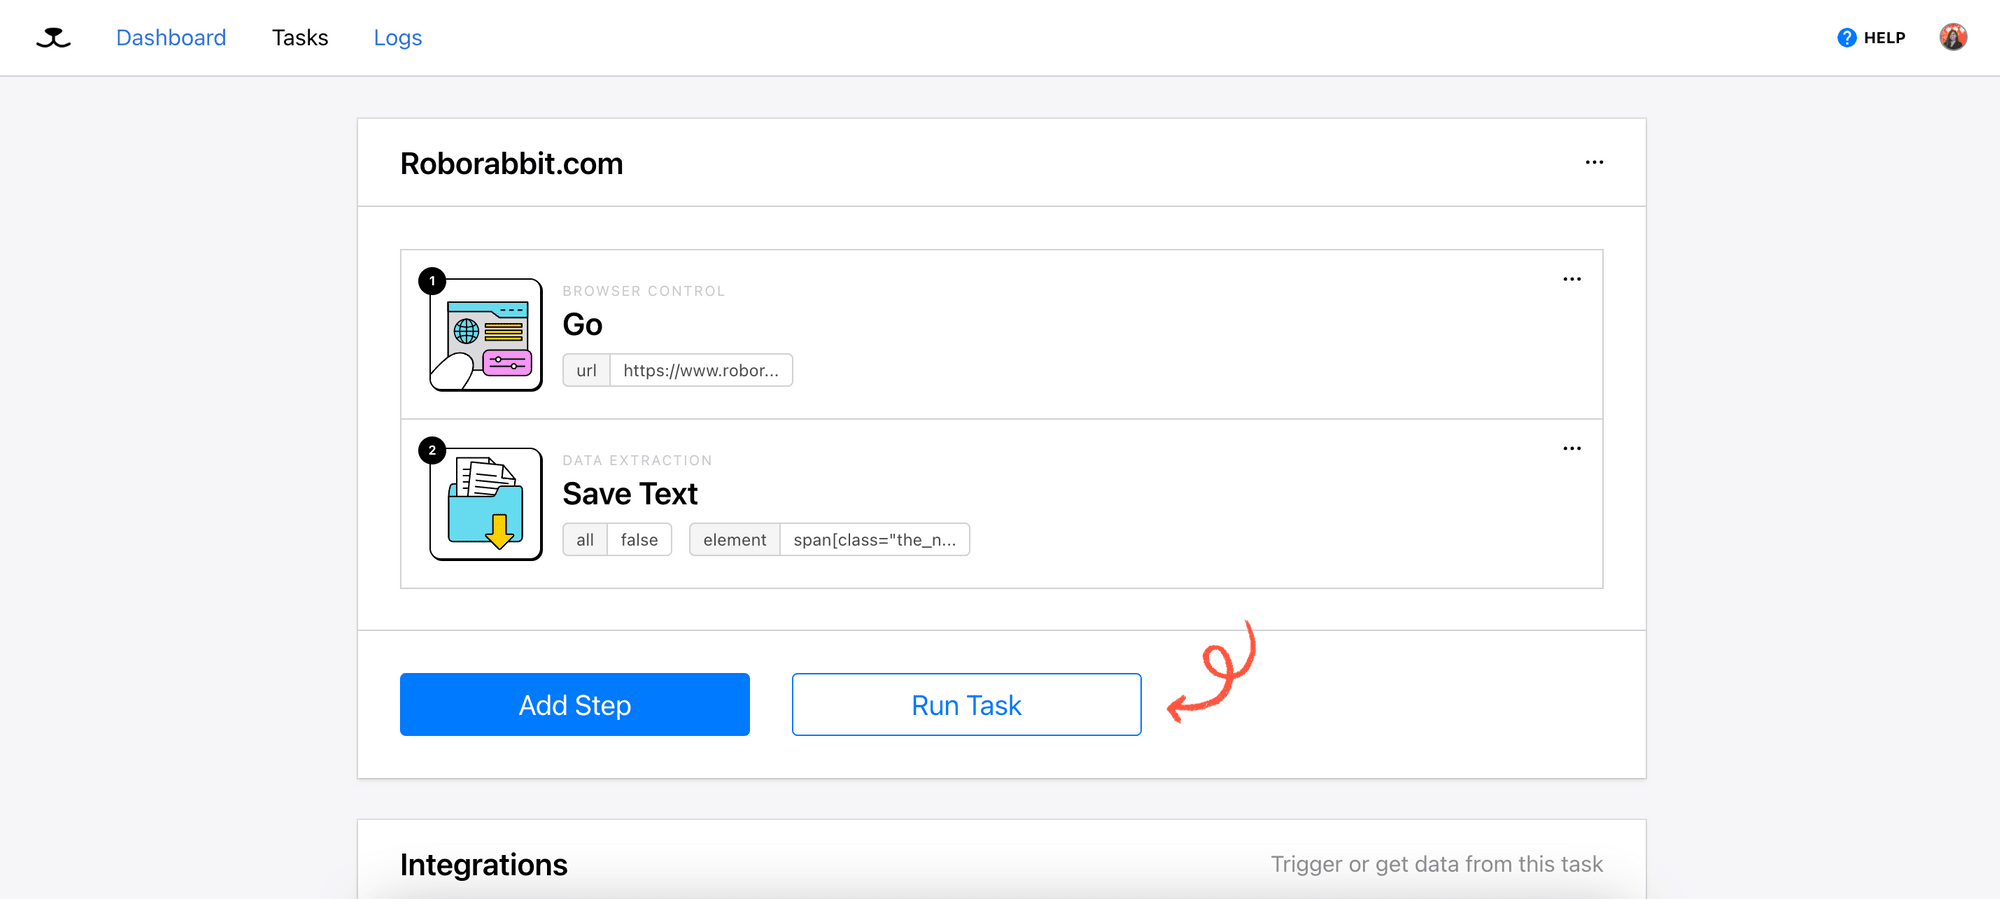
We have the necessary steps added to our task. Now, we can click the “Run Task” button to execute and test the task.
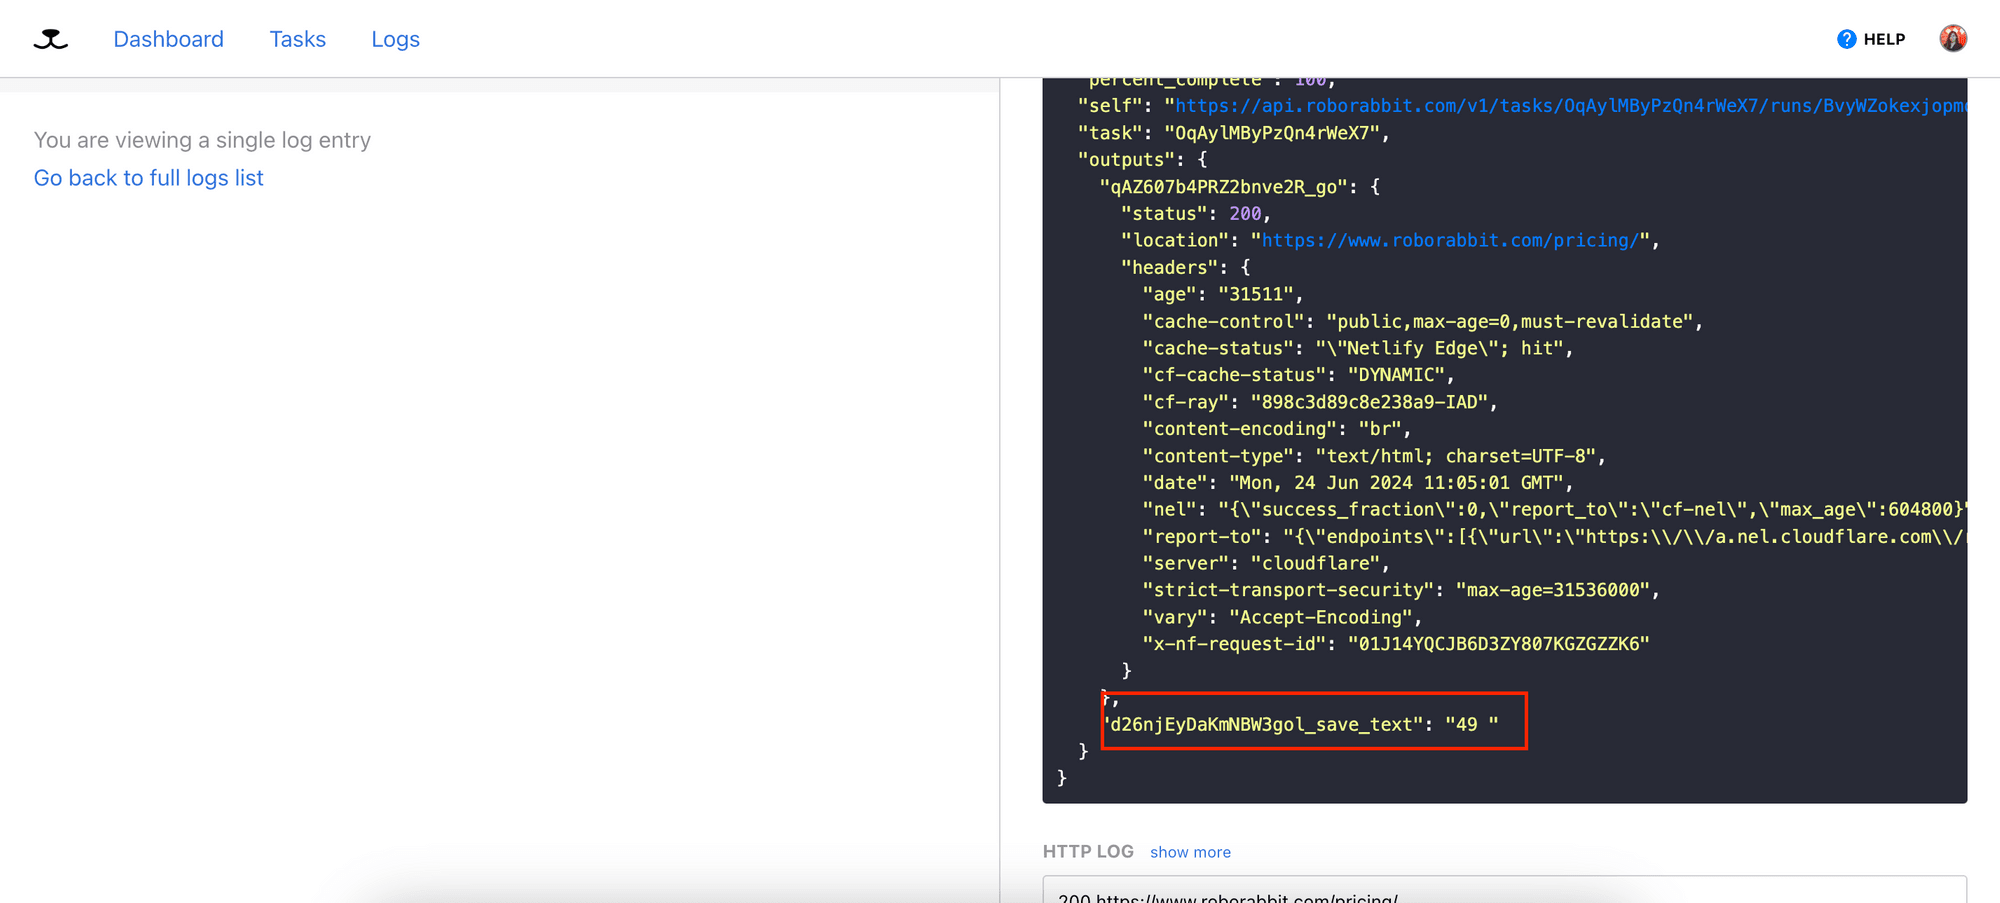
After the task has completed running, check the log to see the result.
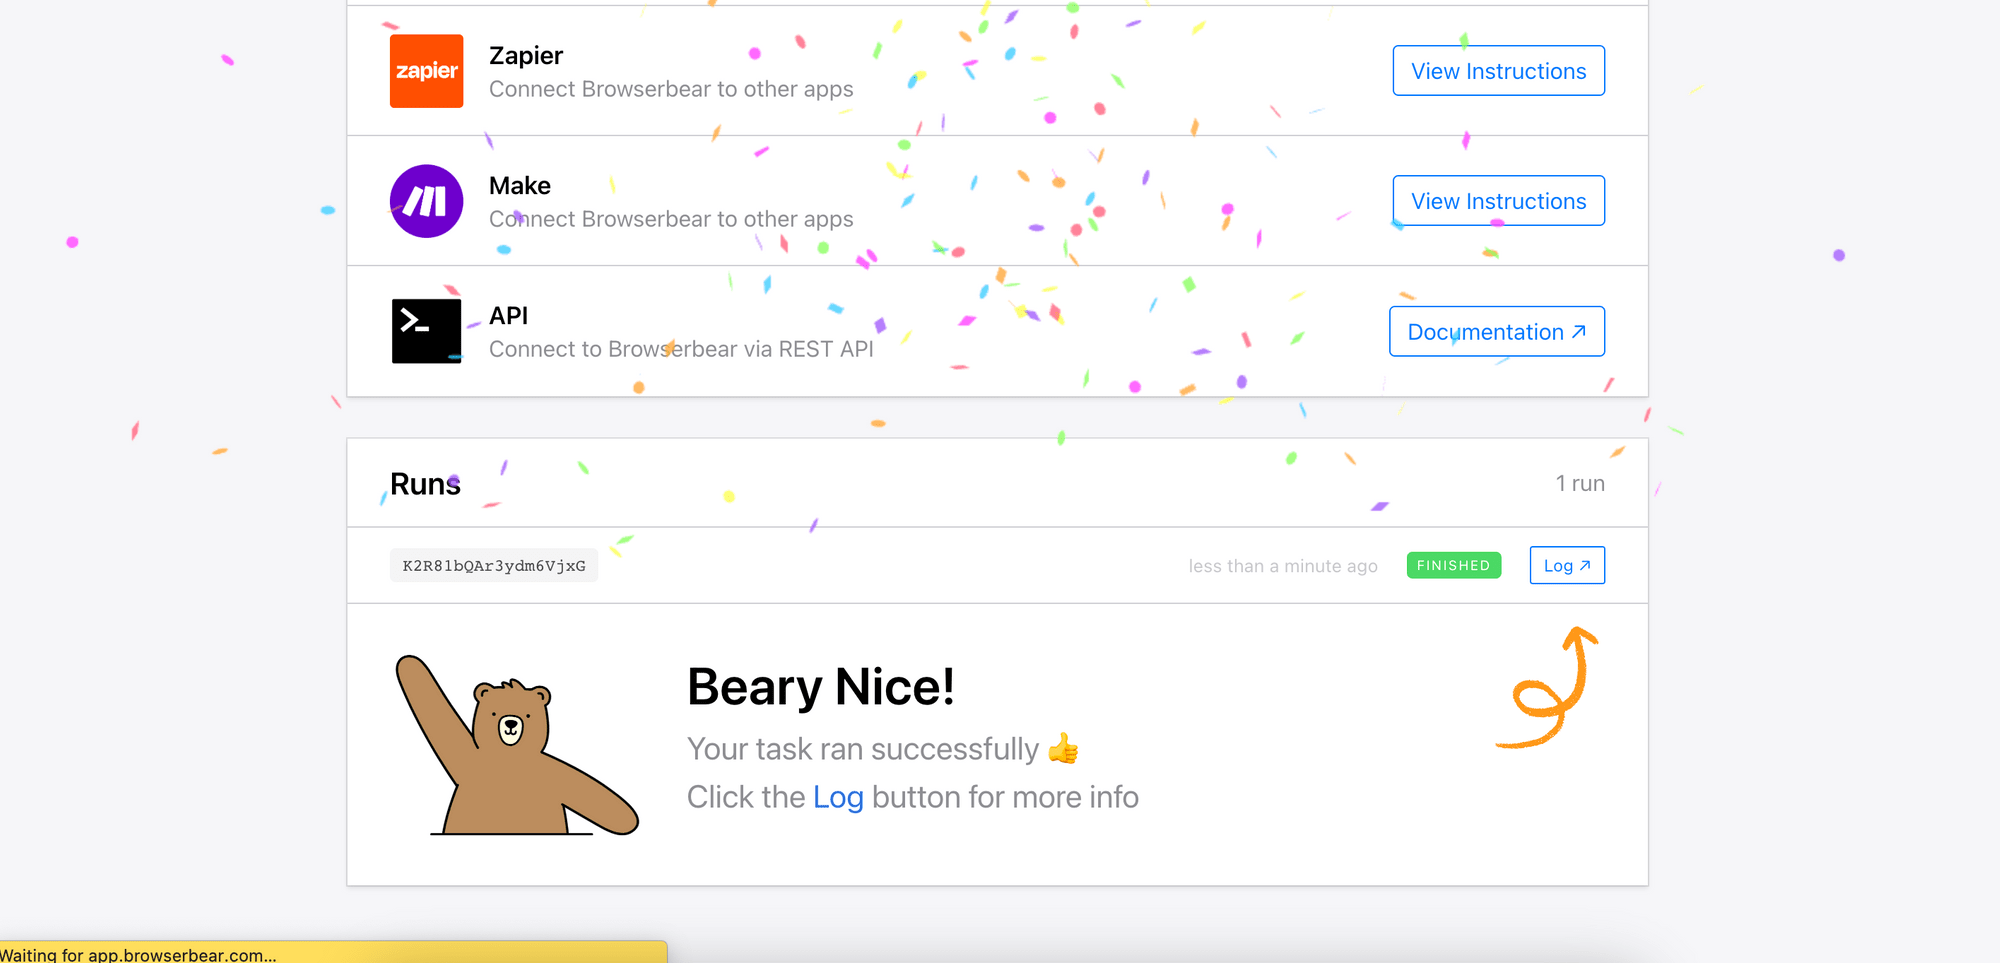
You should be able to see the value of the selected HTML element (price) from the log.
Writing the Code
Now that we can extract the price, we need to execute the task repeatedly or at a fixed interval to get the latest price. If the price changes, we will receive a price alert via email.
Step 1. Set up an Express Server
Create a new Node.js project by running npm init in your project directory and a file named “index.js” for writing the code. Then, install Express following the official installation guide and paste the code below to the “index.js” file:
const express = require('express')
const app = express()
const port = 3000

app.get('/', (req, res) => {
  res.send('Hello World!')
})

app.listen(port, () => {
  console.log(`Example app listening on port ${port}`)
})
When you execute node index.js in the terminal/command prompt, it should start the server at http://localhost:3000/ with the message “Example app listening on port 3000” in the terminal/command prompt.

Step 2. Create a Function that Triggers the Browserbear Task
In the same project directory, create a new file named “roborabbit.js” and write a function named checkPrice to send a POST request to the Browserbear API to run the task.
const TASK_ID = 'your_task_id';
const API_KEY = 'your_api_key';

module.exports.checkPrice = function () {
  const data = {
    webhook_url: '',
  };
  fetch(`https://api.roborabbit.com/v1/tasks/${TASK_ID}/runs`, {
    method: 'POST',
    body: JSON.stringify(data),
    headers: {
      'Content-Type': 'application/json',
      Authorization: `Bearer ${API_KEY}`,
    },
  });
};
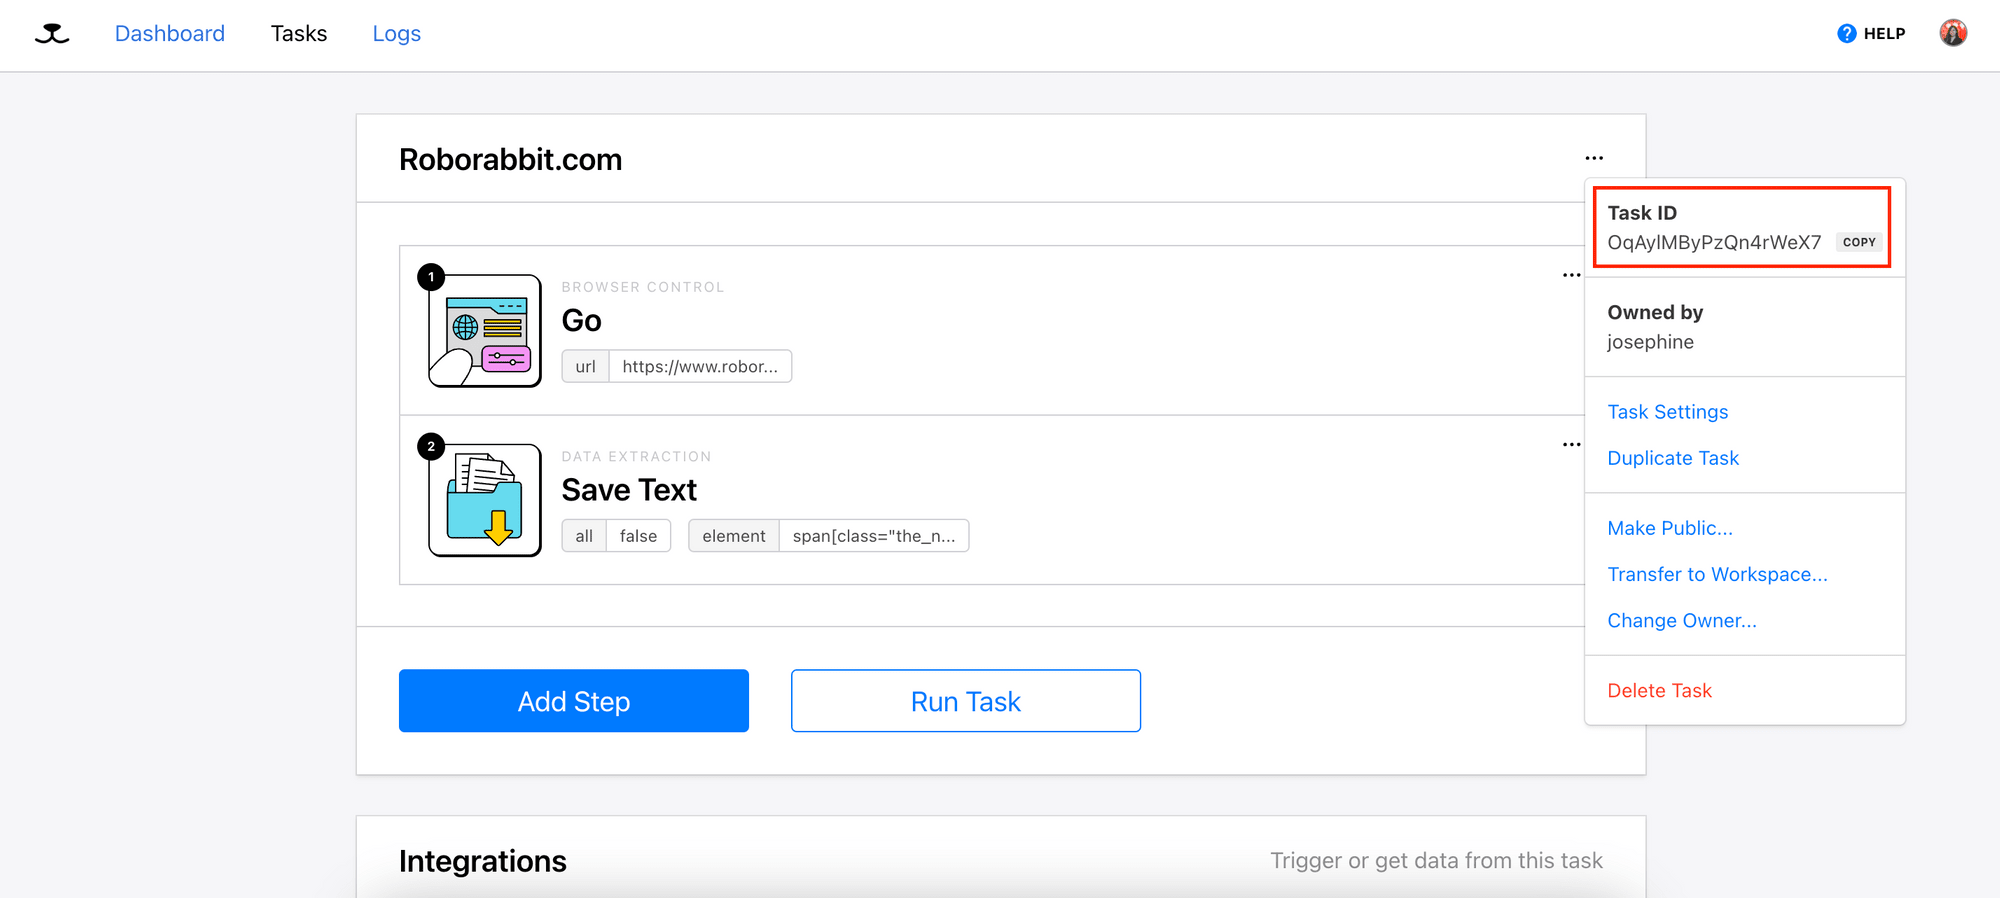
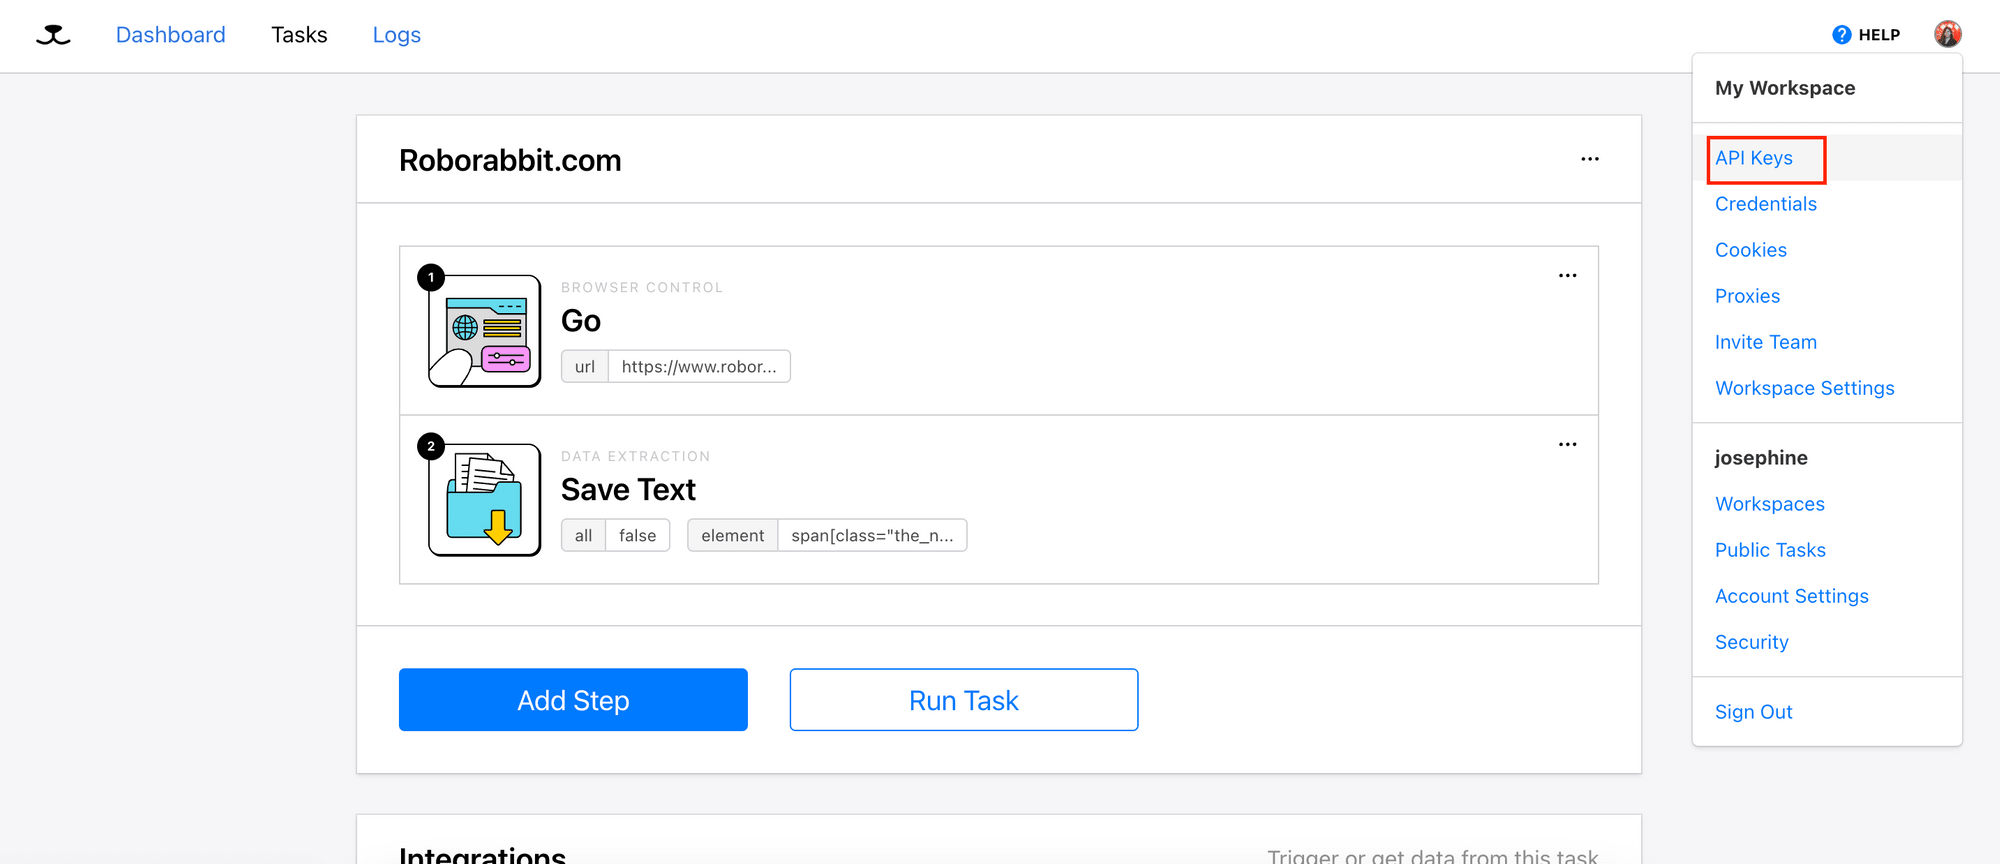
The task ID and API key can be retrieved from your Browserbear dashboard:
Depending on your Node.js version, you might need to install node-fetch and import it explicitly in your code. If you run into an error that is related to node-fetch, try installing it and add this to the beginning of your code:
const fetch = require('node-fetch');
Step 3. Trigger the Browserbear Task
In “index.js”, call the checkPrice function when the server is started.
const roborabbit = require('./roborabbit');

...
app.listen(port, async () => {
  console.log(`Example app listening on port ${port}`);
  roborabbit.checkPrice();
});
Step 4. Create an Endpoint to Receive the Result via Webhook
The result of the Browserbear task can be received via webhook when the task has completed running. In “index.js”, create an endpoint named /job-done to receive the result (price).
We need the body-parser package to read the result. Run npm i body-parser in the terminal/command prompt to install it. Then, read the result from req.body.outputs['complete_step_id'].
const bodyParser = require('body-parser');
app.use(bodyParser.json());
...
app.post('/job-done', (req, res) => {
  const price = req.body.outputs['complete_step_id'];
  console.log('Job done, current price is ' + price);
});
You can construct the complete step ID in the format of [step_id]_[step_name]. Referring to the screenshot below, the complete step ID will be d26njEyDaKmNBW3gol_save_text.
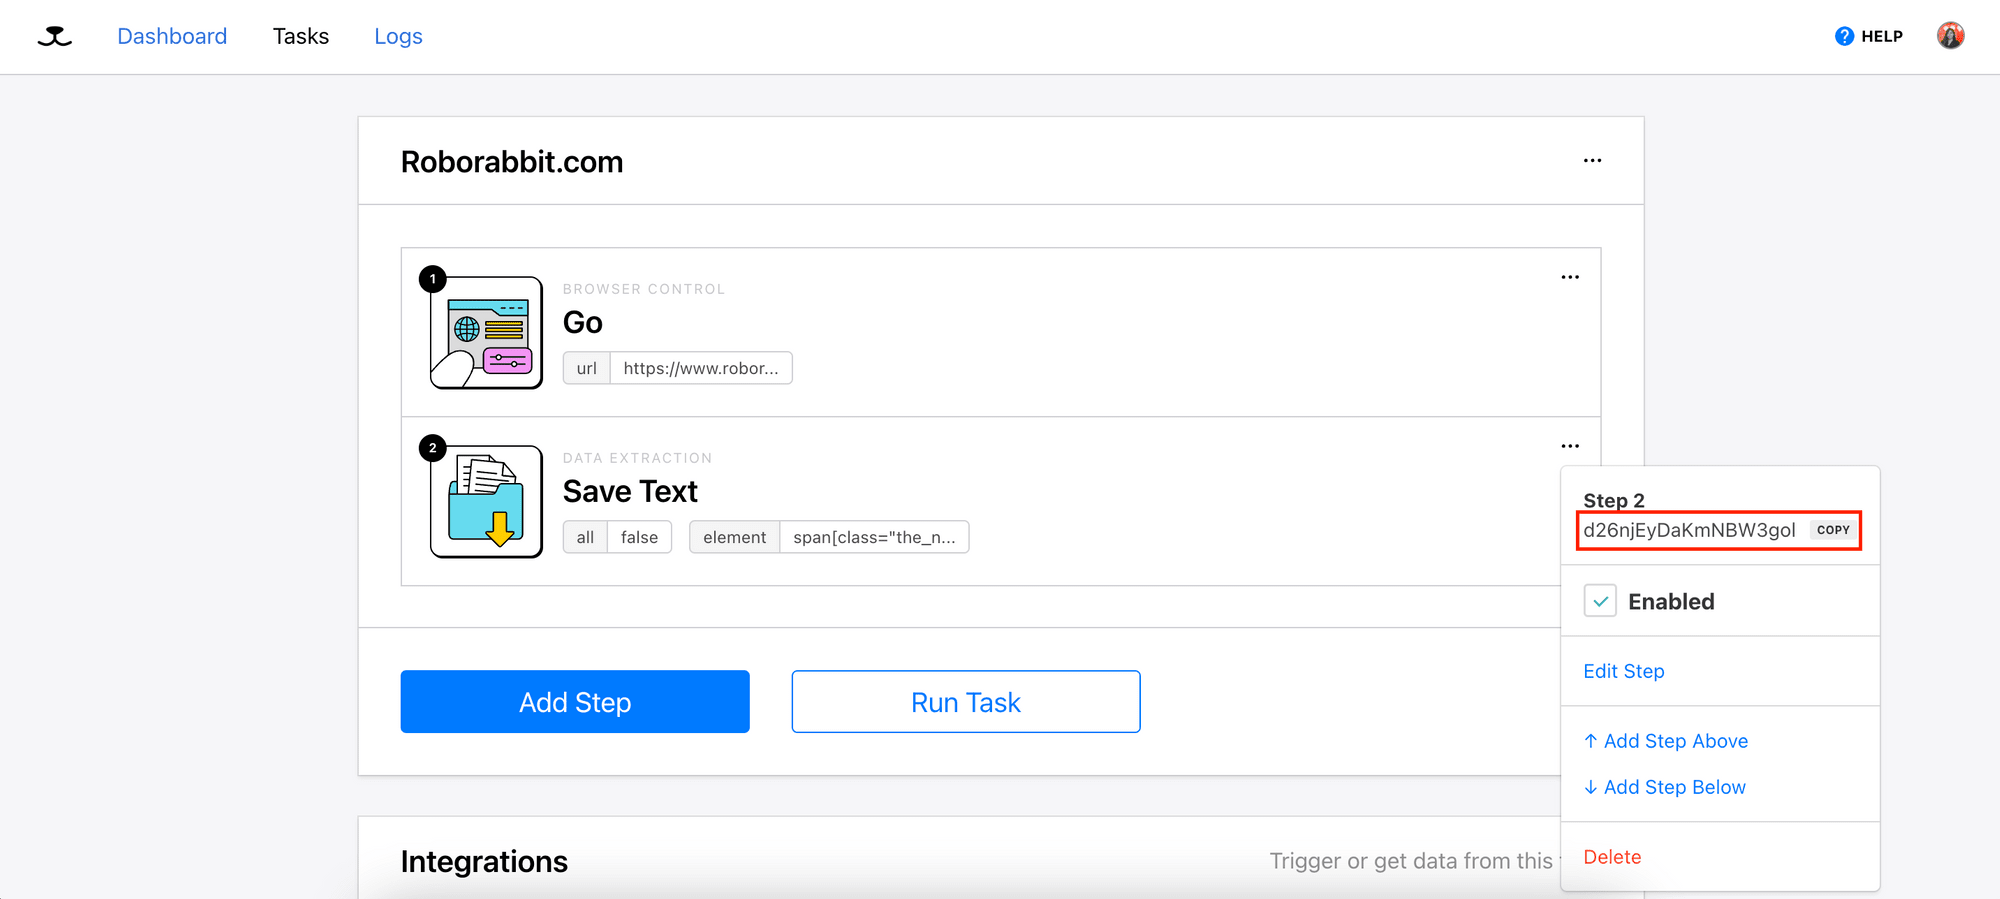
🐰 Hare Hint: You can also get the complete step ID from the log.
After creating the /job-done endpoint, we need to update data.webhook_url in “roborabbit.js” so that the result will be sent to it.
Note: If you’re running the Node.js project from your local machine, you will need ngrok to make it publicly accessible.
Install ngrok by running npm i ngrok in the terminal/command prompt. Then, run ngrok http 3000 to get a publicly accessible URL for your locally hosted Node.js server.

Instead of using http://localhost:3000, use the URL that is provided by ngrok instead.
module.exports.checkPrice = function () {
  ...
  const data = {
    webhook_url: 'https://2d15-2404-160-8105-64df-5c6a-2d82-f27d-d71c.ngrok-free.app/job-done',
  };
	...
};
Step 5. Send an Email when the Price Changes
We will send an email from a Gmail account using Nodemailer (install it by running npm i nodemailer). So, you will need to prepare a Gmail username and password. If you have enabled 2-factor authentication on your Google account, you need to use an app-specific password instead of your actual password. You can follow the steps from the official guide to generate one.
In the project directory, create a new file named “alertService.js” and write a function named sendEmail with the code below:
const nodemailer = require('nodemailer');

module.exports.sendEmail = function (oldPrice, currentPrice) {

  const transporter = nodemailer.createTransport({
    port: 465, // true for 465, false for other ports
    host: 'smtp.gmail.com',
    auth: {
      user: '[email protected]',
      pass: 'your_password',
    },
    secure: true,
  });

  const mailData = {
    from: '[email protected]',
    to: '[email protected]',
    subject: 'Price Alert',
    html: `Price has changed from ${oldPrice} to ${currentPrice}.`,
  };

  transporter.sendMail(mailData, function (err, info) {
    if (err) console.log(err);
    else console.log(info);
  });
};
In “index.js”, create a condition to check whether to send a price alert or continue monitoring the price.
const alertService = require('./alertService');
let oldPrice = 0;
...
app.post('/job-done', (req, res) => {
  ...
  if(!oldPrice) {
     oldPrice = currentPrice;
  }
  if (currentPrice != oldPrice) {
      console.log(`Price has changed from ${oldPrice} to ${currentPrice}.`);
      alertService.sendEmail(oldPrice, currentPrice);
      oldPrice = currentPrice;
  }
  roborabbit.checkPrice();
});
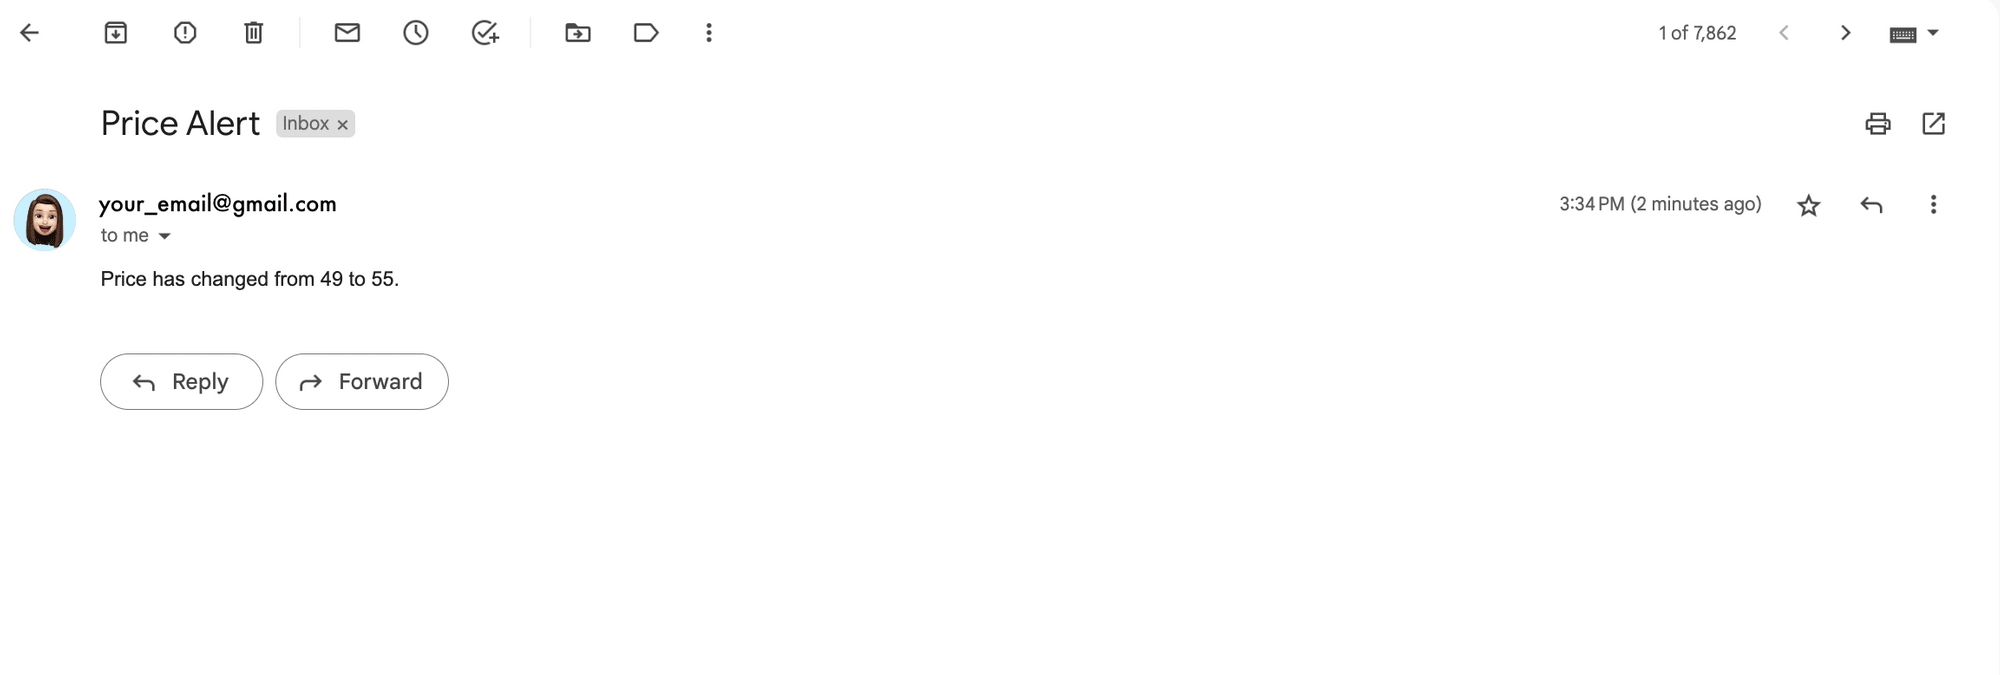
When the price changes, you’ll receive an email notifying you about the price change.
Conclusion
Using automation to monitor competitors’ prices and get notified immediately when the price changes not only improve the job's efficiency but also preserves valuable human resources for more strategic tasks. Besides monitoring competitors’ prices, you can modify the code to track the prices of flights, stocks, and other listings.
If you want to get started immediately, view the full code on GitHub and duplicate the Browserbear task below into your account:


