How to Convert cURL Commands to Python Requests
Contents
cURL commands are useful for making HTTP requests from the command line, but they can become cumbersome and difficult to manage. Converting these commands to Python can greatly improve readability and extensibility, especially for complex requests or when working with JSON data.
Python's simplicity and flexibility make it easier to organize and efficiently execute HTTP requests. Let’s learn how to convert cURL commands to Python requests in this article!
What is cURL
cURL, short for "Client URL", is a command-line tool that allows you to make HTTP requests and transfer data to or from a server using URLs. It supports various protocols such as HTTP, FTP, and SMTP. In your cURL command, you can also include cookies, data, authentication credentials, and other headers, like making a typical HTTP request.
Here's an example of a simple cURL command:
curl https://www.example.com
cURL is commonly used for testing APIs and interacting with web services, similar to using API tools like Postman and Insomnia, but directly from your Linux, Mac, and Windows terminal/command line.
Converting cURL Commands to Python Requests
While cURL is efficient, its command-line interface may be less user-friendly. To make HTTP requests more user-friendly and handle complex scenarios using code, you can convert cURL commands to Python. Here's how:
Step 1. Inspect the cURL Command
Before we convert a cURL command to a Python request, it's crucial to understand the components of the cURL command. A cURL command typically starts with the curl keyword followed by the URL to which the request is being made:
curl [URL]
For more complex commands, various options can be added to the command, like:
-X [request method]: Specify the HTTP method (e.g., POST).-H "Header: Value": Sets the request header.-d '{"key1": "value1", "key2": "value2"}': Specifies the data payload (if any).-o output.txt: Save the response to a file.-u username:password: Authenticate using basic auth.-L: Follow redirects.-v: Enable verbose mode for debugging.
Here’s an example of a POST request with headers and data:
curl -X POST https://example.com/api/data
-H "Content-Type: application/json"
-H "Authorization: Bearer YOUR_TOKEN_HERE"
-d '{"key1": "value1", "key2": "value2"}'
🐰 Hare Hint: Here’s a list of other cURL options.
Step 2. Install the ‘requests’ Library
We will use the requests library to make web requests in Python. If you haven't already installed it, you can do so by executing the command below in your terminal/command line:
pip install requests
Note: Replace pip with pip3 if you’re using Python 3.x.
Step 3. Convert cURL to Python
In the same project directory, create a new Python file (eg. script.py) and import the requests library. Then, specify the target URL and make an HTTP request to the URL with requests.
Here’s an example of making a POST request to the specified URL:
python import requests

url = 'https://example.com/api/data'

response = requests.post(url)
Step 4. Handle cURL Options
To convert various cURL options such as -H, -d, and more to Python requests, you'll need to map them accordingly. For example, options like -H and -d can be mapped to separate JSON objects and passed to the post() method as parameters:
headers = {'Content-Type': 'application/json', 'Authorization': 'Bearer YOUR_TOKEN_HERE'}
data = {'key1': 'value1', 'key2': 'value2'}

response = requests.post(url, headers=headers, json=data)
Step 5. Execute the Python Request
Finally, execute the Python file in your terminal/command line by running the command below:
python script.py
Note: Replace python with python3 if you’re using Python 3.x.
It is equivalent to running the original cURL command in the terminal/command line.
Automatically Convert cURL Commands to Python Requests
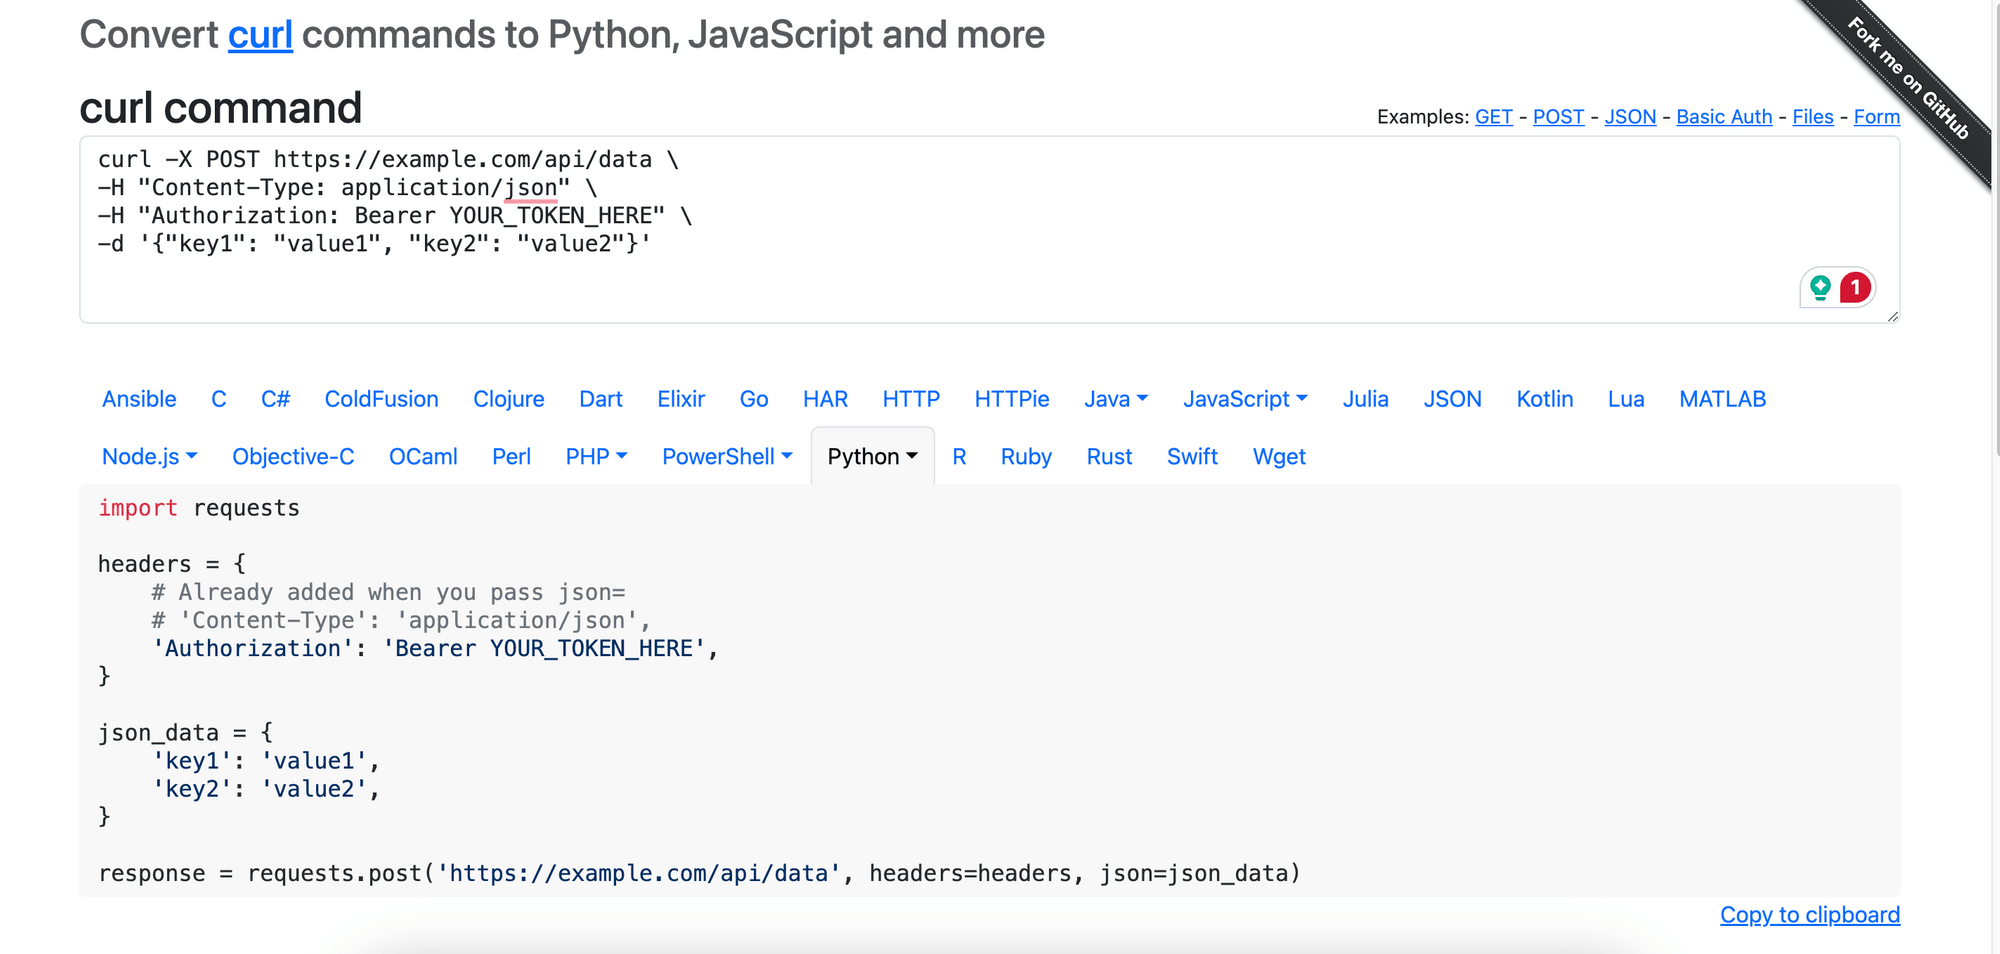
Besides converting cURL commands manually, you can use online tools like curlconverter or Python libraries like uncurl for automatic conversion. These tools can streamline the process and generate Python code from your cURL command.
For example, using _curlconverter, a_ll you need to do is paste your cURL command into the textbox. The equivalent Python code will be generated automatically:

Alternatively, you can write your own script to convert the cURL command, using a Python library called uncurl. First, install the library by executing the command below in the terminal/command line:
pip install uncurl
Then, in a new Python file (eg. script.py), paste the code below:
import uncurl

script_content = '''
import requests

'''

curl = "curl -X POST https://example.com/api/data -H 'Content-Type: application/json' -H 'Authorization: Bearer YOUR_TOKEN_HERE' -d '{\"key1\": \"value1\", \"key2\": \"value2\"}'"
script_content += 'response = ' + uncurl.parse(curl)

script_content += '''

if response.status_code == 200:
    print(response.content)
else:
    print(f'Failed to retrieve the page. Status code: {response.status_code}')
'''

# Write the content to a new script file
file_name = 'new_script.py'

with open(file_name, 'w') as file:
    file.write(script_content)

print(f"Script '{file_name}' created successfully!")
When you run python script.py in the terminal/command line to execute the code, the cURL command will be converted into the equivalent Python code and written to a new file named new_script.py. Here’s the result of the converted Python code:
import requests

response = requests.post("https://example.com/api/data",
    data='{"key1": "value1", "key2": "value2"}',
    headers={
        "Authorization": "Bearer YOUR_TOKEN_HERE",
        "Content-Type": "application/json"
    },
    cookies={},
    auth=(),
)

if response.status_code == 200:
    print(response.content)
else:
    print(f'Failed to retrieve the page. Status code: {response.status_code}')
🐰 View the code on GitHub.
Conclusion
Converting cURL commands to Python requests offers a more user-friendly and flexible approach to handling HTTP requests. While cURL commands are fast and efficient, Python provides better readability for complex requests and data structures. Moreover, using available online tools like curlconverter or custom scripts that can convert cURLs to Python code automatically, the process can be streamlined and simplified!


