Automate the Boring Stuff with Python (and Browserbear) with These 5 Ideas
Contents
Doing the same repetitive tasks every day can cause a lack of motivation, boredom, and burnout. It may even negatively impact your performance and productivity, as well as hinder creativity and problem-solving skills, since such activities require minimal mental effort.
To address this issue, it's crucial to delegate such tasks using automation. Python offers a straightforward syntax and a vast range of libraries and tools that simplify the automation process. And with Browserbear, a no-code web automation tool, you can further simply it and automate all types of web-related activities effortlessly.
In this article, we will explore how Python can be used to automate web tasks and highlight some of the use cases where it can be helpful. In some examples, you will see how automating in Python can be even easier with the use of Browserbear.
What is Browserbear
Browserbear is a scalable, cloud-based browser automation tool that helps you to automate any browser task. From automated website testing, scraping data, taking scheduled screenshots for archiving, to automating other repetitive browser tasks, you can use Browserbear to help you.
One of the best things about Browserbear is its simplicity. Unlike other web automation tools, Browserbear is easy to set up and use. To get started, you simply need to create a task in your Browserbear account (start your free trial) and add the steps needed to carry out the task, without coding a single line! Once you have done this, you can start automating tasks on any web page.

Similar to Bannerbear, the flagship automated image and video generation tool from the same company, you can easily integrate it into your existing applications or code using its API. After creating an automation task in Browserbear, you can use it in your Python code by sending an HTTP request to the API.
Browserbear runs your tasks in the cloud and returns the data when the task has finished running, which means you do not have to worry about its scalability and other performance limitations.
🐻 Follow Getting Started with Browserbear: How to Automate Browsers to create your first Browserbear task!
How to Use Browserbear in Python
To use the Browserbear API in your Python code, you need to import the Requests module and insert your Browserbear account’s API Key to the header of the requests. The Task ID will also be needed when making HTTP requests to the Browserbear API. You can declare it as a variable in your code.
import requests
import json

api_key = "your_api_key"
headers = {
  'Authorization' : f"Bearer {api_key}"
}
task_uid = "the_task_id"
Then, you can send a POST request to Browserbear with the Task ID to trigger your task.
post_url = f"https://api.browserbear.com/v1/tasks/{task_uid}/runs"
response = requests.post(post_url, headers=headers)

result = json.loads(response.text)
That is how easy it is to automate a browser task in Python with the help of Browserbear. Although you can code an automation task in Python from scratch, integrating a no-code automation service like Browserbear into your Python project can help you save time and shorten your learning curve.
Things You Can Automate with Python
Idea 1. Save Images from a Web Page
If you are scraping data that includes images or analyzing data that includes visual content, this automation can be beneficial. It can be used in various applications, including web scraping, data analysis, image processing, and content curation.
import requests
import os
from bs4 import BeautifulSoup

url = "https://www.browserbear.com/blog/web-scraping-with-python-an-introduction-and-tutorial"
response = requests.get(url)
soup = BeautifulSoup(response.text, "html.parser")
img_tags = soup.find_all("img")

urls = [img["src"] for img in img_tags]
print(urls)

folder_path = "images"
if not os.path.exists(folder_path):
    os.makedirs(folder_path)

for url in urls:
    response = requests.get(url)
    filename = os.path.join(folder_path, url.split("/")[-1])
    with open(filename, "wb") as f:
        f.write(response.content)
Alternatively, you can create the same automation in Browserbear easily with only two steps and make a POST request in your code to trigger the task (as shown in Using Browserbear in Python ).
P.S. You can click on the Browserbear task embedded above to duplicate it into your project immediately!
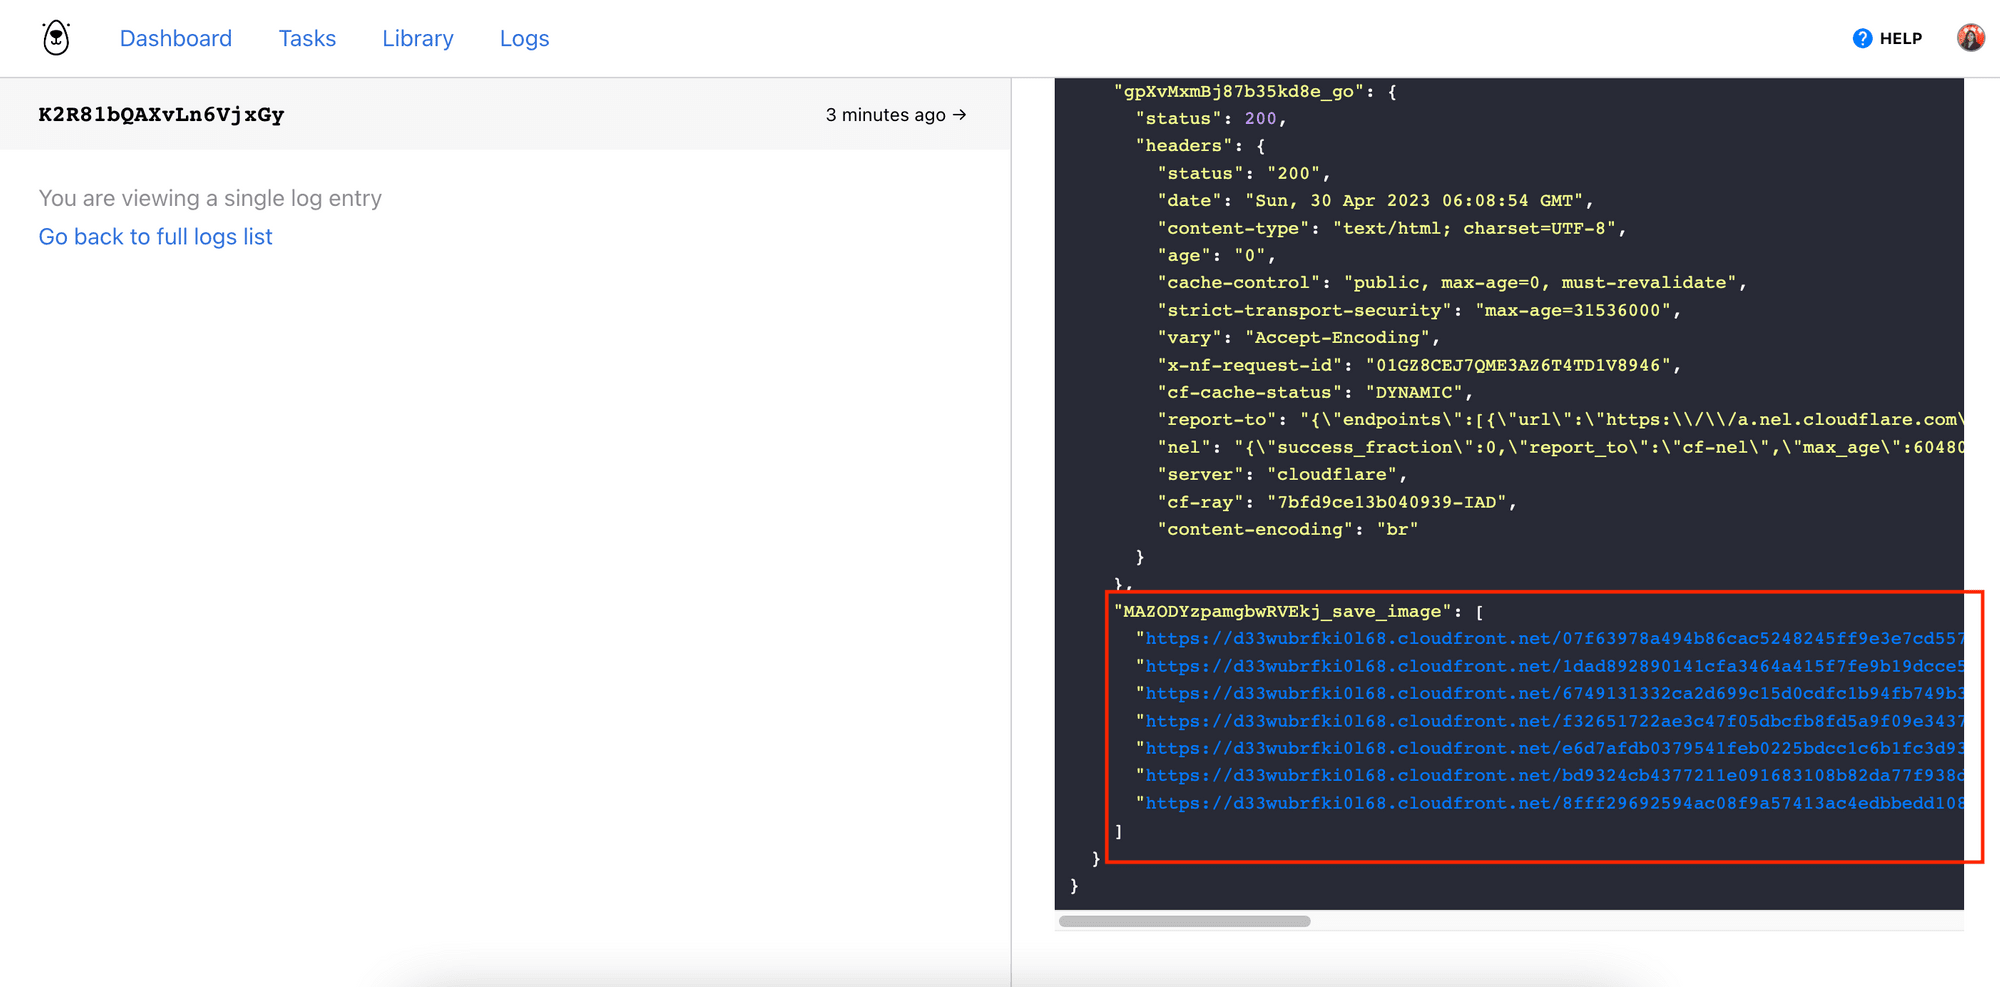
The response returned will contain the URL of the images, which you can cross-check with the run’s log from your Browserbear dashboard.

Idea 2. Scrape Data
Data scraping is the process of extracting data from a website automatically rather than manually copying and pasting them. It is commonly used for various purposes such as market research, price comparison, data analysis, and data aggregation. Generally, it involves writing code that retrieves the HTML content of a web page, parses the data, and extracts the desired information.
The example below extracts the text content of all the h2 elements on a web page:
import requests
from bs4 import BeautifulSoup

url = 'https://www.browserbear.com/blog/web-scraping-with-python-an-introduction-and-tutorial/#creating-a-browserbear-task'
response = requests.get(url)
html_content = response.content

soup = BeautifulSoup(html_content, 'html.parser')

paragraphs = soup.find_all('h2')

for paragraph in paragraphs:
    print(paragraph.text)
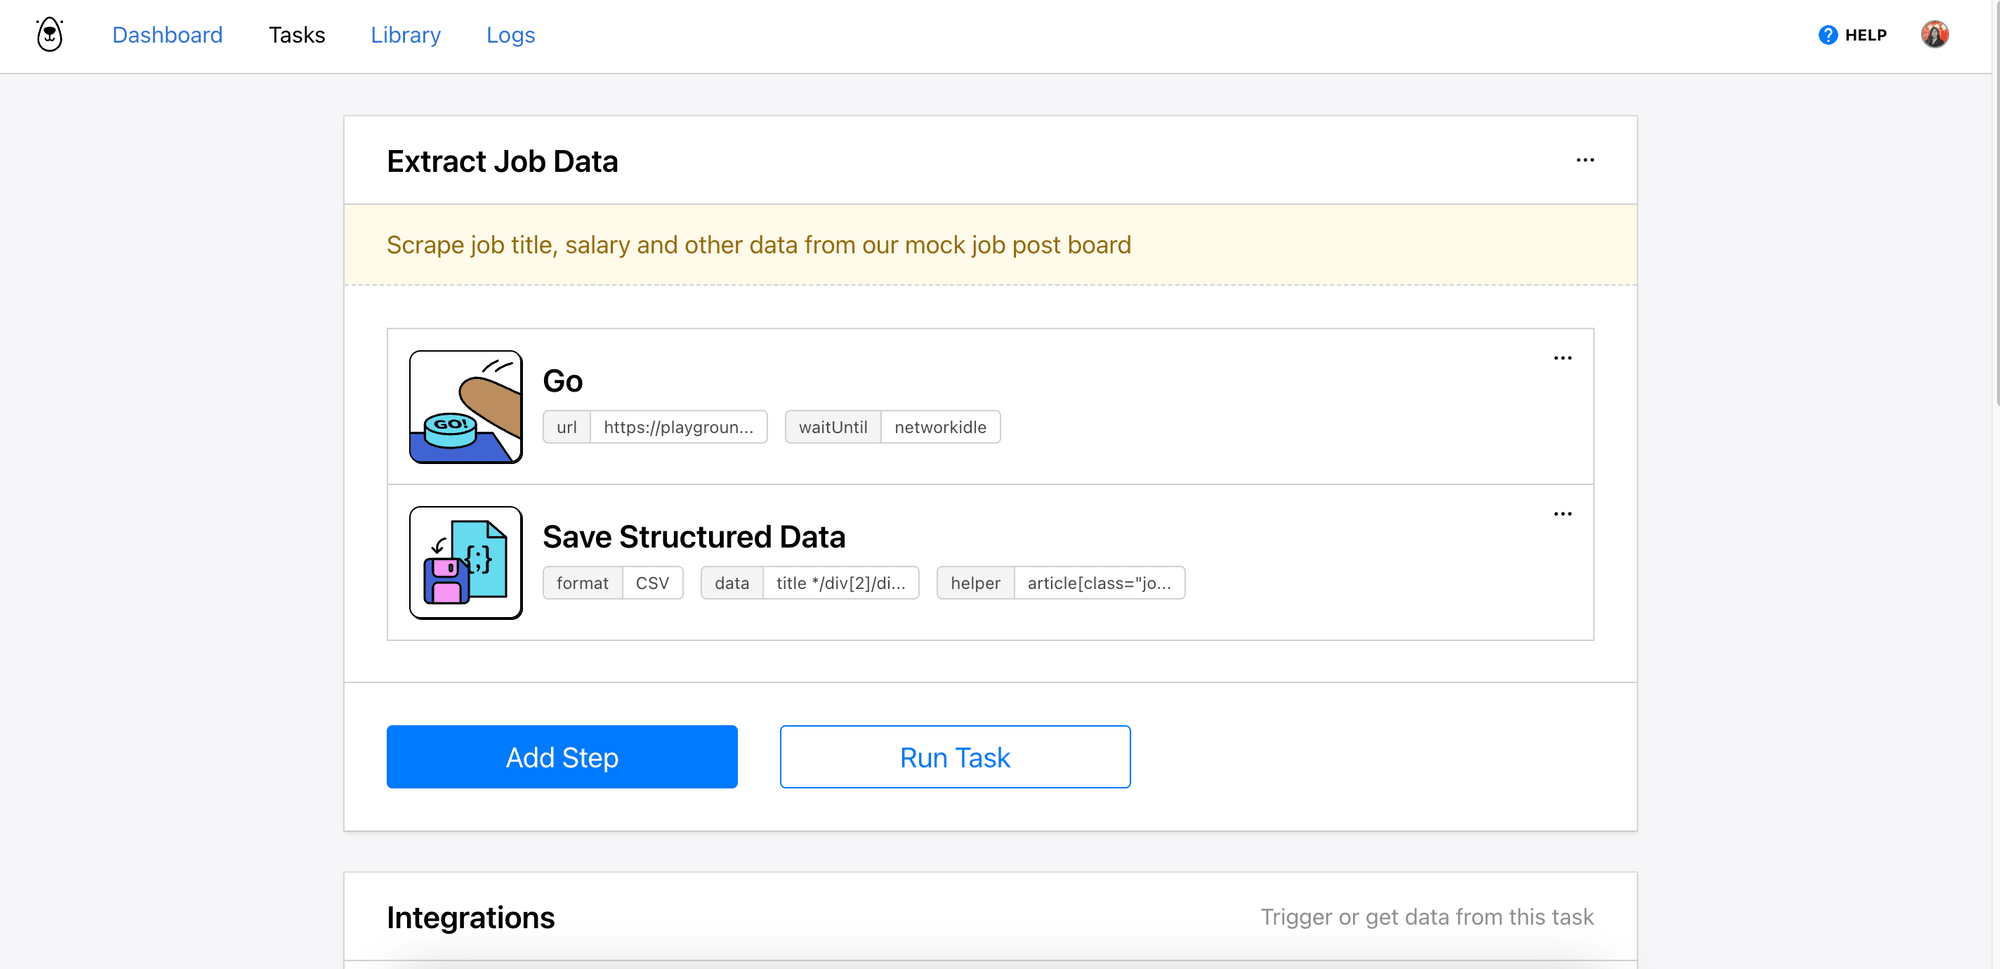
Using Browserbear, it only requires two steps:
If you’re looking to create an automated data scraping task that involves more data, refer to How to Scrape Data from a Website Using Browserbear. It teaches you how to scrape data from various HTML elements and save them as structured data in JSON or export them to a CSV file.
Idea 3. Take Screenshots of a Website
Taking a screenshot of a website can be useful for a variety of reasons, such as creating website thumbnails or documenting website changes. Python provides a simple and effective way to take screenshots of websites using the Selenium library:
from selenium import webdriver

url = "https://www.browserbear.com"

options = webdriver.ChromeOptions()
options.add_argument('--headless')
driver = webdriver.Chrome(options=options)

driver.get(url)
driver.save_screenshot("screenshot.png")

driver.quit()
However, the code above only screenshots the visible part of the web page displayed on the window. To take a full screenshot of the web page, you need to use another approach that sets the height of the window to the full height of the page.
from selenium import webdriver
from selenium.webdriver.common.by import By

url = "https://www.browserbear.com"

options = webdriver.ChromeOptions()
options.add_argument('--headless')
driver = webdriver.Chrome(options=options)

driver.get(URL)

S = lambda X: driver.execute_script('return document.body.parentNode.scroll'+X)
driver.set_window_size(S('Width'),S('Height')) # May need manual adjustment

driver.find_element(By.TAG_NAME, "body").screenshot('full_screenshot.png')

driver.quit()
You can do both in the same Browserbear task, using different values (true/false) for the full_page property.
Idea 4. Fill out Online Forms
Filling out online forms can be a tedious and time-consuming task, especially if you need to fill out the same form multiple times. Fortunately, Python can be used to automate the process of filling out online forms.
The simple example below fills out a form that has two inputs (name and email) and clicks the submit button.
from selenium import webdriver
from selenium.webdriver.common.keys import Keys

url = 'https://example.com/form'
driver = webdriver.Chrome()
driver.get(url)

name_field = driver.find_element_by_name('name')
name_field.send_keys('John Doe')

email_field = driver.find_element_by_name('email')
email_field.send_keys('[email protected]')

submit_button = driver.find_element_by_xpath('//button[text()="Submit"]')
submit_button.click()

driver.quit()
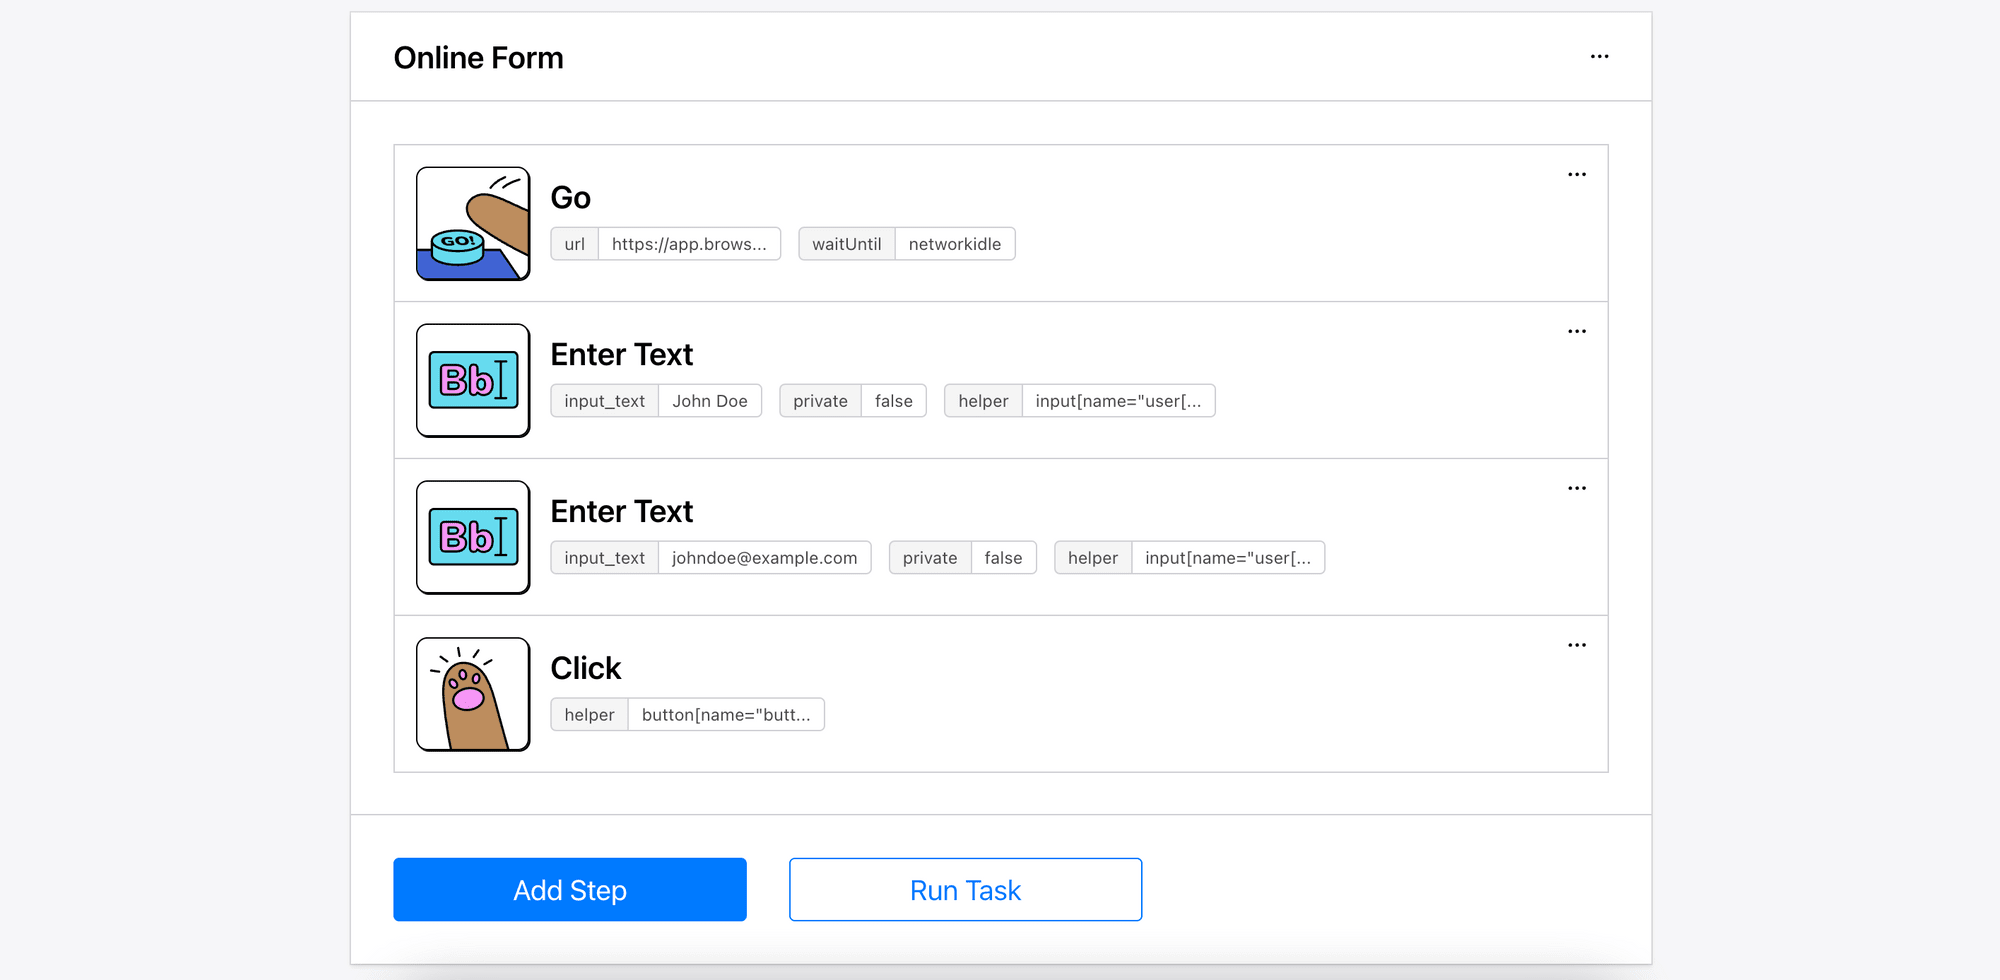
You can do it in four steps with Browserbear:

🐻 Bear Tips: Check out How to Auto-Fill Forms with Data from a CSV File in Python Using Browserbear for a detailed guide!
Idea 5. Monitor Website Changes
Monitoring website changes tracks the changes in a website's content, structure, or availability over time. It can be useful for keeping track of competitor websites, tracking news or product updates on specific websites, or monitoring your website for potential issues.
import requests
from bs4 import BeautifulSoup
import time

url = "https://www.browserbear.com"

response = requests.get(url)
content = response.content

# Monitor the page for changes
while True:
    # Send a new request to get the current content of the page
    response = requests.get(url)
    new_content = response.content

    # Compare the new content with the old content
    if new_content != content:
        print("Website content has changed!")
        content = new_content

    # Wait for a certain amount of time before sending the next request
    time.sleep(60)
When the content of the website changes, you will get a message that informs you about the change. This helps you to stay up-to-date with important updates or changes on a website and keep track of the changes over time.
Conclusion
With a bit of coding knowledge and some creativity, you can automate almost any task involving the browser and these are just some of the examples. If you are looking for a powerful and easy-to-use tool for automating web tasks to add to your Python automation, Browserbear is worth checking out. Combining the capabilities of Python with Browserbear, you can automate almost any browser task in a breeze!


